Data Management
- To perform the operations on the Bulk records at a time, Salesforce provides the “Data Management” features.
- By which we can perform the Bulk Import / Export operations on the bulk records at a time.
Data management opportunities provided by Salesforce include, but are not limited to:
– Backup. When you operate with large data arrays, protecting yourself from the loss or corruption of valuable data is paramount.
– Import/Export. This functionality is crucial when your data needs to be accessed from external devices, applications, or web services, and converted to/from popular file formats.
– Reports and dashboarding. Organizing data by defined criteria and representing vital information graphically are powerful ways to quickly gain insights into particular areas of customer interactions.
– Integrations. You can combine Salesforce functionality with the features of third-party solutions to cater to the needs of your teams in full.
– Governance. Establishing the principles on which data is handled and used is crucial for maintaining data privacy, quality, and consistency.
– Data quality assessment. Only good data contributes to driving your customer interactions forward, so before using acquired information, you need to separate the wheat from the chaff.
Salesforce data management tools
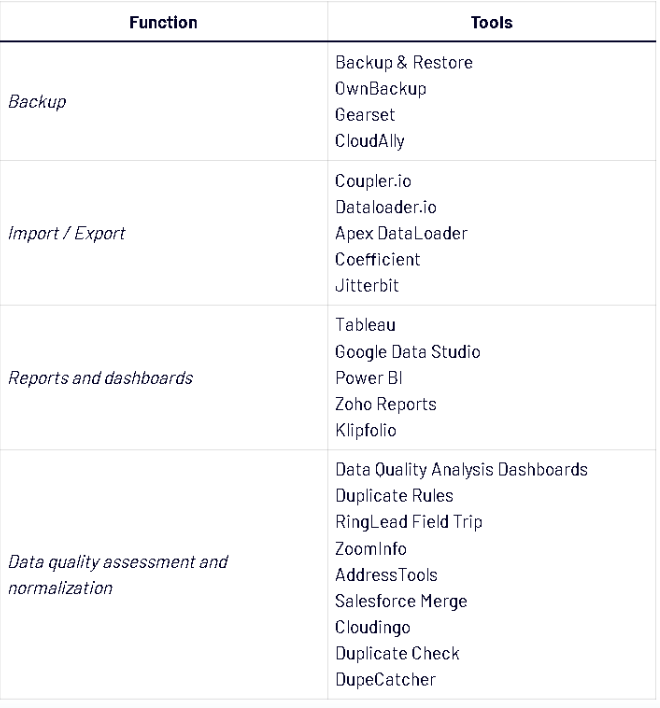
Salesforce provides the below ways to manage the bulk records.
- By using Apex Programming
- By using Import Wizard
- By using Data Loader Tool (On-Premise)
- Third Party Tools:
- Workbench
- DataLoader.io
- DataLoader CliQ
- Aside.io
- Informatica Cloud
Data Import Wizard :
- Data Import Wizard is a readymade feature provided by Salesforce to perform only Import Operations (INSERT, UPDATE) on the records.

Note: We can’t fetch the records from the objects by using this feature. (i.e. No Export Operations) By using this feature, we can perform the operations on max. of 50,000 records at a time.
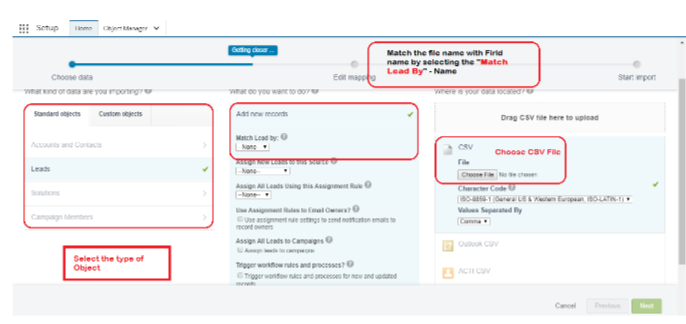
- We have the supply the input records to the Import Wizard in the form of a “.CSV” file. (CSV –> Comma Separated Value File)
Note: Import Wizard will support to perform the operations on the object like “Account, Contact, Lead, Solution, CampaignMember and All Custom Objects”.
- We have the supply the input records to the Import Wizard in the form of a “.CSV” file. (CSV –> Comma Separated Value File)
Note: Import Wizard will support to perform the operations on the object like “Account, Contact, Lead, Solution, CampaignMember and All Custom Objects”.
Data Loader :
- DataLoader is an On-Premise Tool, provided by Salesforce, which requires the pre-installation in the local system.
- By using DataLoader Tool, we can perform both Import and Export operations on All Standard and All Custom objects in Salesforce.
(i.e. We can perform INSERT, UPDATE, DELETE, EXPORT,…etc.) - By using DataLoader, we can process max. of 5 Million Records (i.e. 50 Lacks) at a time.
Note:
We need to supply the input records to the DataLoader in the form of a “.CSV” file format.
DataLoader will provide the Output Files (i.e. Results) in the form of “.CSV” file format.
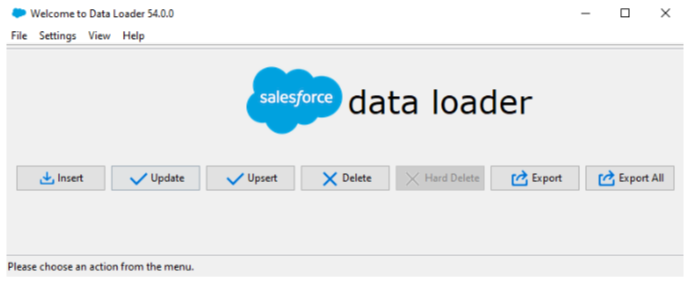
Data Loader Operator :
1. INSERT:
By using this button, we can insert either one or more records into the associated object.
We need to supply all the records information by placing inside a “.csv“ file as the input to the DataLoader.
Input : .CSV File.
–> Map the Fields.
Output Files: 2 Files.
- Success File.
- Error File.
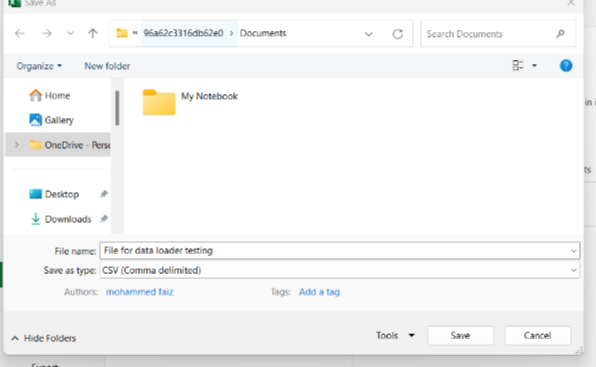
Creating File Data :-
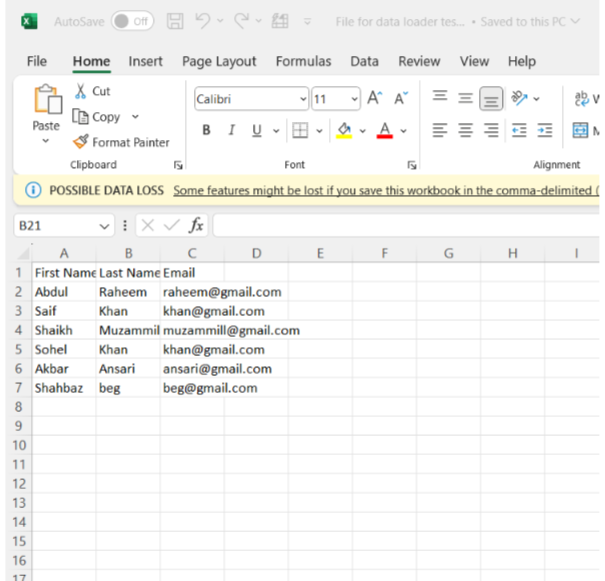
Save as in ( .CSV formate ) :-
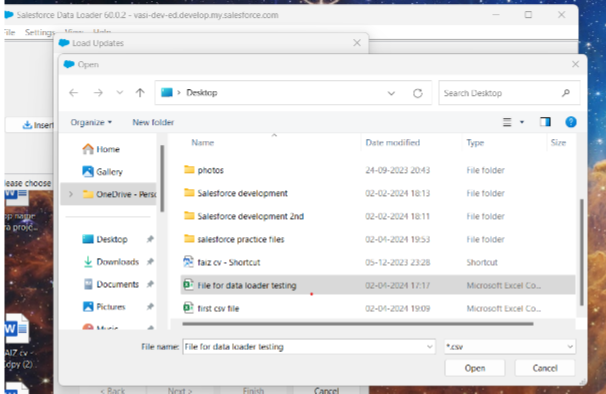
This is how we map the Fields :- 🡪 Map the Fields.
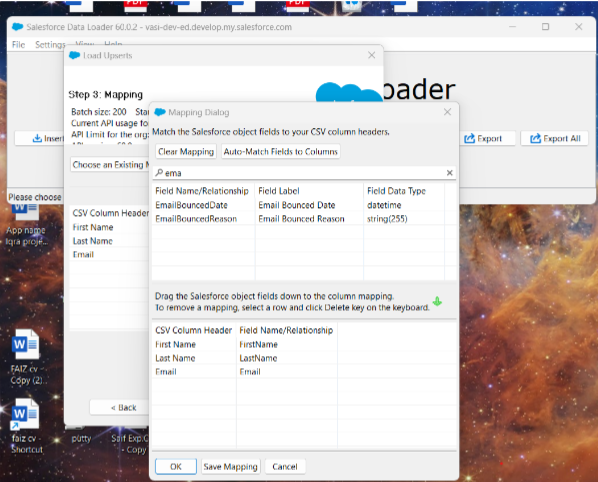
Chose from salesforce files fields label with CSV file labels with just drag and drop :-
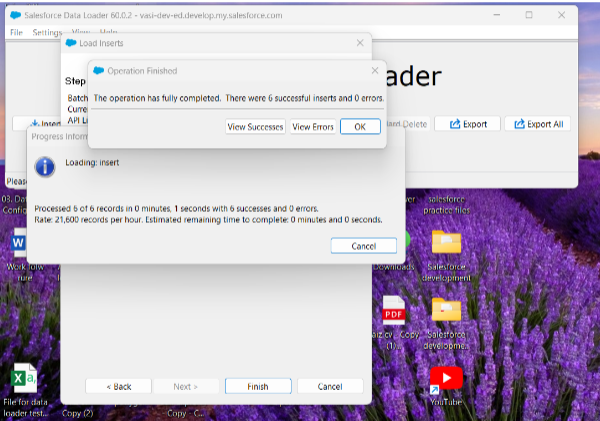
Output Files:–
1. Success File.
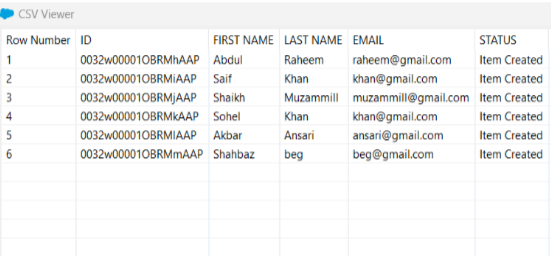
1. Error File:- All files are insert successfully no error found
Out Put :- In salesforce.org contacts :-

2. UPDATE:
We can update the existing records in the Salesforce object by using this option.
Note: To update the record, we should have the Record ID. We can update one or more record details at a time by using DataLoader.
Choosing the file to update the data:-
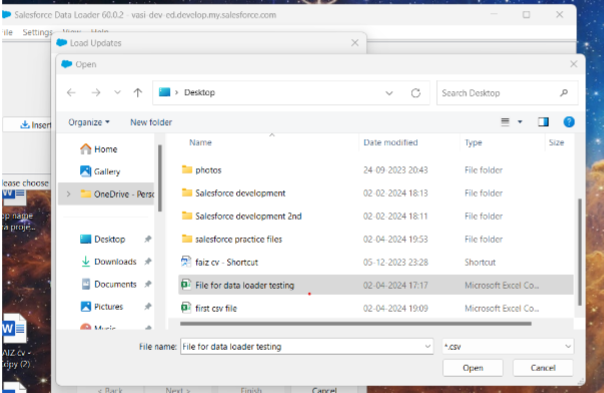
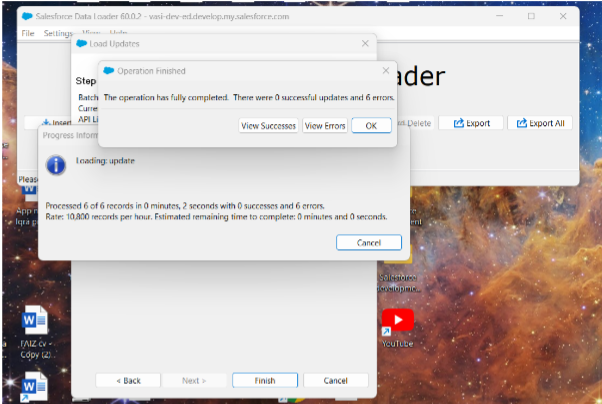
Update is done and no errors are found :-
DELETE:
We can remove the records from the object based on the specified Record ID.
Note: Deleted records will go to the Recycle Bin for the next 15 Days. To delete the records from the object, we must supply the record ID inside the CSV file.
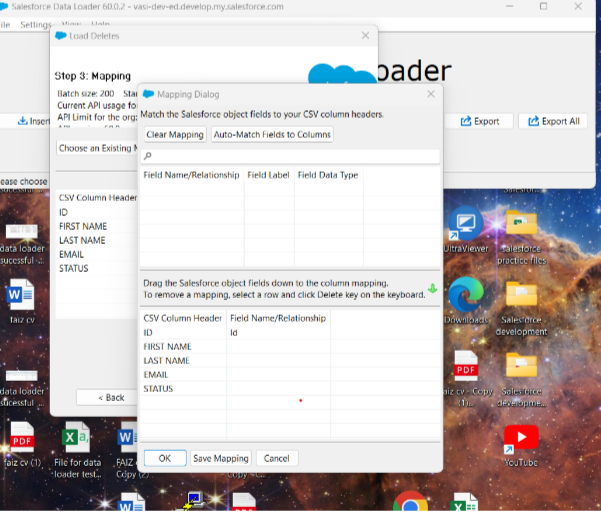
To delete map the Field with the help of id :-
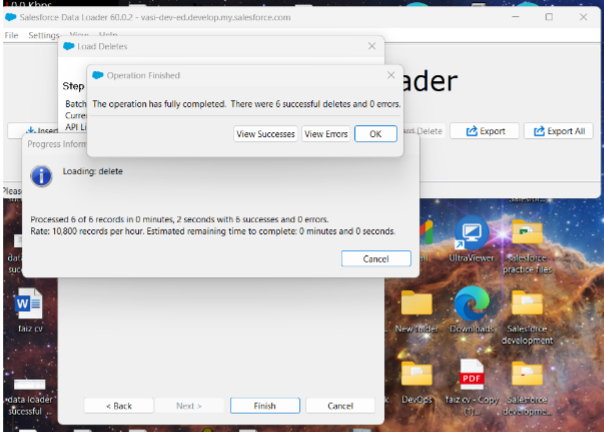
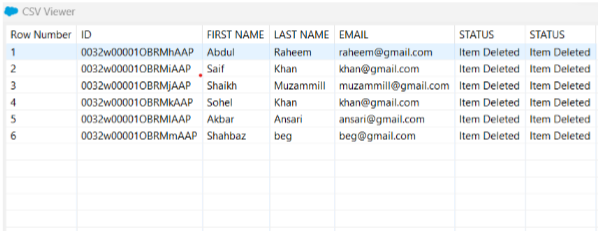
Output data is deleted:-
Undelete:- In Salesforce, “undelete” refers to the process of restoring records that have been previously deleted from the system. When a record is deleted in Salesforce, it is moved to the Recycle Bin where it stays for a limited period of time (usually 15 days) before being permanently erased from the system. During this time, users with appropriate permissions can “undelete” the record, bringing it back into the active database.
Dataloader is a powerful tool provided by Salesforce for bulk data import, export, and deletion. It allows administrators and users to perform various data management tasks efficiently. However, historically, Dataloader did not directly support the “undelete” operation. Instead, users had to rely on other means such as using the Salesforce user interface to manually undelete records from the Recycle Bin.
However, there might have been updates or additions to Dataloader capabilities beyond my last training data. It’s recommended to refer to the latest Salesforce documentation or community forums for the most up-to-date information on Dataloader features and capabilities, including support for undelete operations.
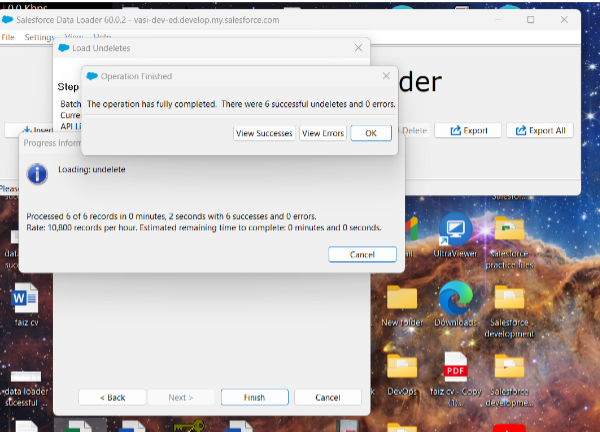
Output of Undelete :-

3. UPSERT:
UPSERT = UPDATE + INSERT
We can perform both Insert and Update operations into the object at a time. DataLoader will differentiate the records based on the Record ID. It will Update the Records, which are having Record ID. It will insert the records, which doesn’t have the record id.
Note: We need to place records inside a CSV file, which needs to be inserted and updated.
First select the matching field to upsert data ( Email / Id ) :-
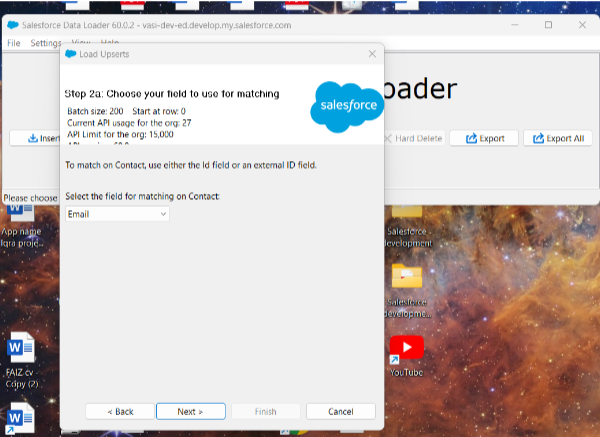
Choos maping with your requirement :-
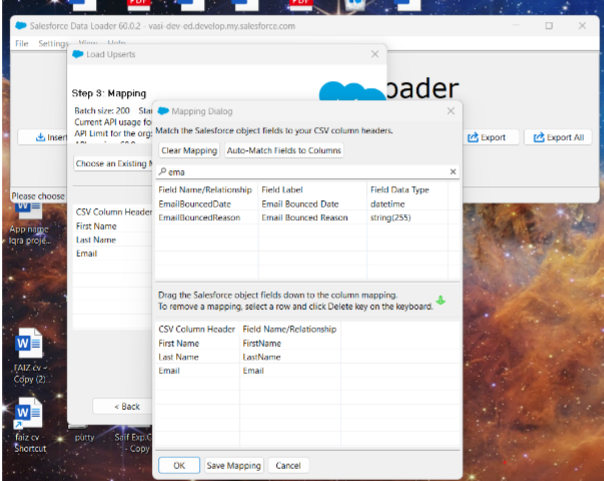
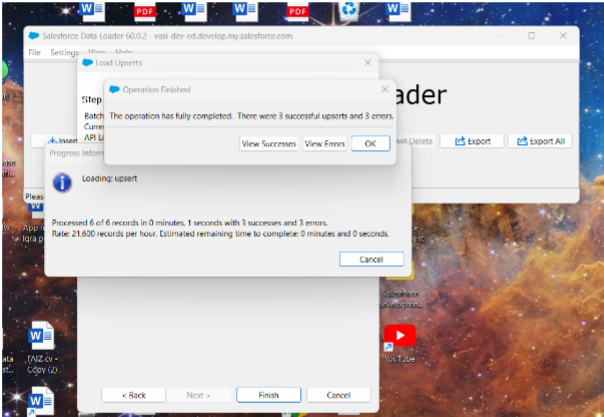
Output :-


4 EXPORT:
We can fetch the required records from the object. We can fetch the required records from the object, by adding the user-defined conditions. We can select the required column information to be fetched.
Select the fields to export :-
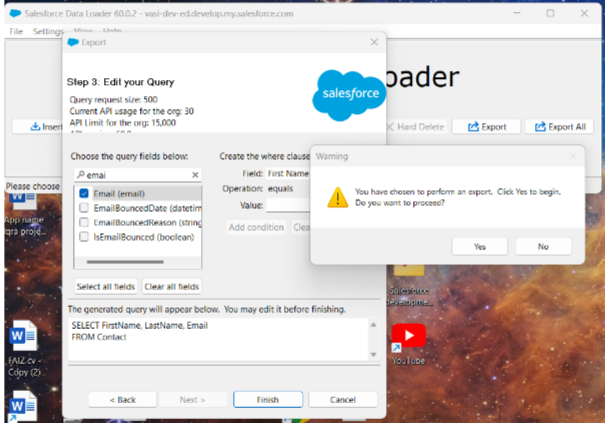
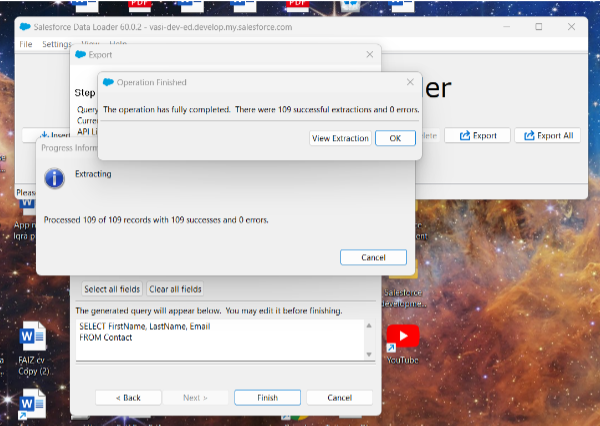
Output :-

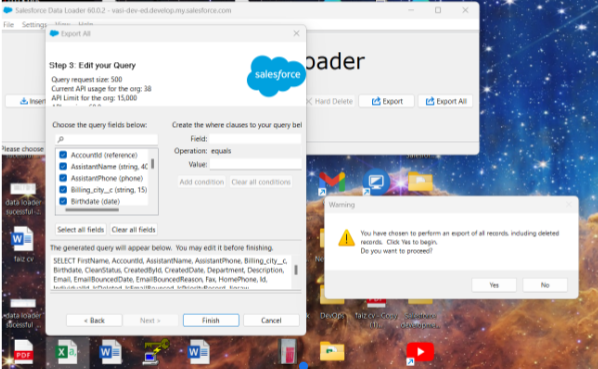
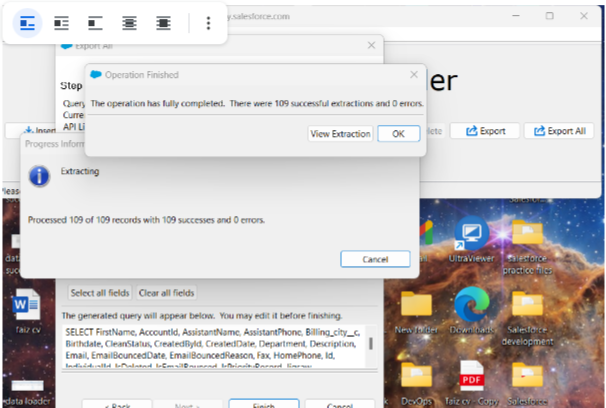
EXPORT ALL:
We can fetch the records from the object, including Deleted records from the recycle bin.
Choose the fields to export ( here all fields are selected ) :-
Output :-

HARD DELETE:
We can remove the records from the object Permanently without moving it to the recycle bin. We need the below permission to perform a Hard Delete.
Profile Level: “Bulk API Hard Delete” Checkbox to be selected.
Note: By default, the Hard Delete button will be disabled in the DataLoader. To enable the “Hard Delete” button, we should have “Bulk API Hard Delete” permission at the profile level.
Course Video
Practices Tasks
1. Create a CSV Excel file to import data in contacts.
2. Import 20 contacts using the data import wizard.
3. Update the email address of those 20 contacts using the data loader.
4. Delete 5 contacts with the help of a data loader.
5. Export 5 contacts using data loader.
YouTube Reference :
1) Data Management in Hindi/Urdu
2) Data Management in English


