

Database Configuration
ABOUT THE SETUP MENU IN SALESFORCE
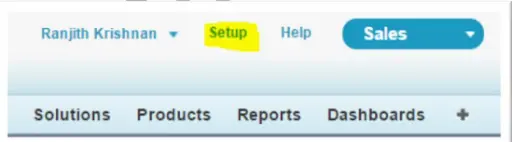
The Salesforce page also called Setup consists of a tab bar, a navigational sidebar, and a main window as shown below.
- It is located at the top right side of your Salesforce Org as highlighted above next to your Name menu.
- It provides access to various options/tools to manage the salesforce Org and customize and develop applications.
At the top of each Salesforce page are tabs and links for navigating to major features.
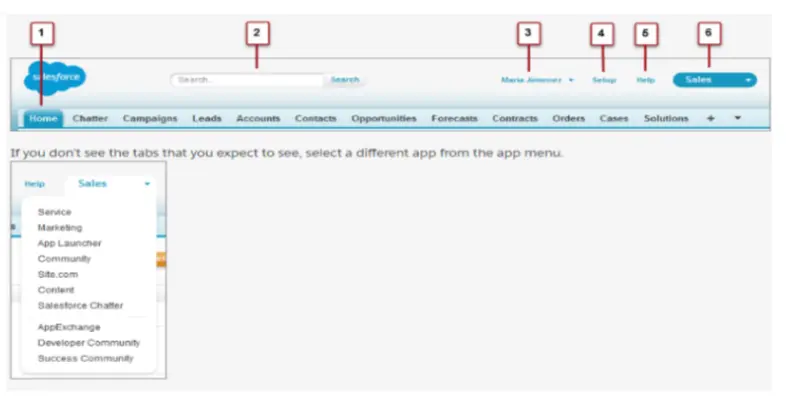
- Use the tabs to switch between objects and features. You can customize this list to suit your needs (more on this in a bit).
- Search to find any record.
- Access user-specific customizations from the drop-down next to your name.
- Use the Setup menu to customize Salesforce for your whole org. (You must have administrative privileges.)
- Access help resources and training.
- A list of apps, each of which contains different features and tabs.
1. What is App?
- An app is a group of tabs that work as a unit to provide functionality for a business Objective.
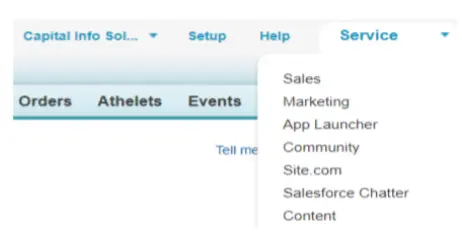
- Users can switch between apps using the app drop-down menu at the top-right corner of every page in Classic.
- It can have both Standard and Custom Tabs.
– You can customize existing apps to match the way you work or build new apps by grouping standard and custom tabs.
Example: Sales App consists of Tabs such as Lead, Accounts, Contacts, Chatter, etc.
2. Types of App:
There are two types of applications.
– Standard Application.
– Custom Application.
3. Standard Application:
– Applications created by the salesforce are called standard Applications.
Example: Sales, Service, Marketing, etc.
1. Standard Applications cannot be deleted, but they can be customized.
4. Custom Applications:
– Applications created by the user are called custom Applications.
– They can be deleted or customized as per business requirements.
5. Steps to Create Custom Applications
Lightning Experience:
- Navigate to Setup > Apps > App Manager.
- Click “New Lightning App” to start creating a new app.
- Provide details such as the app name, description, and logo.
- Choose the navigation style (Standard Navigation or Console Navigation).
- Select the utility items and objects you want to include in your app’s navigation.

Fill in the details as per the requirements and click “Next”.

Fill in the Navigation style, Supported form factors, Setup Experience, and Personalization settings as per the requirements and click “Next”.

Add Utility Items such as Flow, History, chatterbox, etc, and click “Next”.

Select the object you want to use in the Application and click “Next”.

Select the profiles to whom the app will be visible and click “Save & Finish”.
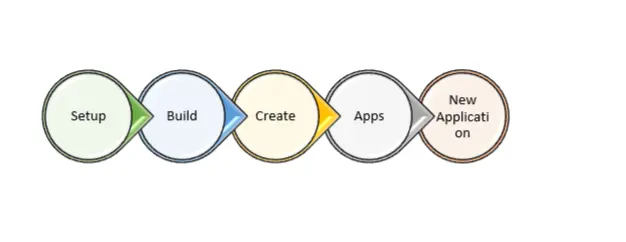
Steps to Create Custom Applications
Classic:

What is an object in Salesforce:
An object in Salesforce is a carrier of data stored systematically. Each object comprises several fields that correspond to columns in a database. Data is stored in records of objects which correspond to rows in a database. Objects can be related to other objects using relationship fields. There are 2 types of objects in Salesforce that are “standard object” and “custom object.”
Standard Objects:
These are the objects that already exist in the Salesforce platform to manage the configurations and settings of the environment. Once you log in to the Salesforce platform, you can see the available objects.
Example:
The most preferred standard object is called the Account Object. It is the object that stores the preliminary information about a customer, partner, competitor, or another organization. We can explore the account object by following the steps below.
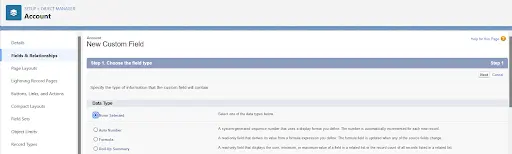
Step 1
Login to the Salesforce platform and navigate to the App Launcher (grid icon in the top-left corner). Select “Sales” (or appropriate app) from the App Launcher menu.
Step 2
In the Sales app, click on the gear icon (⚙️) in the top-right corner and select “Setup” from the dropdown menu.
Step 3
In the Setup menu, navigate to the Object Manager by typing “Object Manager” in the Quick Find box and selecting it from the dropdown.
Step 4
Within the Object Manager, locate and click on “Account” from the list of objects.

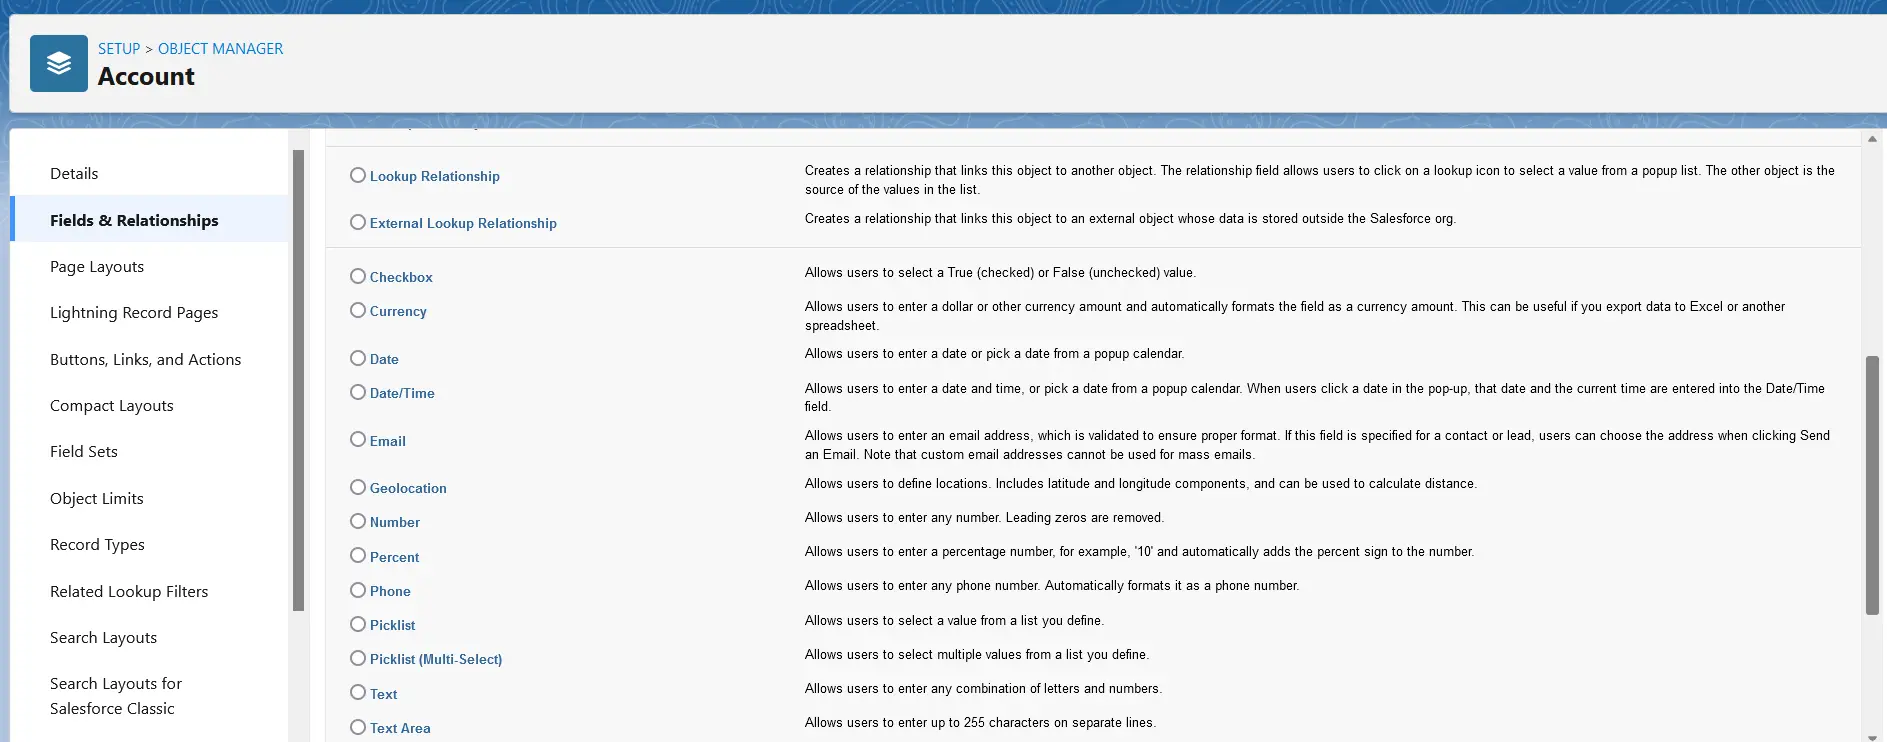
Step 5: In the Account object detail page, click on the “Fields & Relationships” tab. It will display the complete Account table with field names and data types.
Custom Objects:
a custom object is a database table used to store data specific to your organization’s needs. Unlike standard objects, which come pre-built with Salesforce (such as Account, Contact, Opportunity, etc.), custom objects are created by administrators to meet unique business requirements.
1. Navigate to Setup:
– In Salesforce Classic: Click on the gear icon in the top-right corner and select “Setup” from the dropdown menu.
– In Salesforce Lightning Experience: Click on the App Launcher icon (grid icon) in the top-left corner, then select “View All” and choose “Setup.”
2. Access Object Manager:
– In Salesforce Classic: In the Setup menu, under “Build,” expand the “Create” section and select “Objects.”
– In Salesforce Lightning Experience: In the Setup menu, type “Object Manager” in the Quick Find box and select it from the dropdown.
3. Create New Custom Object:
– Click on the “Create” button or link.
– Select “Custom Object” from the dropdown menu.
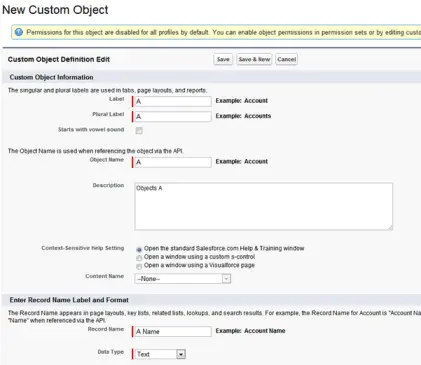
4. Define Custom Object Properties:
Fill in the required information for the custom object:
-Label: Enter a descriptive name for the custom object.
– Plural Label: Provide a plural name for the object.
– Object Name: Salesforce will automatically populate this field based on the label.
– Optionally, you can set other properties such as Record Name, Data Type for the Record Name, Data Category, Deployment Status, and optional settings like Allow Reports, Allow Activities, etc.
5. Save the Custom Object:
– Once you’ve filled in the necessary information, click on the “Save” button to create the custom object.
What’s the Difference Between Standard and Custom Objects?
Standard objects, such as accounts, cases, contacts, and opportunities, are included with Salesforce by default. Custom objects are based on standard objects, extend standard functionality and store information that is unique to an org.
What are the Tabs in Salesforce?
Tabs are nothing but the carriers of objects. There are mainly 4 types of tabs:
1. Standard Object Tabs:
Standard object tabs display data related to standard objects.
2. Custom Object Tabs:
Custom object tabs display data related to custom objects. These tabs look and function just like standard tabs.
3. Web Tabs:
Web Tabs display any external Web-based application or Web page in a Salesforce tab.
4. Visualforce Tabs:
Visualforce Tabs display data from a Visualforce Page.
What are fields in Salesforce?
Fields in Salesforce mean what the columns represent in relational databases. It can store data values that are required for a particular object in a record.
To create a field, login to Salesforce then click Settings → Setup Home → Object Manager → Account → Fields & Relationships →New
Object Relationships
An object relationship in Salesforce is a two-way association between two objects. Relationships are created by creating custom relationship fields on an object. This is done so that when users view records, they can also see and access related data. Seven types of object relationships in Salesforce are explained below:
1. Master-detail relationship:
It is a strongly coupled relationship among Salesforce objects, which means if a master record gets deleted, then the child records associated with it are also deleted. In this type of relationship, the parent record controls the behavior of the child record regarding visibility and sharing. It means the security setting of a parent object applies to the child object.
For example, if we create a master-detail relationship between the Meetup and Participant objects, where Meetup will act as the parent object and Participant will serve as the child object, then if someone deletes a Meetup record, all the associated Participant records will also get deleted. The following image gives a visual representation of the master-detail relationship between Meetup and Participant:

2. Lookup relationship:
It is a loosely coupled relationship among Salesforce objects, which means even if a parent record gets deleted, the child records remain in the system. Here, both the parent and child have their sharing settings and security controls. The following image gives a visual representation of the lookup relationship between Meetup and Participant objects and what happens when the parent (Meetup) record gets deleted:

3. Self-relationship:
Self-relationship is another example of a lookup relationship. In Salesforce, we can use lookup relationships to create self-relationships among objects; we can have a maximum of 40 self-lookups. For example, a campaign record can have a Parent Campaign record, as shown in the following screenshot:

4. External lookup relationship:
We can create two special lookups on an external object apart from the standard lookup relationship. They are external lookup relationships and indirect lookup relationships.
External lookup relationship allows us to link an external object to a parent external object whose data is stored in an external data source. In other words, it allows us to link two external objects.
5. Indirect lookup relationship:
An indirect lookup relationship allows us to link an external object to a standard or custom object. We can only create an indirect lookup to an object with a unique external ID field on the parent object that is used to match the records in this relationship. While creating an indirect lookup relationship field on an external object, we have to specify the child object field and the parent object field to match and associate records in the relationship. For example, we can display a related list of payments from the ERP external record with matching external IDs on the account object.
6. Many-to-many relationship
The many-to-many relationship in Salesforce allows us to link a child record to multiple parents. For example, a campaign is attached to many leads, and one lead may have more than one campaign. A visual representation of the many-to-many relationship is shown in the following image:

If you have two objects, called Case and Article, and you want to relate these two objects in such a manner that one case can have multiple articles and one article is linked to many cases, then we must use the many-to-many relationship. The many-to-many relationship is made with the help of a junction object. In this case, we can create the third object, let’s say, Solution with two master-detail relationships with Solution – Case and Solution – Article.
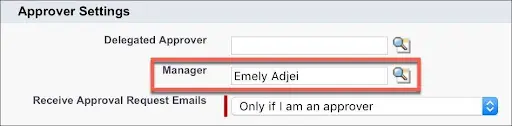
7. Hierarchical relationship:
In Salesforce, only a user object has this type of relationship where we can create a hierarchy of users in the organization. For example, a user can have his manager, and his manager may have a senior manager, and so on till the CEO or CIO level. The best example is the manager field on a user object as shown in the following image:
Use of Junction object.
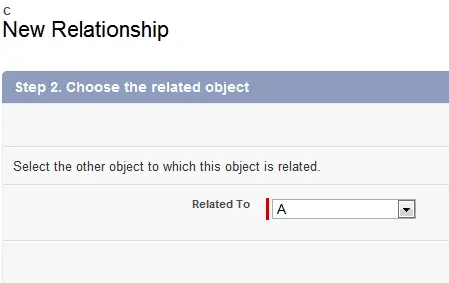
Let us assume that we have two custom objects – A and B. To provide the many to many relationship between A and B, we will need to create one more object let’s say it would be C, it will be called as junction object.
So, start with creating Object A. Go to Settings → Object Manager → Create (Drop down) → Custom Object.
In the next screen give the name of the field.
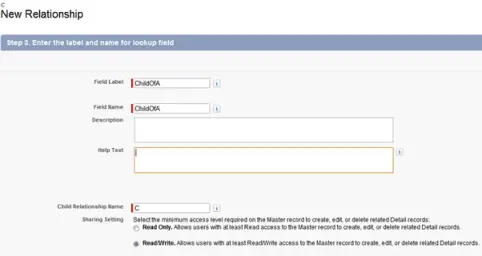
for Master record A, I have used the name “Child of A” and in the same way for Master record B – I used “Child of B”.
Until now, we have created two fields on object C in which one refers to master record A and the other refers to master record B as shown in the below screen. Now we can create a tab for all the custom objects to add the record. First, create a record for A then B , and for record C screen will look like the below snap.
Practices Tasks
1. Create 2 custom objects called “Students” and “Subjects”.
2. Create 2 Tabs for objects Students and Subjects.
3. Create fields using data type ‘lookup, picklist, and multi-select picklist’.
4. Create a roll-up summary, Multiselect picklist, and Master Detail field.
5. Create Field dependency and rest all data type fields as these are regular and easiest data types and fields.
YouTube Reference:
1) Salesforce Admin Database Configuration Hindi/Urdu
2) Salesforce Admin Database Configuration in English
The Setup menu in Salesforce is a centralized location that provides access to various tools and options for managing and customizing your Salesforce organization. It includes a tab bar, a navigational sidebar, and a main window, allowing administrators to configure settings, create objects, manage users, and develop applications.
An app in Salesforce is a collection of tabs that work together to provide functionality for a specific business objective. Apps can include standard and custom tabs and allow users to switch between different sets of features tailored to their roles.
Objects are database tables in Salesforce that store specific data. They can be Standard Objects (predefined by Salesforce) or Custom Objects (created by users for specific needs).
Fields are columns in a Salesforce object that store specific data, such as names, dates, or numerical values. They can be standard or custom.
Go to Setup > Object Manager > Create Custom Object, define its properties, and save.
These are links between objects, allowing related data to be connected. Examples include
Master-Detail: The child record is dependent on the parent. Deleting the parent deletes the child. Lookup: A loosely coupled relationship; deleting the parent does not affect the child.
Tabs are UI components that display object data or external content. Types include Standard Object Tabs, Custom Object Tabs, Web Tabs, and Visualforce Tabs.
The Setup Menu provides tools to customize Salesforce, manage apps, and configure objects, fields, and settings.
Navigate to Setup > App Manager > New Lightning App, configure app details, choose objects, and assign it to user profiles.
