Validations and Formula Fields
About Custom Formula Type:
1. Formula is one of the data types of the field.
2. This is used to derive its value from a formula expression you define.
Literal Value
The hard-coded text string or number in the formula. For example, if there is a formula to calculate the bonus of employees where the percentage of bonus is always 20% from the salary field (Salary__c). Salary__c *0.20 Here the number 0.20 is hardcoded which would never change in the calculation.
Field Reference
This denotes the standard or custom field of the object that is referred in the formula. Salary__c is a custom field reference. Fields from related objects can also be referred in the below format. If the standard object and standard field. ObjectName.FieldName If the custom object and custom field. ObjectName__r.FieldName.
Function
System-defined formulas such as ISBLANK (value), TODAY (), etc., require input from the user such as ISBLANK (value), ISCHANGE (value), etc., and some of them do not require any value like TODAY () which return current date always.
Operator
Used to specify the types of calculation to perform.
Comment
Use a forward slash followed by an asterisk (/*) to begin the comment and end with an asterisk followed by a forward slash (*/). Example /*this is a comment in formula*/.
3. Every formula in the salesforce returns the result in any of the below formats.
a) Checkbox
b) Currency
c) Date
d) Date Time
e) Number
f) Text
g) percent
4. Steps to create the formula.
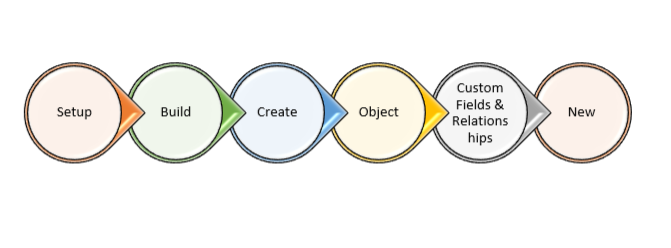
Step 1: Choose the field type as “Formula”.
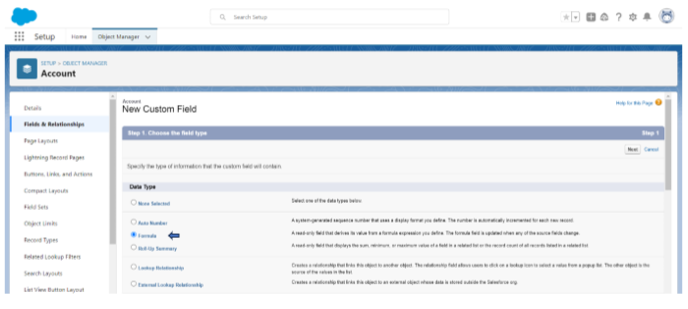
Step 2: Choose the output type (return type of the formula)

Step 3: Create the formula here.

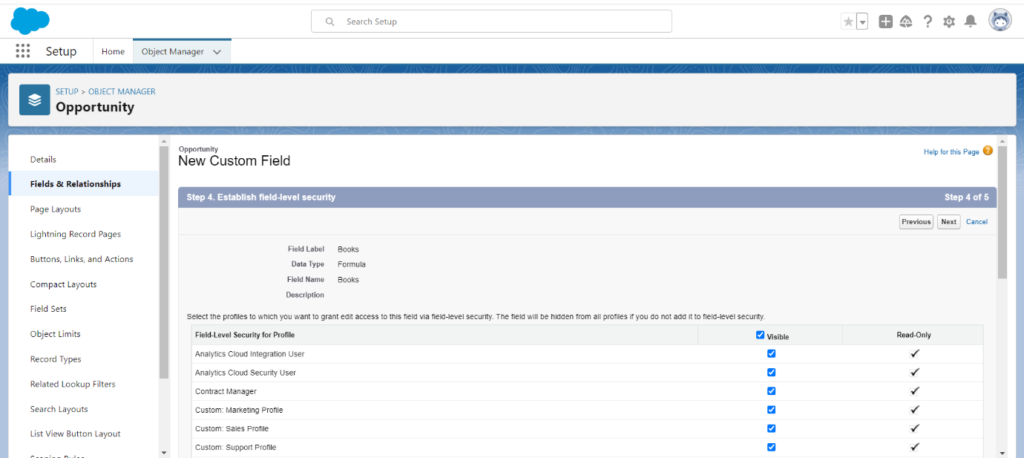
Step 4: Give the field-level security.
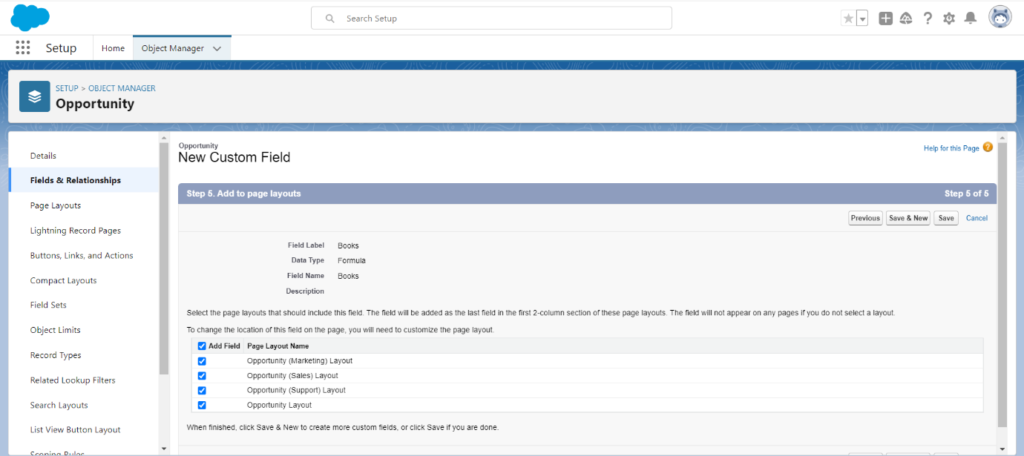
Step 5: Add the field to the layouts.
5. Global Data:
a) Data that remains constant throughout the application is called global data.
b) All global objects are prefixed with a ‘$’ sign.
Example:
$Organization.
$User.
$UserRole.
$System.
$Api.
Formula Example:
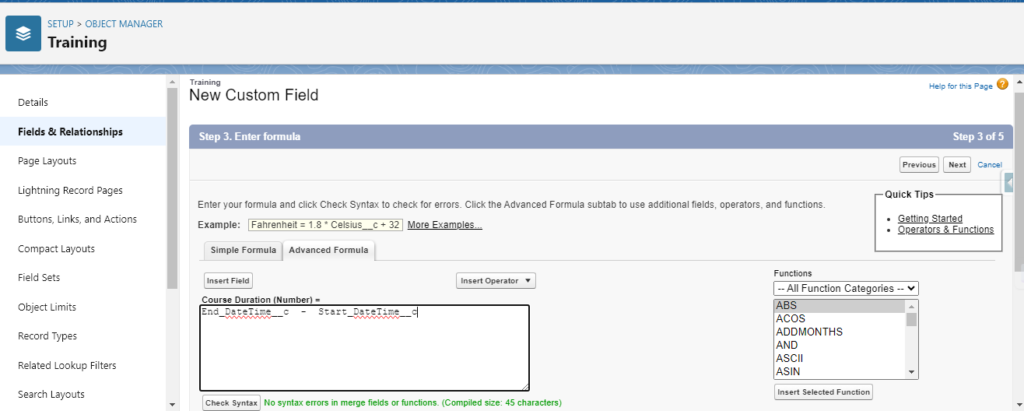
Create a Training object and two DateTime fields named ‘Start DateTime’ and ‘End DateTime’ and one formula field named ‘Course Duration’.
Object: Training__c.
Field Name: Course Duration.
Formula field Return Type: Number.
Formula Editor:
End_DateTime__c – Start_DateTime__c
Formula can also be built by using pre-defined functions provided by Salesforce as
follows.
PRE-DEFINED FUNCTIONS IN SALESFORCE:
IF (Logic Condition, return_value_if_true, return_value_if_false)
Logic Condition: This is a logical check that would return true or false.
Scenario:
On a custom object called “Training” If Fee__c = 0, then return the text ‘is a Free Course’
or ‘is a Paid Course’.
Solution:
Object: Training__c
Field Name: This Course
Return Type: Text
Formula Editor:
IF (Fee__c = 0,’ is a Free Course’,’ is a Paid Course’)
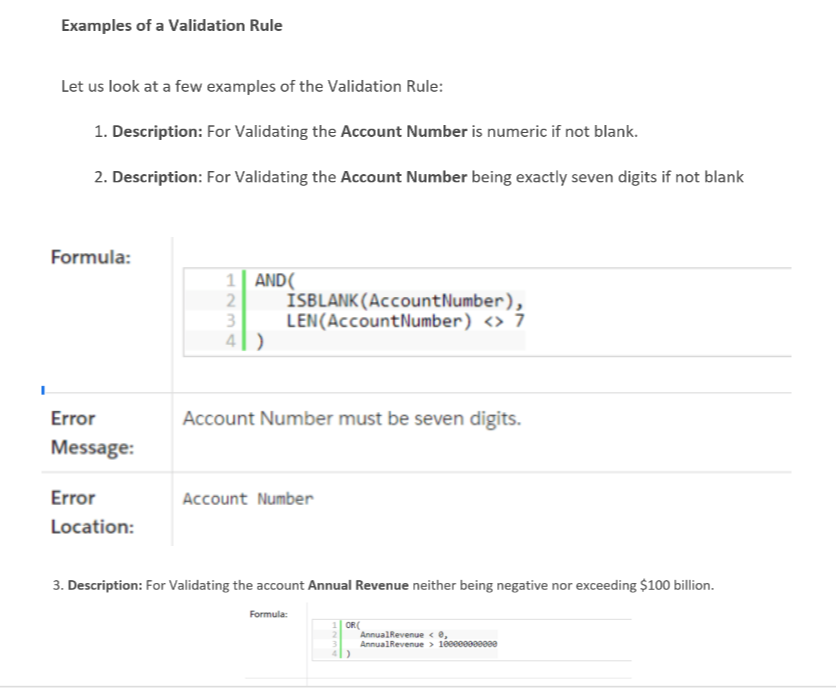
Validation Rules:
- This is a declarative feature to restrict users from entering invalid data.
- Used to set custom error messages when the input data is not in a defined format.
- Used to make a field required conditionally.
- This will fire only when a new record is inserted/updated.
- When the expression returns true, then an error message will be thrown.
Types of Validation rules:
- Standard Validation
- Custom Validation
When does it fire?
It fires when the record is saved (due to insert or modification).
Why should I need validation rules?
1. To make a field conditionally required.
2. To make a field required.
3. To accept the input in a certain defined format.
4. To set a field as required such as Checkbox which is not possible in the edit page of the field or page layout.
The validation rule is like a formula consisting of Expression.
This will always return Boolean (True or False).
It works as below. When the record is saved, then validation rules will be invoked like standard validations. When the rules resolve to true, then error message will be thrown in the interface.

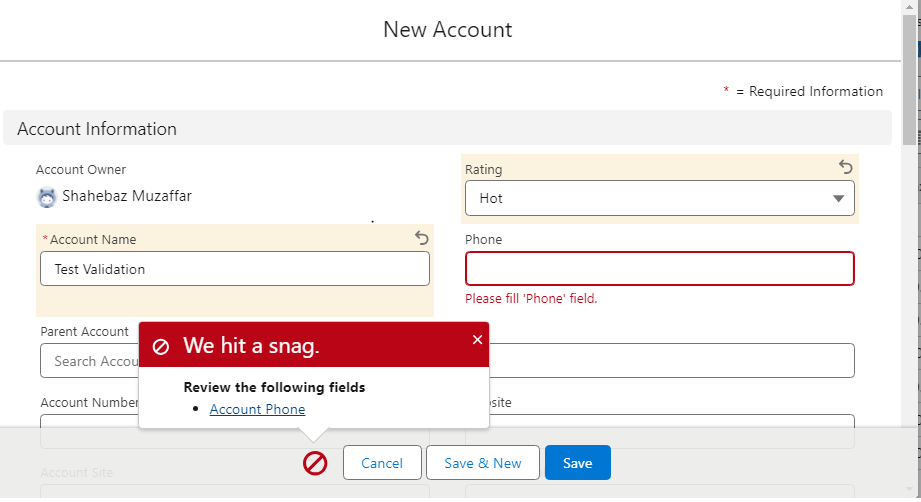
This custom error message will be displayed next to the field optionally and at the top of the page.
An error message will be thrown in the interface if the user saves the record using a standard layout. If the record is inserted or modified through API, then the error message will be thrown in system log or error file.
Lastly, we are going to learn the Steps to create a Validation Rule
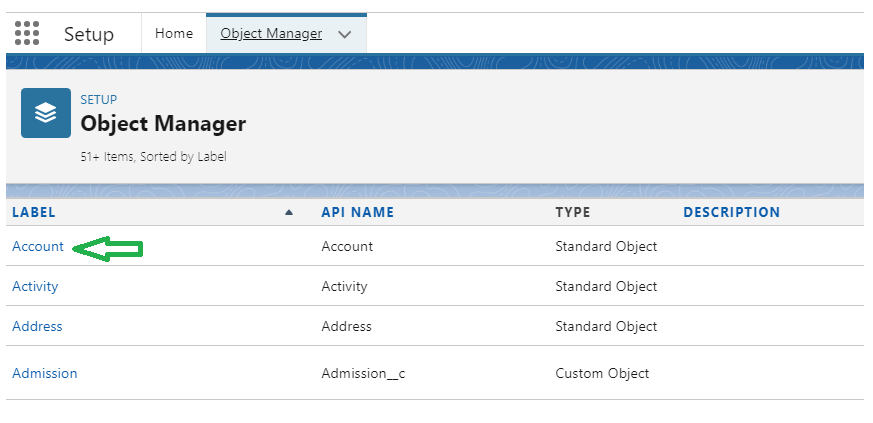
- From Setup, open the Object Manager and click Account Objects can vary as per user’s requirement.
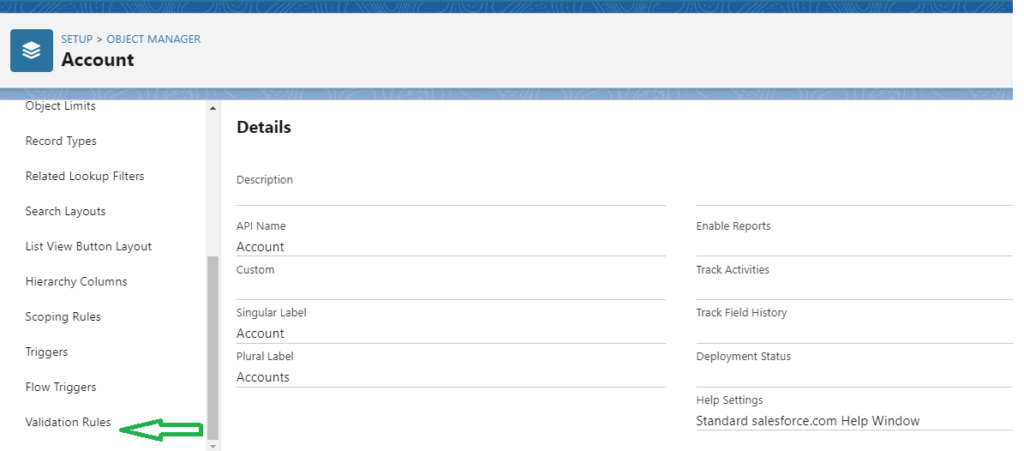
- In the left sidebar, click Validation Rules.
- Click New.
- Enter the required properties for your Validation Rules.
- Click Check Syntax to check the formula used
- Provide an Error message to be displayed.
- Click Save to finish.


Testing by creating a new Account record:
Course Video
Validation Business Scenarios
Practices Tasks
1. Create a formula field on an account to display the Name and Age in another field.
2. Use more functions to develop the formula.
3. Create a Validation rule to mark one field as required.
Ex. Create a Validation rule on account object to make ‘Phone’ field as required.
4. Create a validation rule to through custom error when the account rating is hot.
5. Create a validation rule to display an error when the type of account is prospect and make fax mandatory.


