

Classes and Objects in JavaScript
Imagine you have a box. This box is special because it can hold different things like toys, books, or anything you like. In programming, we have something similar called a “class.”
1. What is a Class?
A class is like a blueprint or plan for creating objects. Imagine you have a blueprint for building a house. It tells you what the house should look like and what rooms it should have. Similarly, a class tells the computer what properties and actions an object should have when created.
Structure of a Class
// Define a class
class ClassName {
// Execution code like methods, fields, properties, constructor, etc.
}
2. What is an Object?
Now, imagine using that blueprint to create an actual car. That car you make is called an “object.”
An object is a real instance or copy of a class. It has unique properties (like the car’s color) and behaviors (like driving or stopping).
Structure of an Object
// Creating an object
let objectName = new ClassName(parameters); // Accessing properties
objectName.propertyName = value; // Setting properties
Example: Car Class and Objects in JavaScript
<body>
<script>
// Define the Car class
class Car {
// Properties (attributes) of the car
constructor(colour, speed) {
this.colour = colour; // Colour of the car
this.speed = speed; // Speed of the car
}
// Method (action) of the car
drive() {
console.log(`The ${this.colour} car is driving at ${this.speed} km/h.`);
}
}
// Create an object (instance) of the Car class
let firstCar = new Car(“Red”, 60); // Creating a new car object with color Red and speed 60
let secondCar = new Car(“Blue”, 200); // Creating another car object with color Blue and speed 200
// Calling the drive method for each car
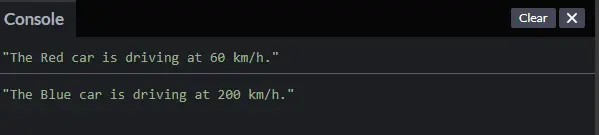
firstCar.drive(); // Output: The Red car is driving at 60 km/h.
secondCar.drive(); // Output: The Blue car is driving at 200 km/h.
</script>
</body>
Code Explanation
1. Define the Car class:
class Car {
// Constructor to initialize the car object with properties
constructor(colour, speed) {
this.colour = colour; // Setting the colour property of the car
this.speed = speed; // Setting the speed property of the car
}
// Method to simulate the car driving
drive() {
console.log(`The ${this.colour} car is driving at ${this.speed} km/h.`);
}
}
class Car: This defines a new class named Car. A class is like a blueprint for creating objects, in this case, a car object.
constructor(colour, speed): This is a special constructor method. It runs automatically when a new object of the Car class is created. The constructor is used to initialize the object with specific values.
• color and speed are parameters that the constructor will receive when a new Car object is created.
• Inside the constructor, this. color and this.speed sets the object’s properties to the values passed in when the object is created.
drive(): This is a method (a function inside a class) that allows the car to “drive.” When this method is called, it prints a message to the console using the car’s color and speed properties. It shows the car’s color and its speed, simulating the car’s driving.
2. Create objects (instances) of the Car class:
let firstCar = new Car(“Red”, 60); // Creating a new car object with color Red and speed 60
let secondCar = new Car(“Blue”, 200); // Creating another car object with color Blue and speed 200
new Car(“Red”, 60): This creates a new instance (object) of the Car class named firstCar. The “Red” and 60 values are passed into the constructor, so firstCar will have the color “Red” and a speed of 60.
new Car(“Blue”, 200): This creates another instance of the Car class named secondCar, with the color “Blue” and a speed of 200.
Each Car object has its own unique set of properties (colour and speed), so firstCar has “Red” and 60, while secondCar has “Blue” and 200.
3. Calling the drive() Method for Each Car
firstCar.drive(); // Output: The Red car is driving at 60 km/h.
secondCar.drive(); // Output: The Blue car is driving at 200 km/h.
firstCar.drive(): This calls the drive() method for the firstCar object. The method uses the car’s colour (“Red”) and speed (60) properties to output the message: “The Red car is driving at 60 km/h.”
secondCar.drive(): This calls the drive() method for the secondCar object. The method outputs the message: “The Blue car is driving at 200 km/h.” using the colour and speed properties of secondCar
Output
The super() Function in JavaScript
The super() Function in JavaScriptThe super() function in JavaScript is used in the context of inheritance in object-oriented programming. When a class inherits from another class (called the parent class or superclass), the super() function allows the child class (the subclass) to access the properties and methods of the parent class.
The implementation is shown below in an Example of inheritance
Class with Inheritance (Building on Blueprints)
Sometimes, you might want to create a class based on another class. This is like making a new blueprint by adding some special features to an existing one. This is called inheritance.
For example, we can create a SportsCar class based on the Car class. The SportsCar class will have all the features of the Car class, but we can add extra features, like a turbo speed method.
<body>
<script>
//Define the Car class
class Car {
// Properties (attributes) of the car
constructor(colour, speed) {
this.colour = colour; // Colour of the car
this.speed = speed; // Speed of the car
}
// Method (action) of the car
drive() {
console.log(`The ${this.colour} car is driving at ${this.speed} km/h.`);
}
}
class SportsCar extends Car {
// Properties of SportsCar
constructor(colour, speed, topSpeed) {
super(colour, speed); // Call the parent class constructor (Car) to set colour and speed
this.topSpeed = topSpeed; // Special property for sports car
}
// Method specific to SportsCar
showTopSpeed() {
console.log(`${this.colour} sports car can go up to ${this.topSpeed} km/h!`);
}
}
// Create an object (instance) of the SportsCar class
let mySportsCar = new SportsCar(“Yellow”, 100, 300); // Creating a sports car with top speed of 300 km/h
// Calling the drive method for each car
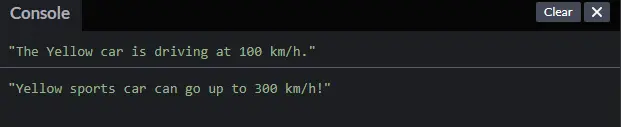
mySportsCar.drive(); // Output: The Yellow car is driving at 100 km/h.
// Calling the showTopSpeed method specific to SportsCar
mySportsCar.showTopSpeed(); // Output: Yellow sports car can go up to 300 km/h!
</script>
</body>
4. Inheritance: Creating the SportsCar Class
// Define the SportsCar class that inherits from Car
class SportsCar extends Car {
// Properties of SportsCar
constructor(colour, speed, topSpeed) {
super(colour, speed); // Call the parent class constructor (Car) to set colour and speed
this.topSpeed = topSpeed; // Special property for sports car
}
// Method specific to SportsCar
showTopSpeed() {
console.log(`${this.colour} sports car can go up to ${this.topSpeed} km/h!`);
}
}
class SportsCar extends Car:
• This line defines a new class SportsCar, which inherits from the Car class.
• Inheritance means that SportsCar will have all the properties and methods of Car (like color, speed, and drive()), but it can also have its own special properties and methods.
• Calling the Parent Constructor: Inside the SportsCar constructor, we use super(colour, speed) to call the parent class (Car) constructor and initialize the inherited colour and speed properties.
• In this case, SportsCar adds a new property, topSpeed, and a new method, showTopSpeed().
constructor(colour, speed, topSpeed):
• The constructor of SportsCar takes three arguments: colour, speed, and topSpeed.
• super(colour, speed) calls the constructor of the parent Car class to set up the common properties (colour and speed) using the super() function.
• this.topSpeed = topSpeed: This initializes the new topSpeed property specific to SportsCar.
showTopSpeed():
• This is a method unique to the SportsCar class. It outputs a message to the console showing the top speed of the sports car.
5. Creating Objects from the SportsCar Class
// Create an object (instance) of the SportsCar class
let mySportsCar = new SportsCar(“Yellow”, 100, 300); // Creating a sports car with top speed of 300 km/h
new SportsCar(“Yellow”, 100, 300):
• This creates a new object of the SportsCar class.
• “Yellow” is the color, 100 is the speed, and 300 is the topSpeed. These values are passed to the SportsCar constructor.
• super(colour, speed) inside the SportsCar constructor calls the Car class constructor to set up the common properties colour and speed.
• The topSpeed is set directly for this SportsCar object
6. Calling Methods for Each Object
// Calling the drive method for each car
firstCar.drive(); // Output: The Red car is driving at 60 km/h.
secondCar.drive(); // Output: The Blue car is driving at 200 km/h.
mySportsCar.drive(); // Output: The Yellow car is driving at 100 km/h.
// Calling the showTopSpeed method specific to SportsCar
mySportsCar.showTopSpeed(); // Output: Yellow sports car can go up to 300 km/h!
firstCar.drive() and secondCar.drive():
• These call the drive() method from the Car class and display the car’s speed and color for firstCar and secondCar.
mySportsCar.drive():
• This calls the drive() method for the SportsCar object mySportsCar. It outputs “The Yellow car is driving at 100 km/h.”, using the properties inherited from the Car class.
mySportsCar.showTopSpeed():
• This calls the showTopSpeed() method, which is unique to the SportsCar class. It outputs “Yellow sports car can go up to 300 km/h!”.
Output
Course Video
YouTube Reference :
1) What is a JavaScript Class? | Web Development Course in Hindi
2) Classes and objects in javascript in English
Practice Scenarios
1. Create a class Rectangle with properties of width and height. Add a method calculateArea that returns the area of the rectangle.
The task is to create a JavaScript class named Rectangle with two properties, width and height. Additionally, you need to add a method called calculateArea to the class, which calculates and returns the area of the rectangle.
1. Create the Rectangle Class: Define a class called Rectangle using the class keyword.
2. Add Properties: Inside the class, add two properties, width and height, to represent the dimensions of the rectangle. You can do this within the class constructor.
3. Add the calculateArea Method: Still inside the class, add a method called calculateArea that calculates the area of the rectangle using the formula: area = width * height.
Here’s an example program:
class Rectangle {
// Step 2: Add properties (width and height) within the constructor
constructor(width, height) {
this.width = width;
this.height = height;
}
// Step 3: Add the calculateArea method
calculateArea() {
// Calculate and return the area of the rectangle
return this.width * this.height;
}
}
// Example usage:
// Create an instance of the Rectangle class with width 5 and height 10
const myRectangle = new Rectangle(5, 10);
// Call the calculateArea method to get the area
const area = myRectangle.calculateArea();
// Display the result
console.log(“Area of the rectangle:”, area);
Output

2. Write a JS program to Calculate the area of a square using inheritance by taking the side from the user.
The task is to write a JavaScript program that calculates the area of a square using inheritance. In this context, inheritance means creating a class that inherits properties or methods from another class.
1. Create a Base Class (Shape): Define a base class called Shape (or any suitable name) that has a property or method to calculate the area.
2. Create a Derived Class (Square):
– Create a derived class called Square that inherits from the Shape class.
– The Square class should have a property to represent the side length of the square.
3. Calculate Area: Add a method to the Square class to calculate the area of the square based on its side length.
4. User Input: Prompt the user to enter the side length of the square.
Here’s an example program:
// Step 1: Create a Base Class (Shape)
class Shape {
// The base class can have common properties or methods related to shapes
}
// Step 2: Create a Derived Class (Square) that inherits from Shape
class Square extends Shape {
// Step 3: Add a property for side length
constructor(sideLength) {
super(); // Call the constructor of the base class
this.sideLength = sideLength;
}
// Step 3: Add a method to calculate the area of the square
calculateArea() {
return this.sideLength * this.sideLength;
}
}
// Step 4: User Input
// Prompt the user to enter the side length of the square
var side = parseFloat(prompt(“Enter the side length of the square:”));
// Check if the user entered a valid number
if (!isNaN(side) && side > 0) {
// Step 5: Example Usage
// Create an instance of the Square class with the user-provided side length
const userSquare = new Square(side);
// Calculate and display the area
const area = userSquare.calculateArea();
console.log(`The area of the square with side length ${side} is: ${area}`);
} else {
console.log(“Invalid input. Please enter a valid positive number for the side length.”);
}
Output


3. Write a JS program to calculate the Average of the total marks using class Methods.
The task is to write a JavaScript program that calculates the average of total marks using class methods.
1. Create a Class: Define a class, let’s call it StudentMarks or any suitable name.
2. Add Properties: Add properties to the class to represent the total marks obtained by a student. You might also include the number of subjects or any other relevant information.
3. Add a Method to Enter Marks: Add a method to the class that allows the user to enter marks for each subject. This method should update the total marks property.
4. Add a Method to Calculate Average: Add another method to the class that calculates and returns the average of the total marks.
5. User Input: Prompt the user to enter marks for each subject.
Here’s an example program:
// Step 1: Create a Class (StudentMarks)
class StudentMarks {
// Step 2: Add properties (totalMarks, numOfSubjects, etc.)
constructor() {
this.totalMarks = 0;
this.numOfSubjects = 0;
}
// Step 3: Add a method to enter marks for each subject
enterMarks(subjectMarks) {
this.totalMarks += subjectMarks;
this.numOfSubjects++;
}
// Step 4: Add a method to calculate the average
calculateAverage() {
// Check if there are subjects to avoid division by zero
if (this.numOfSubjects > 0) {
return this.totalMarks / this.numOfSubjects;
} else {
return 0; // Avoid division by zero
}
}
}
// Step 5: User Input
// Prompt the user to enter marks for each subject
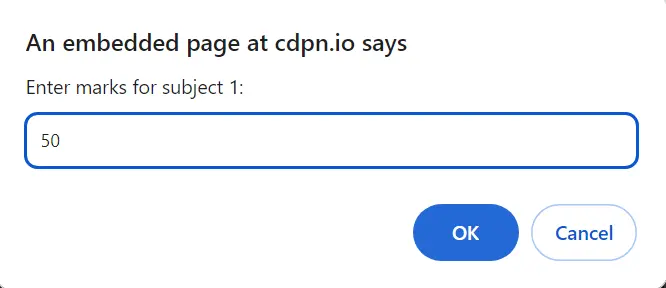
var marks1 = parseFloat(prompt(“Enter marks for subject 1:”));
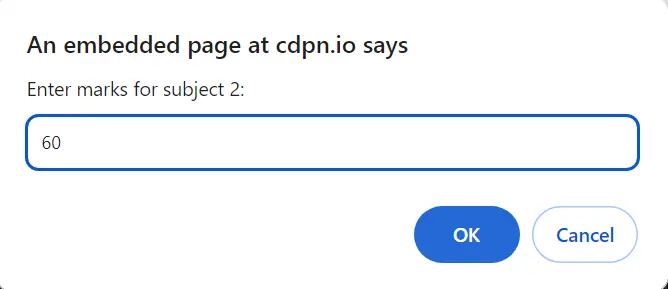
var marks2 = parseFloat(prompt(“Enter marks for subject 2:”));
// Continue this for other subjects as needed
// Step 6: Example Usage
// Create an instance of the StudentMarks class
const student = new StudentMarks();
// Enter marks for each subject
student.enterMarks(marks1);
student.enterMarks(marks2);
// Continue this for other subjects as needed
// Calculate and display the average
const average = student.calculateAverage();
console.log(`The average of total marks is: ${average}`);
Output
4. Write a JS program to print the names of Different Students and the Average of all marks by taking Marks as an array.
The task is to write a JavaScript program that prints the names of different students along with their average marks. The marks will be provided as an array for each student.
1. Create a Class: Define a class, let’s call it Student or any suitable name.
2. Add Properties: Add properties to the class to represent the student’s name and marks.
3. Add a Method to Calculate Average: Add a method to the class that calculates and returns the average of the marks.
4. Create Instances for Different Students: Create instances of the Student class for different students, providing their names and marks as arrays.
5. Display Information: Display the names of the students along with their average marks.
Here’s an example program:
// Step 1: Create a Class (Student)
class Student {
// Step 2: Add properties (name, marks)
constructor(name, marks) {
this.name = name;
this.marks = marks;
}
// Step 3: Add a method to calculate the average
calculateAverage() {
if (this.marks.length > 0) {
const sum = this.marks.reduce((total, mark) => total + mark, 0);
return sum / this.marks.length;
} else {
return 0; // Avoid division by zero
}
}
}
// Step 4: Create Instances for Different Students
const student1 = new Student(“Alice”, [80, 75, 90]);
const student2 = new Student(“Bob”, [85, 92, 88]);
const student3 = new Student(“Charlie”, [78, 80, 85]);
// Step 5: Display Information
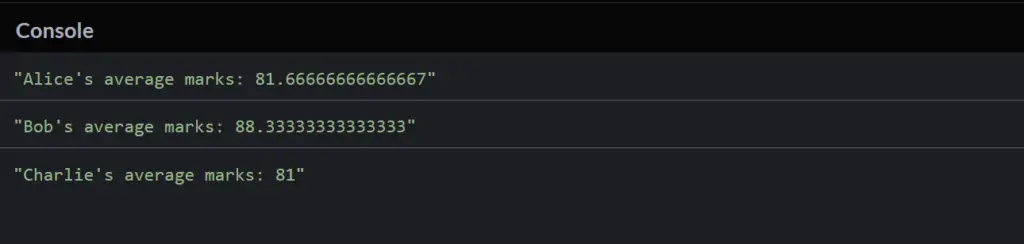
console.log(`${student1.name}’s average marks: ${student1.calculateAverage()}`);
console.log(`${student2.name}’s average marks: ${student2.calculateAverage()}`);
console.log(`${student3.name}’s average marks: ${student3.calculateAverage()}`);
Output
5. Create a class BankAccount with properties balance and owner. Add methods of deposit and withdrawal to update the balance.
The task is to create a JavaScript class named BankAccount with two properties, balance and owner. Additionally, you need to add two methods, deposit and withdrawal, to the class. These methods will be responsible for updating the balance when money is deposited or withdrawn from the bank account.
1. Create the BankAccount Class: Define a class called BankAccount using the class keyword.
2. Add Properties: Inside the class, add two properties, balance and owner, to represent the account’s balance and owner’s name.
3. Add the deposit Method: Add a method called deposit that takes an amount as a parameter and updates the balance by adding the deposited amount.
4. Add the withdrawal Method: Add a method called withdrawal that takes an amount as a parameter and updates the balance by subtracting the withdrawn amount.
Here’s an example program:
class BankAccount {
// Step 2: Add properties (balance and owner)
constructor(balance, owner) {
this.balance = balance;
this.owner = owner;
}
// Step 3: Add the deposit method
deposit(amount) {
// Update the balance by adding the deposited amount
this.balance += amount;
console.log(`Deposited ${amount} into ${this.owner}’s account. New balance: ${this.balance}`);
}
// Step 4: Add the withdrawal method
withdrawal(amount) {
// Check if there is sufficient balance before withdrawing
if (amount <= this.balance) {
// Update the balance by subtracting the withdrawn amount
this.balance -= amount;
console.log(`Withdrawn ${amount} from ${this.owner}’s account. New balance: ${this.balance}`);
} else {
console.log(`Insufficient funds for withdrawal from ${this.owner}’s account.`);
}
}
}
// Example usage:
// Create an instance of the BankAccount class with initial balance 1000 and owner’s name “John”
const johnsAccount = new BankAccount(1000, “John”);
// Deposit 500 into John’s account
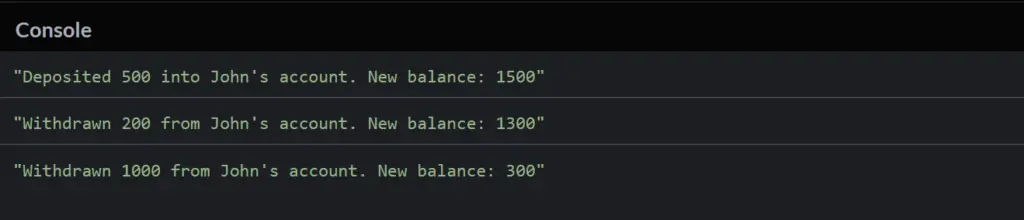
johnsAccount.deposit(500);
// Withdraw 200 from John’s account
johnsAccount.withdrawal(200);
// Attempt to withdraw 1000 (more than the balance) from John’s account
johnsAccount.withdrawal(1000);
Output
JavaScript classes are templates for creating objects. They encapsulate data and methods that work on that data, allowing developers to implement object-oriented programming in JavaScript. Learn more in our JavaScript classes free course video.
Use the class keyword followed by the class name.
Example:
class Person {
constructor(name) {
this.name = name;
}
}
Explore this in the JS classes with free video tutorial.
The constructor method is a special function called when creating a new object instance. It initializes object properties.
Example:
class Car {
constructor(brand) {
this.brand = brand;
}
}
Learn step-by-step in the Free JavaScript classes tutorial for beginners.
Use the new keyword with the class name.
Example:
let myCar = new Car(“Toyota”);
Find practical examples in the JavaScript classes with free tutorial.
Yes, you can define methods within the class body.
Example:
class Animal {
speak() {
console.log(“Animal speaks”);
}
}
Discover how in the JavaScript classes free course video.
Inheritance allows a class to inherit methods and properties from another class using the extends keyword.
Example:
class Dog extends Animal {
bark() {
console.log(“Woof!”);
}
}
Explore this concept in the JS classes with free video tutorial.
The super keyword calls the parent class constructor or its methods.
Example:
class Dog extends Animal {
constructor(name) {
super();
this.name = name;
}
}
Learn more in the Free JavaScript classes tutorial for beginners.
Yes, JavaScript classes are built on prototypes, providing a cleaner syntax for object-oriented programming. Check this out in the JavaScript classes with free tutorial.
Use the static keyword to define a method that can be called on the class itself, not on instances.
Example:
class MathUtil {
static add(a, b) {
return a + b;
}
}
Watch this explained in the JS classes with free video tutorial.
Yes, use the # symbol to declare private properties and methods (available in modern JavaScript).
Example:
class BankAccount {
#balance = 0;
deposit(amount) {
this.#balance += amount;
}
}
Find step-by-step guidance in the Free JavaScript classes tutorial for beginners.
