

JavaScript Events
A JavaScript event is an action or occurrence in the browser that JavaScript can respond to. The user or the browser triggers these events and can be anything like a click, keypress, mouseover, scroll, etc.
When an event happens, JavaScript can execute a function (called an event handler or event listener) in response. This allows you to create interactive web pages.
For example:
• When you click a button, that’s an event.
• When the page finishes loading, that’s an event.
• When you move your mouse over an image, that’s an event too!
Now, JavaScript is like a “watcher” on your webpage. It watches for these events to happen and then takes action when they do. This action is called event handling.
For instance:
• When you click a button, you might want a message to appear.
• When you hover over a picture, you might want it to change color.
To make this happen, we use event handlers. These are special tools in JavaScript that listen for events and then run some code when those events occur.
Example:
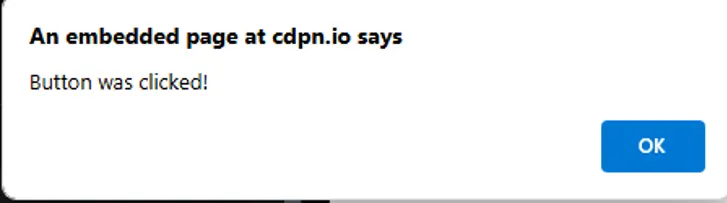
<button onclick=”alert(‘Button was clicked!’)”>Click me!</button>
Output:

After Clicking:
Event Listeners:
An event listener listens for a specific event (like a click or a key press) and then tells the browser to do something in response to that event. You can attach an event listener to almost any HTML element, like buttons, images, or even the whole webpage.
Example:
<body>
<p> Example of the addEventListener() method. </p>
<p> Click the following button to see the effect. </p>
<button id = “btn”> Click me </button>
<p id = “para”></p>
<script>
document.getElementById(“btn”).addEventListener(“click”, fun);
function fun() {
document.getElementById(“para”).innerHTML = “Hello World” + “<br>” + “Welcome to the iqratechnology.com”;
}
</script>
</body>
Code Explanation:
1. document.getElementById(“btn”): This line is selecting the button element using its id=”btn”. It’s like telling JavaScript, “Find the button with this id.”
2. .addEventListener(“click”, fun): The addEventListener() method is added to the button. It listens for a click event on the button. When the button is clicked, it will execute the function fun.
3. function fun(): This is the function named fun, which is called when the button is clicked. The function contains the actions that happen when the event (the click) occurs.
4. document.getElementById(“para”): This targets the <p id=”para”> element on the page, the empty paragraph that was initially created.
5. .innerHTML = …: This changes the inner HTML of the para element. In other words, this updates the text inside the paragraph.
6. “Hello World”: This is the first part of the text that will be displayed inside the paragraph.
7. “<br>”: This inserts a line break between the two parts of the text, so the second line will appear below the first line.
8. “Welcome to the iqratechnology.com”: This is the second part of the text that will appear after the line break.
So, when the button is clicked, the fun function runs and updates the content of the paragraph with the id para to say:

Form Events
Form events are actions or behaviors that happen when a user interacts with a form on a webpage. A form is made up of things like text fields, checkboxes, radio buttons, and buttons where users can input information.
| Event | Description | Example |
|---|---|---|
| submit | Fired when a form is submitted (e.g., by clicking the submit button). |
document.getElementById(‘myForm’) .addEventListener(‘submit’, function(e){ e.preventDefault(); alert(‘Form Submitted’); }); |
| reset | Fired when a form is reset (e.g., by clicking a reset button). |
document.getElementById(‘myForm’) .addEventListener(‘reset’, function(){ alert(‘Form Reset’); }); |
| focus | Fired when a form element (input, select, etc.) gains focus. |
document.getElementById(‘name’) .addEventListener(‘focus’, function(){ alert(‘Input Focused’); }); |
| change | Fired when the value of a form element (input/select) changes. |
document.getElementById(‘name’) .addEventListener(‘change’, function(){ alert(‘Value Changed’); }); |
| select | Fired when a user selects text within an input or textarea. |
document.getElementById(‘message’) .addEventListener(‘select’, function(){ console.log(‘Text Selected’); }); |
Mouse Events
Mouse events refer to the actions or interactions that occur when the user clicks or interacts with a form using their mouse (or other pointing devices like a touchpad). These events help track user actions like clicking buttons, selecting options, or interacting with form fields
| Event | Description | Example |
|---|---|---|
| click | Fired when a mouse button is clicked (pressed and released) over a form element, such as a button, checkbox, or submit button. |
document.getElementById(‘submitButton’) .addEventListener(‘click’, function() { alert(‘Button clicked!’); }); |
| dblclick | Fired when the mouse button is clicked twice in quick succession over a form element. |
document.getElementById(‘myInput’) .addEventListener(‘dblclick’, function() { alert(‘Input field double-clicked!’); }); |
| mousedown | Fired when the mouse button is pressed down over a form element. |
document.getElementById(‘inputField’) .addEventListener(‘mousedown’, function() { console.log(‘Mouse button pressed down on the input field’); }); |
| mouseup | Fired when the mouse button is released over a form element. |
document.getElementById(‘submitBtn’) .addEventListener(‘mouseup’, function() { alert(‘Mouse button released over the button!’); }); |
| mousemove | Fired when the mouse pointer moves over a form element. |
document.getElementById(‘trackingInput’) .addEventListener(‘mousemove’, function() { console.log(‘Mouse is moving over the input field’); }); |
Keyboard Events
Keyboard events in JavaScript are actions that occur when the user interacts with the keyboard while focused on a webpage or a form element. These events help you respond to what the user types, presses, or releases on the keyboard. Common examples include handling keypresses, keydowns, and keyups to capture and process user input.
| Event | Description | Example |
|---|---|---|
| keydown | This event is triggered when a key is pressed down (before the key is released). |
document.getElementById(‘myInput’) .addEventListener(‘keydown’, function(e) { console.log(‘Key down: ‘ + e.key); // Logs the key pressed }); |
| keypress | This event is triggered when a key is pressed and it generates a character (like the letter “A” or the number “1”). |
document.getElementById(‘myInput’) .addEventListener(‘keypress’, function(e) { console.log(‘Key pressed: ‘ + e.key); // Logs the character typed }); |
| keyup | This event is triggered when a key is released after being pressed down. |
document.getElementById(‘myInput’) .addEventListener(‘keyup’, function(e) { console.log(‘Key up: ‘ + e.key); // Logs the key that was released }); |
Course Video
Course Video English:
YouTube Reference :
1) JavaScript Events Tutorial in Hindi / Urdu
2) JavaScript addEventListener Method Tutorial in Hindi / Urdu
3) JavaScript DOM Tutorial – Events in English
Examples for Practice
You have to solve all the questions given below in the editor without copy-pasting.
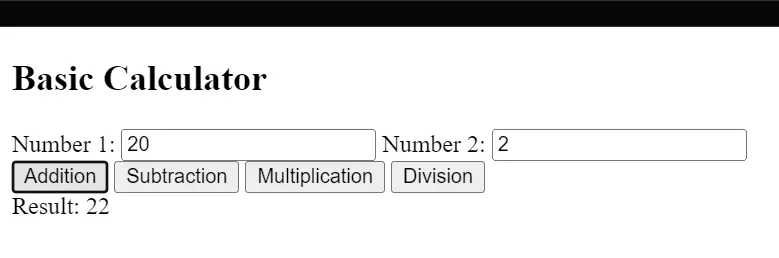
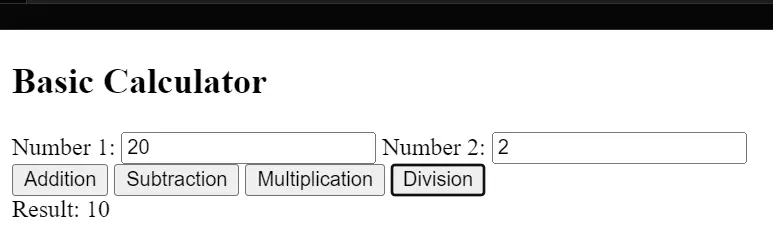
1) Create a basic calculator using a webpage. The webpage should have: - Two boxes where you can type in numbers. - Four buttons: one for addition, one for subtraction, one for multiplication, and one for division. - A space on the page to show the result.
The task is to create a basic calculator using a webpage with two input boxes for numbers, four buttons for addition, subtraction, multiplication, and division, and a space to show the result.
1. Create Input Boxes, Buttons, and Result Area: Use HTML elements (<input>, <button>, <span>) to create two input boxes, four buttons, and an area to display the result.
2. Add Event Listeners: Use JavaScript to add event listeners to the buttons to perform operations when clicked.
Here's an example program:
<body>
<h2>Basic Calculator</h2>
<label for=”num1″>Number 1:</label>
<input type=”text” id=”num1″>
<label for=”num2″>Number 2:</label>
<input type=”text” id=”num2″>
<br>
<button onclick=”add()”>Addition</button>
<button onclick=”subtract()”>Subtraction</button>
<button onclick=”multiply()”>Multiplication</button>
<button onclick=”divide()”>Division</button>
<br>
<span id=”result”>Result: </span>
<script>
// Function to get the values from input boxes
function getValues() {
var num1 = parseFloat(document.getElementById(“num1”).value);
var num2 = parseFloat(document.getElementById(“num2”).value);
return [num1, num2];
}
// Function to perform addition
function add() {
var [num1, num2] = getValues();
var result = num1 + num2;
displayResult(result);
}
// Function to perform subtraction
function subtract() {
var [num1, num2] = getValues();
var result = num1 – num2;
displayResult(result);
}
// Function to perform multiplication
function multiply() {
var [num1, num2] = getValues();
var result = num1 * num2;
displayResult(result);
}
// Function to perform division
function divide() {
var [num1, num2] = getValues();
// Check for division by zero
if (num2 !== 0) {
var result = num1 / num2;
displayResult(result);
} else {
displayResult(“Cannot divide by zero”);
}
}
// Function to display the result
function displayResult(result) {
document.getElementById(“result”).textContent = “Result: ” + result;
}
</script>
</body>
Output
Addition
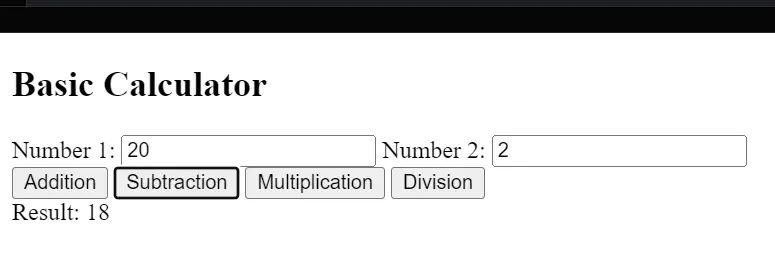
Subtraction
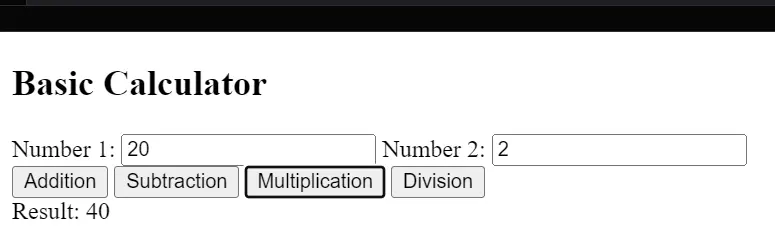
Multiplication
Division
1) Create a basic calculator using a webpage. The webpage should have: - Two boxes where you can type in numbers. - Four buttons: one for addition, one for subtraction, one for multiplication, and one for division. - A space on the page to show the result.
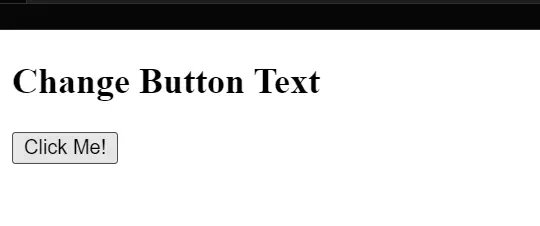
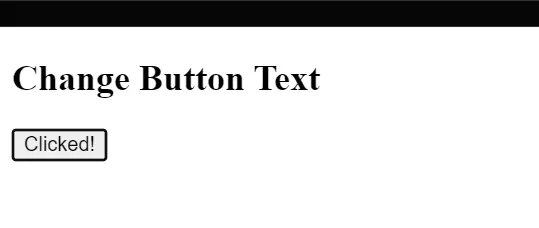
The task is to create a webpage with a button, and when the button is clicked, change its text to ‘Clicked!’ using the Document Object Model (DOM).
– Create Button and Add Event Listener: Use an HTML button element (<button>) and add an event listener to it to change its text when clicked.
Here’s an example program:
<body>
<h2>Change Button Text</h2>
<button id=”myButton”>Click Me!</button>
<script>
// Function to change button text
function changeButtonText() {
var button = document.getElementById(“myButton”);
button.textContent = ‘Clicked!’;
}
// Add event listener to the button
document.getElementById(“myButton”).addEventListener(“click”, changeButtonText);
</script>
</body>
Output
Before Click
After Click
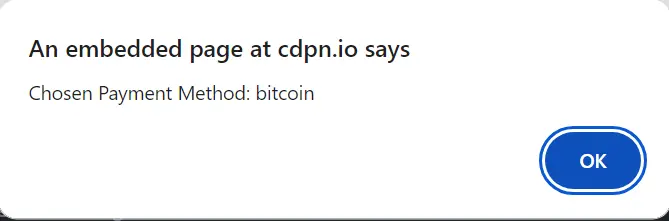
3) Build a form with radio buttons that let users choose a payment method like Credit Card, PayPal, or Bitcoin. When a user picks a method, show a message with their chosen payment method either through a pop-up alert or by updating the content on the webpage.
The task is to create a form with radio buttons for payment methods (Credit Card, PayPal, Bitcoin) and display a message with the chosen payment method either through a pop-up alert or by updating the content on the webpage.
1. Create Form with Radio Buttons: Use HTML form elements (<form>, <input type=”radio”>) to create a form with radio buttons for payment methods.
2. Add Event Listener: Add an event listener to the form to detect when the user selects a payment method.
Here’s an example program:
<body>
<h2>Choose Payment Method</h2>
<form id=”paymentForm”>
<label>
<input type=”radio” name=”payment” value=”creditCard”> Credit Card
</label>
<br>
<label>
<input type=”radio” name=”payment” value=”paypal”> PayPal
</label>
<br>
<label>
<input type=”radio” name=”payment” value=”bitcoin”> Bitcoin
</label>
<br>
<button type=”button” onclick=”showPaymentMethod()”>Submit</button>
</form>
<script>
// Function to show the chosen payment method
function showPaymentMethod() {
// Get the chosen payment method
var selectedMethod = document.querySelector(‘input[name=”payment”]:checked’);
if (selectedMethod) {
// Display the chosen payment method using alert
alert(“Chosen Payment Method: ” + selectedMethod.value);
// Alternatively, update the content on the webpage
// var resultMessage = document.getElementById(“resultMessage”);
// resultMessage.textContent = “Chosen Payment Method: ” + selectedMethod.value;
} else {
// Alert the user to select a payment method
alert(“Please select a payment method.”);
}
}
</script>
</body>
Output
Document

Alert Message
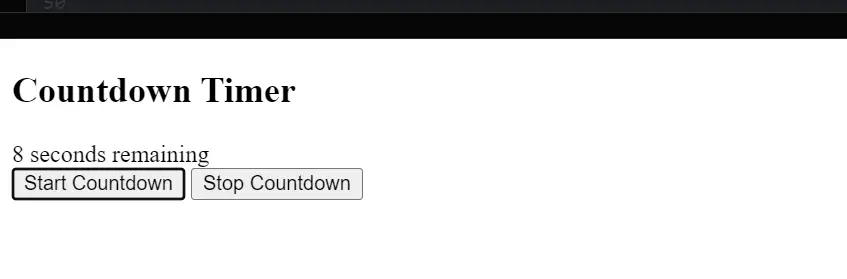
4) Create a countdown timer that decrements every second and displays the remaining time on the webpage. Bonus: Implement a stop button.
The task is to create a countdown timer that decrements every second and displays the remaining time on the webpage. Additionally, a stop button should be implemented to stop the countdown.
1. Create a Countdown Timer and Stop Button: Use HTML elements (<span>, <button>) to display the remaining time and create a stop button.
2. Implement Countdown Logic: Use JavaScript to implement the countdown logic that decrements every second.
3. Implement Stop Button Logic: Add event listeners to the stop button to stop the countdown.
Here’s an example program:
<body>
<h2>Countdown Timer</h2>
<span id=”timer”>10</span> seconds remaining
<br>
<button onclick=”startCountdown()”>Start Countdown</button>
<button onclick=”stopCountdown()”>Stop Countdown</button>
<script>
var countdownInterval;
var remainingTime = 10;
// Function to start the countdown
function startCountdown() {
// Clear any existing intervals
clearInterval(countdownInterval);
// Update the remaining time on the webpage
updateRemainingTime();
// Set an interval to decrement the remaining time every second
countdownInterval = setInterval(function() {
remainingTime–;
// Update the remaining time on the webpage
updateRemainingTime();
// Check if the countdown reaches 0, and stop the countdown
if (remainingTime <= 0) {
stopCountdown();
}
}, 1000);
}
// Function to stop the countdown
function stopCountdown() {
// Clear the interval to stop the countdown
clearInterval(countdownInterval);
remainingTime = 10; // Reset the remaining time
updateRemainingTime(); // Update the remaining time on the webpage
}
// Function to update the remaining time on the webpage
function updateRemainingTime() {
document.getElementById(“timer”).textContent = remainingTime;
}
</script>
</body>
Output
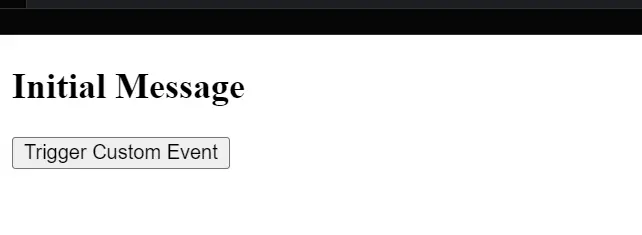
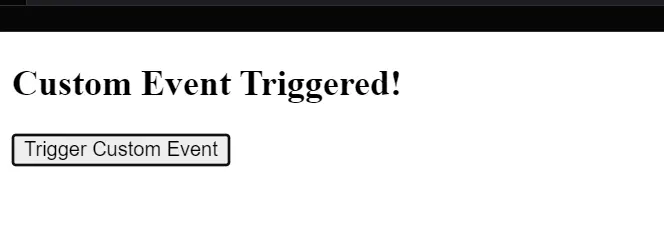
5) Develop a program that utilizes custom events. Create an event listener that responds to a custom event and updates the content on the webpage accordingly.
The task is to create a more flexible and modular program. In this example, we’ll create a custom event and an event listener that responds to the event by updating the content on the webpage.
1. Define Custom Event and Listener: Use CustomEvent to define a custom event and add an event listener to respond to it.
2. Trigger Custom Event: Use JavaScript to trigger the custom event when needed.
Here’s an example program:
<body>
<h2 id=”message”>Initial Message</h2>
<button onclick=”triggerCustomEvent()”>Trigger Custom Event</button>
<script>
// Define a custom event
var customEvent = new CustomEvent(‘updateMessage’, {
detail: {
newMessage: ‘Custom Event Triggered!’
}
});
// Add an event listener to respond to the custom event
document.addEventListener(‘updateMessage’, function(event) {
// Access the data from the event detail
var newMessage = event.detail.newMessage;
// Update the content on the webpage
document.getElementById(‘message’).textContent = newMessage;
});
// Function to trigger the custom event
function triggerCustomEvent() {
// Dispatch the custom event
document.dispatchEvent(customEvent);
}
</script>
</body>
Output
Before Click
After Click
JavaScript events are actions or occurrences, such as user interactions (clicks, mouse movements, or keyboard inputs), that a web page can respond to using event listeners. Learn more in our JavaScript events free course video.
Common events include:
- onclick (Mouse click)
- onmouseover (Mouse hover)
- onkeydown (Key press)
- onchange (Form input change)
- onload (Page load completion)
Check out examples in the Free JavaScript events tutorial for beginners.
You can handle events using:
Inline event handlers (e.g., <button onclick=”myFunction()”>).
JavaScript properties (e.g., element.onclick = function() {}).
The addEventListener() method.
Explore these techniques in the Learn JS events with free video tutorial.
The addEventListener() method is a modern approach to attach multiple event listeners to an element without overwriting existing ones.
Example:
document.getElementById(“myButton”).addEventListener(“click”, function() {
alert(“Button clicked!”);
});
Find detailed explanations in our JavaScript events with free tutorial.
Yes, use the removeEventListener() method to detach an event listener. Ensure the function reference is identical to the one attached. Learn more in the JavaScript events free course video.
Event propagation refers to the order in which events are handled in the DOM:
- Capturing Phase: Events propagate from the root to the target element.
- Bubbling Phase: Events propagate back from the target to the root.
This concept is explained step-by-step in the Free JavaScript events tutorial for beginners.
- event.preventDefault(): Prevents the default action (e.g., submitting a form).
- event.stopPropagation(): Stops the event from propagating to parent elements.
Discover their differences in the JavaScript events with free tutorial.
- Yes, use the CustomEvent constructor to define and trigger custom events.
Example:
let customEvent = new CustomEvent(“myEvent”, { detail: “Custom data” });
document.dispatchEvent(customEvent);
Watch practical examples in our Learn JS events with free video tutorial.
- Use events like onkeydown, onkeyup, or onkeypress to detect keyboard actions.
Example:
document.addEventListener(“keydown”, function(event) {
console.log(“Key pressed: ” + event.key);
});
Check out these techniques in the Free JavaScript events tutorial for beginners.
Best practices include:
- Using addEventListener() for flexibility.
- Avoiding inline event handlers for better separation of HTML and JavaScript.
- Cleaning up event listeners to prevent memory leaks.
Explore these tips in our JavaScript events free course video.
