Adding Image, Video, and Map in Elementor WordPress
Elementor makes it easy to add media elements like images, videos, and maps to your WordPress website. Let’s go through each step-by-step:
Overview of the WordPress Media Library
The WordPress Media Library is a central hub where all uploaded media files, such as images, videos, audio, and documents, are stored and managed. It allows users to easily add, edit, and organize media files for use in posts, pages, and other site content.
Key Features of the Media Library
- Uploading Media
- Users can upload images, videos, audio, and PDFs by clicking Add New or dragging and dropping files.
- The library supports various file formats, including JPG, PNG, GIF, MP4, MP3, and PDF.
2. Managing Media Files
- Files can be searched, filtered by type (image, video, etc.), and sorted by date.
- Users can rename, delete, or replace media files when needed.
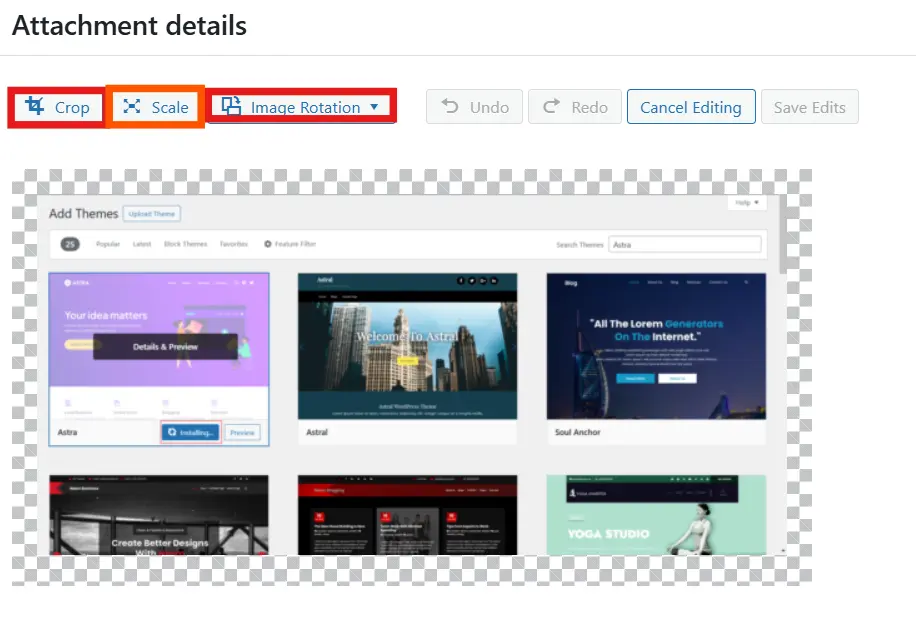
3. Editing Images
- The built-in image editor allows users to crop, rotate, scale, and flip images.
- Captions, alt text, and descriptions can be added for better accessibility and SEO.
4. Inserting Media into Posts and Pages
- Media files can be inserted into posts, pages, and widgets via the Add Media button in the WordPress editor.
- Images and videos can be linked, aligned, and resized before inserting.
5. Integration with Plugins and Themes
- Many WordPress plugins enhance media management, such as gallery plugins, image optimization tools, and cloud storage integration.
Why the Media Library is Important?
- Simplifies media management for website owners.
- Improves SEO with optimized images and alt text.
- Enhances site design with organized and accessible media files.
By mastering the WordPress Media Library, beginners can efficiently manage media files and create visually appealing websites with ease.
1. Adding an Image in Elementor
- Open your page in Elementor.
2. Drag and drop the Image widget onto the section where you want the image
3. Click on the image placeholder to upload or select an image from the Media Library.
4. Adjust settings like size, alignment, caption, and link in the left panel
5. Use the Style tab to add effects, borders, and shadows.
6. Click Publish to save changes.
2. Adding a Video in Elementor
- Drag the Video widget to your page.
2. In the left panel, under Content, paste the video URL from YouTube, Vimeo, or self-hosted MP4 files
3. Adjust settings like autoplay, loop, mute, and play on mobile
4. Use the Style tab to customize video width, aspect ratio, and box shadows.
5. Click Update to save changes.
3. Adding a Google Map in Elementor.
- Drag the Google Maps widget onto your page.
2. In the left panel, enter your location or place an embed code from Google Maps.
3. Adjust the zoom level, height, and alignment for better display.
4. Use the Style tab to add overlays or custom styling (for advanced users).
5. Click Update to save changes.
Conclusion
By using Elementor’s widgets, you can easily add engaging media elements to your WordPress site. Images improve visual appeal, videos enhance storytelling, and maps provide location details, making your website more interactive and user-friendly.
Course Video