Creating a Header in WordPress
The header is one of the most important parts of a WordPress website, as it usually contains the site logo, navigation menu, and other essential elements like search bars or contact information. Here’s how you can create and customize a header in WordPress.
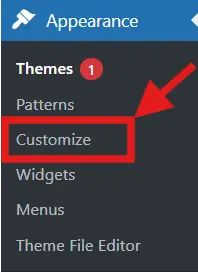
1. Creating a Header Using the WordPress Customizer
1. Go to WordPress Dashboard → Navigate to Appearance > Customize.
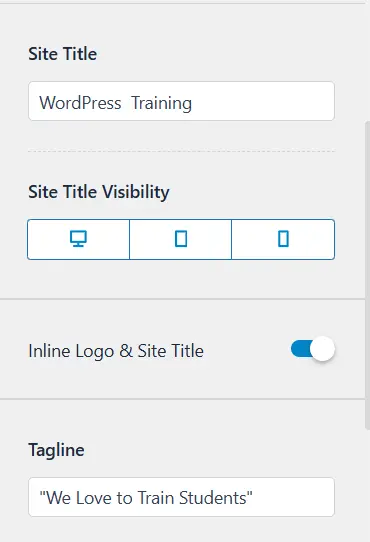
2. Look for the Header section (varies by theme).
3. pload your logo and adjust its size.
4. Configure the site title and tagline (if applicable).
5. Add or edit the navigation menu in the header.
6. Save the changes by clicking Publish.
Conclusion
Creating a header in WordPress can be done using the Customizer or Elementor. The method you choose depends on your theme and preferences. A well-designed header improves user experience and navigation, making it an essential part of any website.
Creating a Footer with ElementKits in WordPress and Adding Social Media Icons
ElementKits is a powerful addon for Elementor that allows you to create a professional-looking footer with ease. Follow these steps to design a footer and add social media icons:
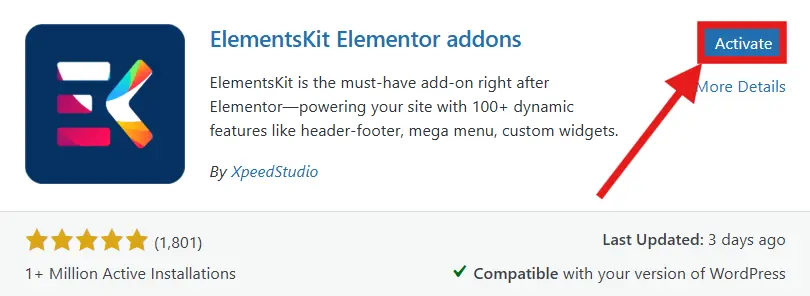
Step 1: Install and Activate ElementKits
1. Go to your WordPress dashboard.
2. Navigate to Plugins > Add New and search for ElementKits.
3. Click Install Now, then Activate the plugin.
Step 2: Enable the Footer Builder
1. Go to ElementKits > Header Footer in the WordPress dashboard.
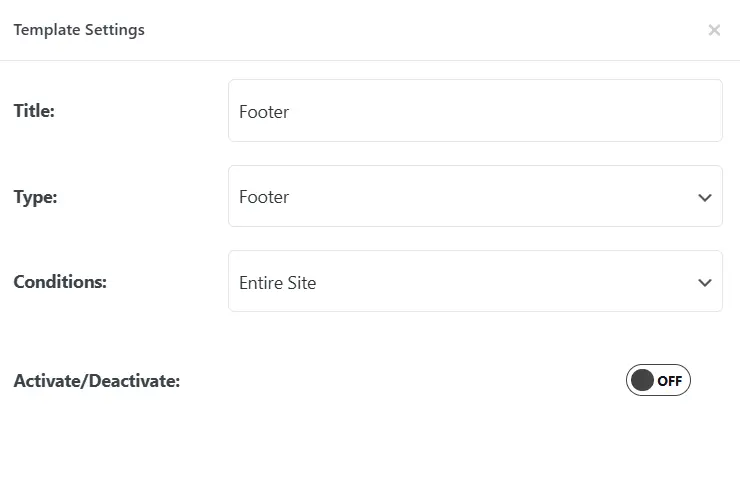
2. Click Add New and name your footer.
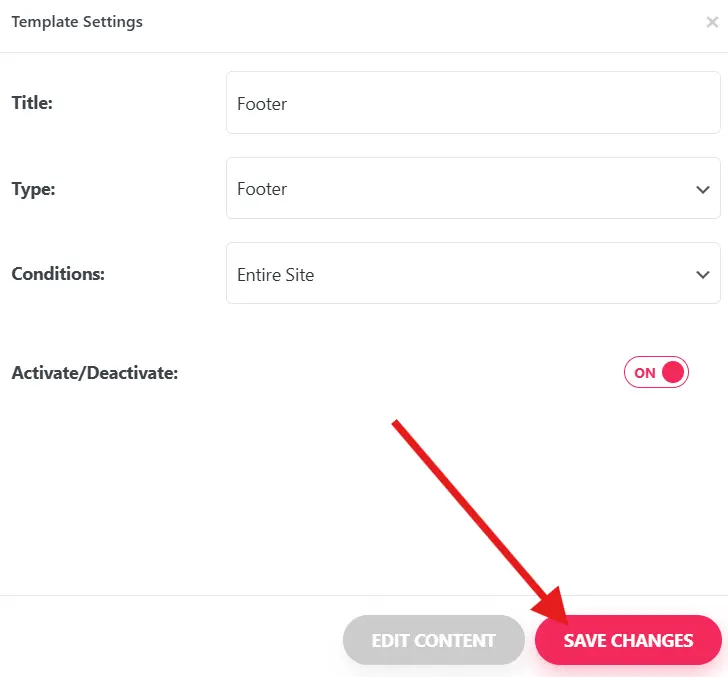
3. Under Type, select Footer and choose the display conditions (e.g., Entire Site).
4. Click Save & Edit with Elementor to open the Elementor editor.
Step 3: Design the Footer
1. Click the ‘+’ icon to add a new section and choose a suitable column layout.
2. Drag and drop widgets like Heading, Text Editor, Image, and Buttons to customize the footer.
3. Use the Style tab to adjust colors, fonts, and spacing for a professional look.
Step 4: Add Social Media Icons
1. Drag the Social Icons widget from ElementKits or Elementor into the footer section.
2. Click on each icon to modify the URL and link it to your social media profiles.
3. Customize the size, color, and alignment from the Style tab to match your footer design.
Step 5: Save and Publish
1. Click Publish and set the display conditions to apply the footer across your site.
2. Visit your website to preview the newly designed footer with social media icons.
By using ElementKits, you can create a custom, responsive, and visually appealing footer that enhances user engagement and brand visibility. 🚀
Course Video