IV. Data Upload:
A. Project Data Upload:
1. Create the Excel File:
• Open Excel and fill in the necessary information for each field (like Project Name, Project Start Date, Project Expected completion date, Area, Saleable Area, Project Type, No of building, etc.).
• Make sure the column names (headers) in the file match the field names in Salesforce. For example, if your custom object has a field called “Project Name,” make sure there’s a column with that exact name in the file.
2. Check the Date Format:
• Ensure that all the dates in the file are in a format that Salesforce understands, such as MM/DD/YYYY (e.g., 12/31/2024) or YYYY-MM-DD (e.g., 2024-12-31).
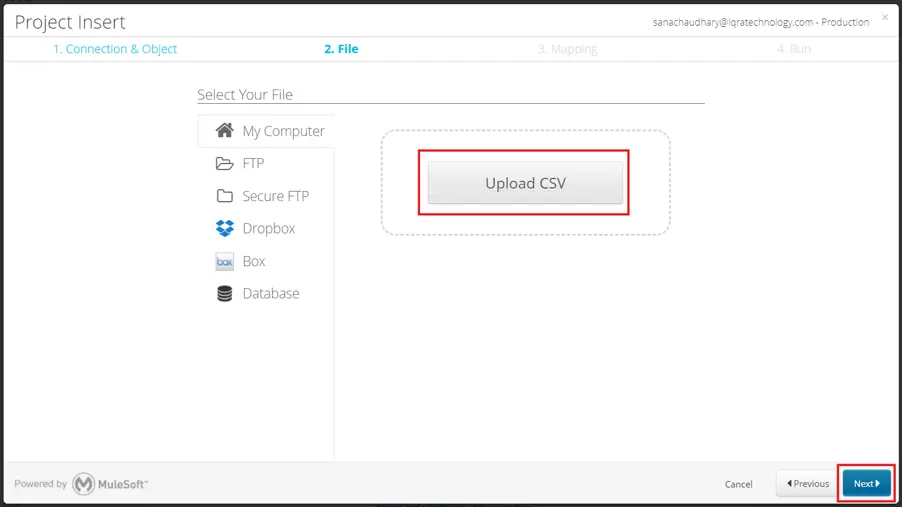
3. Save the File as a CSV:
• After filling in all the data, save the Excel file as a CSV (Comma Delimited) file. This is the format that Salesforce Data Loader requires.
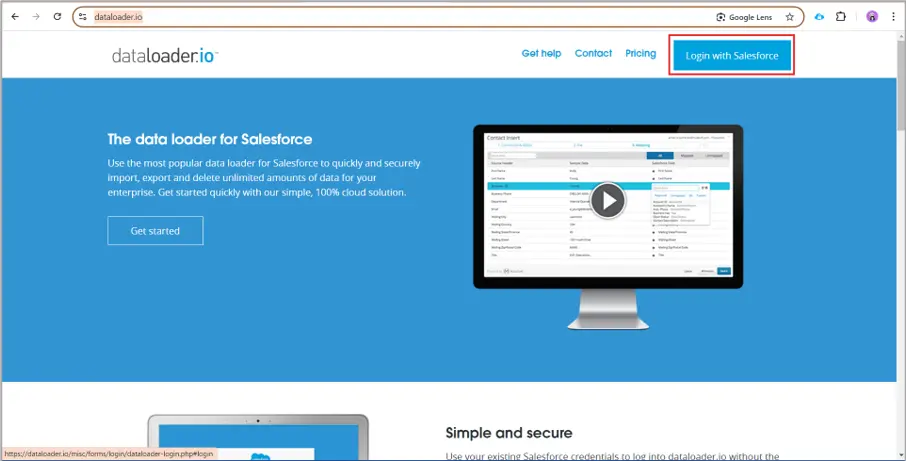
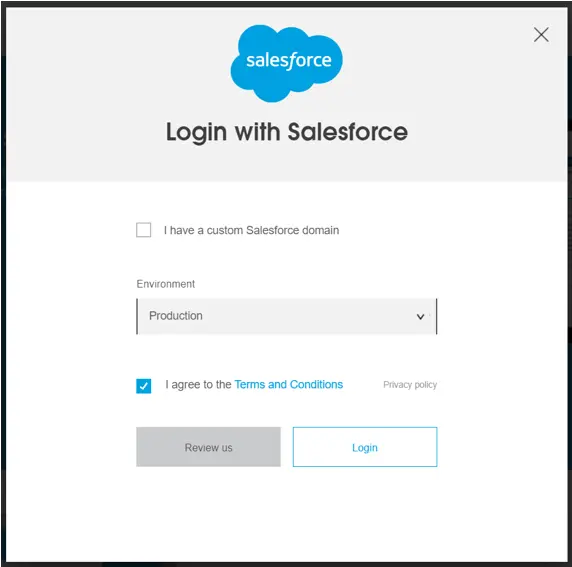
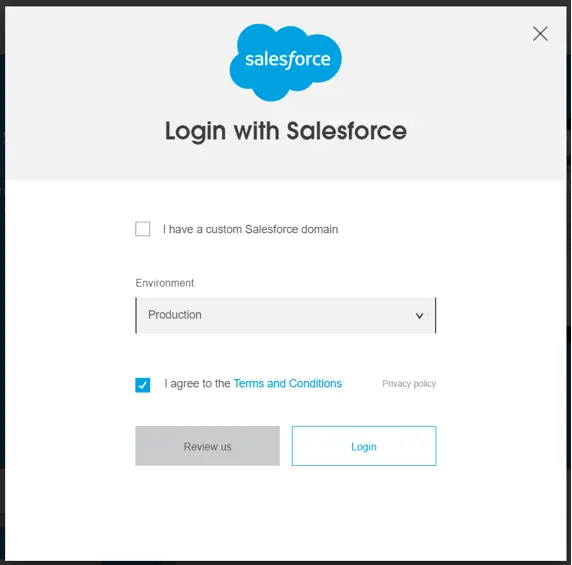
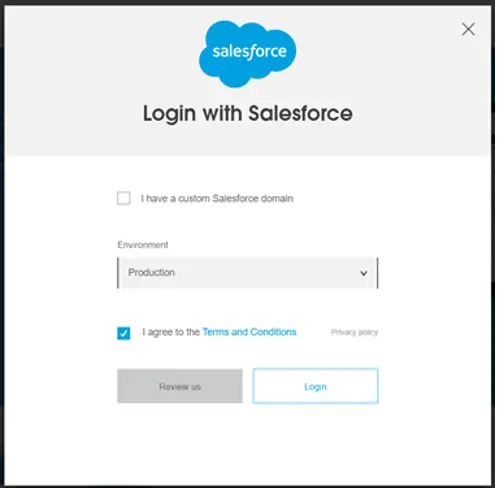
4. Log In to Data Loader:
• Go to the Data Loader website at Data Loader. (https://dataloader.io/ )
• Sign in using your Salesforce username and password.
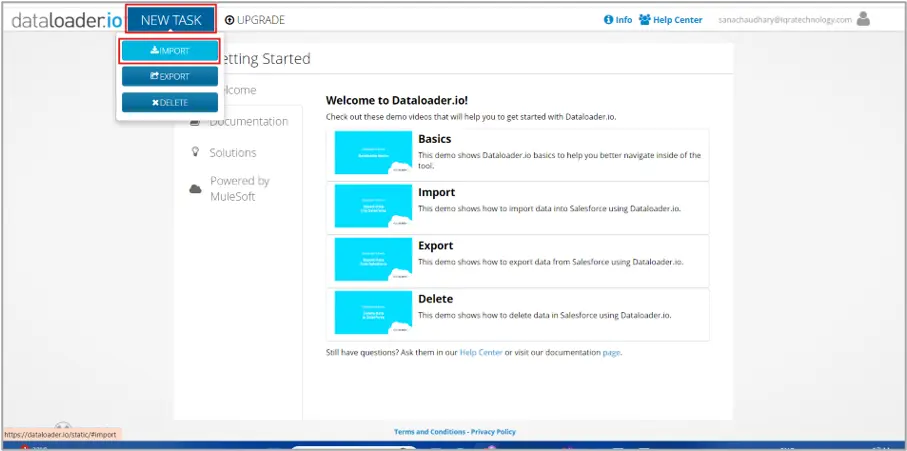
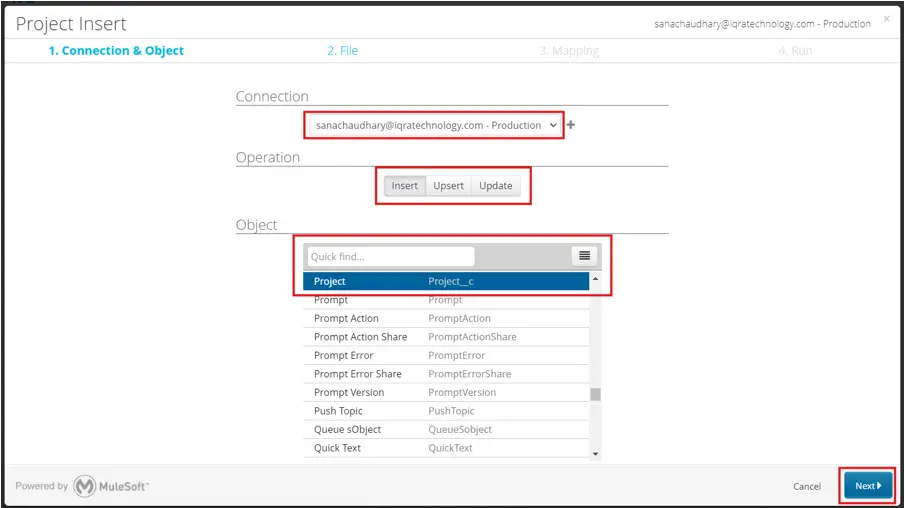
5. Start Uploading:
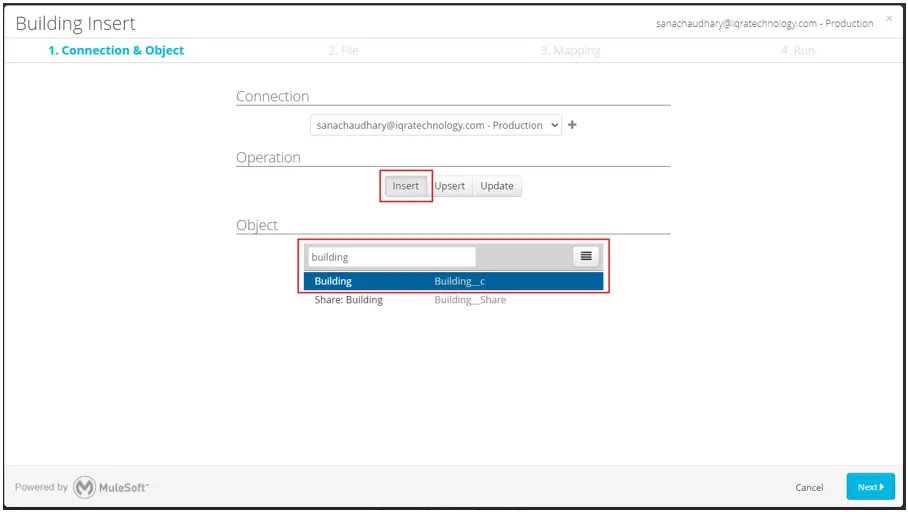
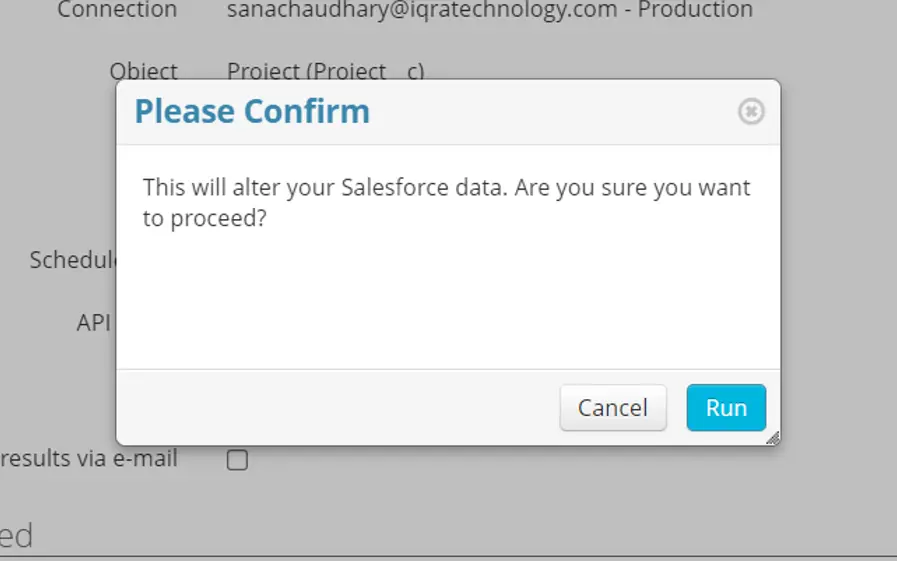
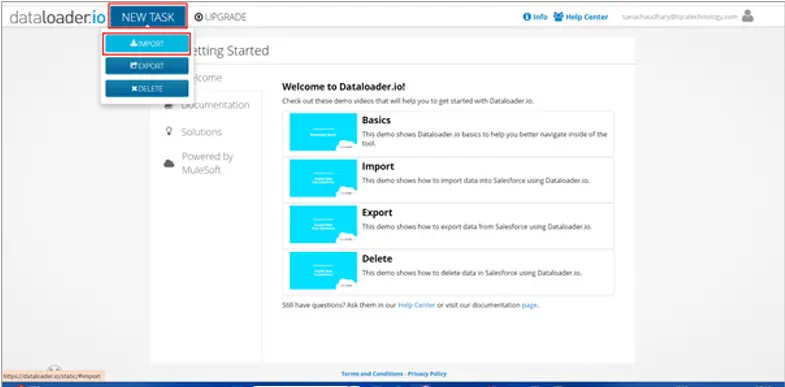
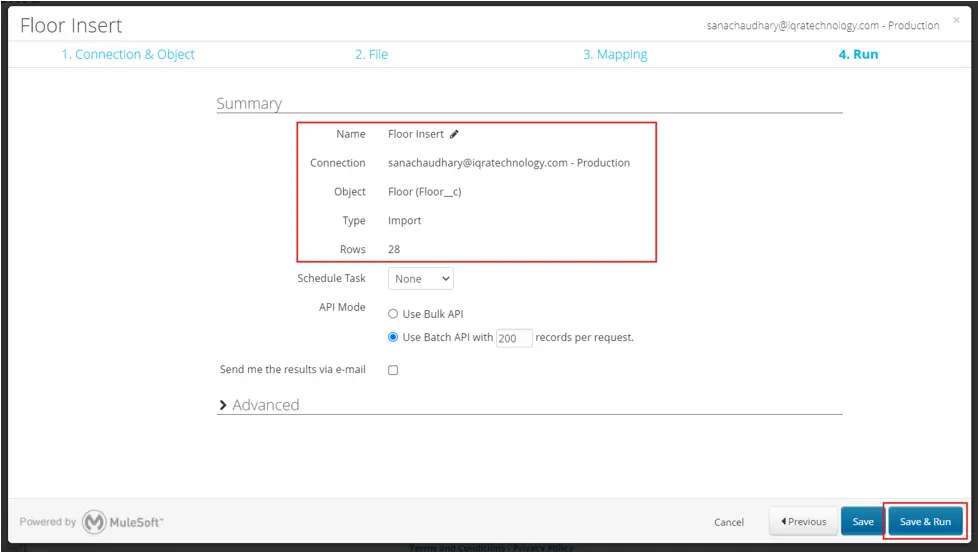
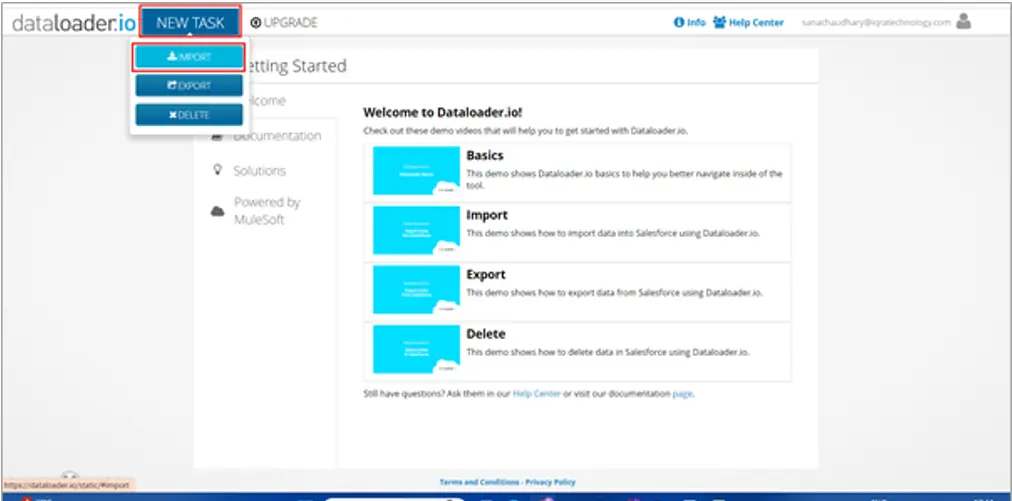
• After you log in, click New Task and select Import.
• Choose Insert because you’re adding new records to Salesforce.
• Select the Projects custom object (or whichever object you’re using to store your project information).
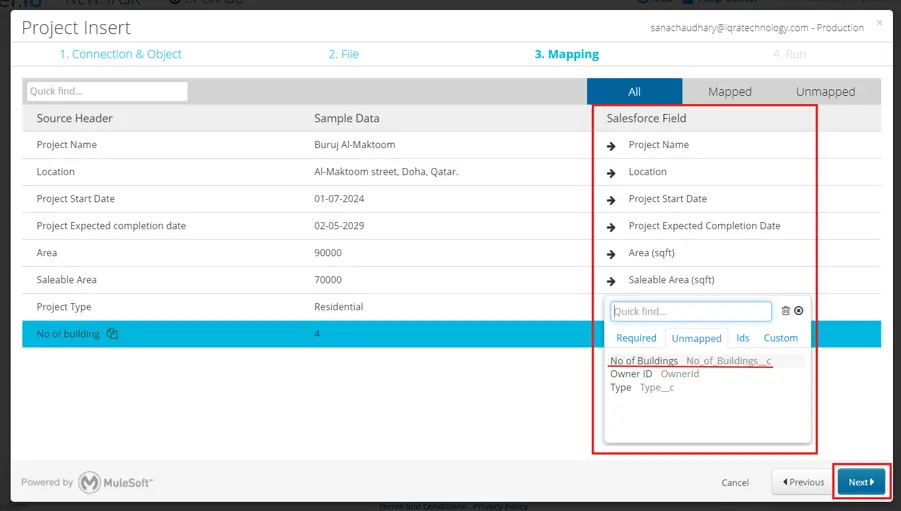
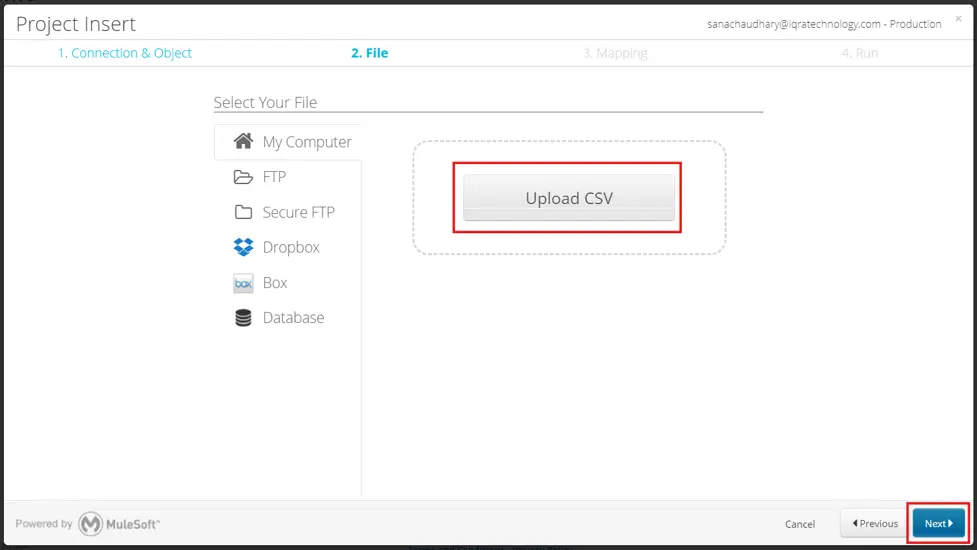
6. Match the Fields:
• Upload your CSV file.
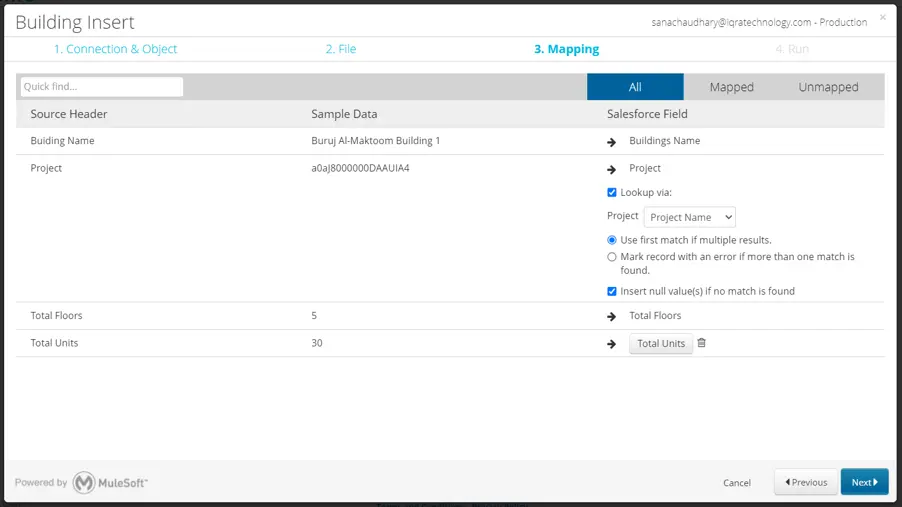
• Data Loader will ask you to match the columns from your file (like Project Name, Start Date, Project Expected completion date, Location, Area, Saleable Area, Project Type, No of building, etc.) to the corresponding fields in Salesforce.
• If Data Loader doesn’t do these automatically, drag and drop the column names to the correct Salesforce fields. For example, match “Project Name” to the field “Project Name” in Salesforce.
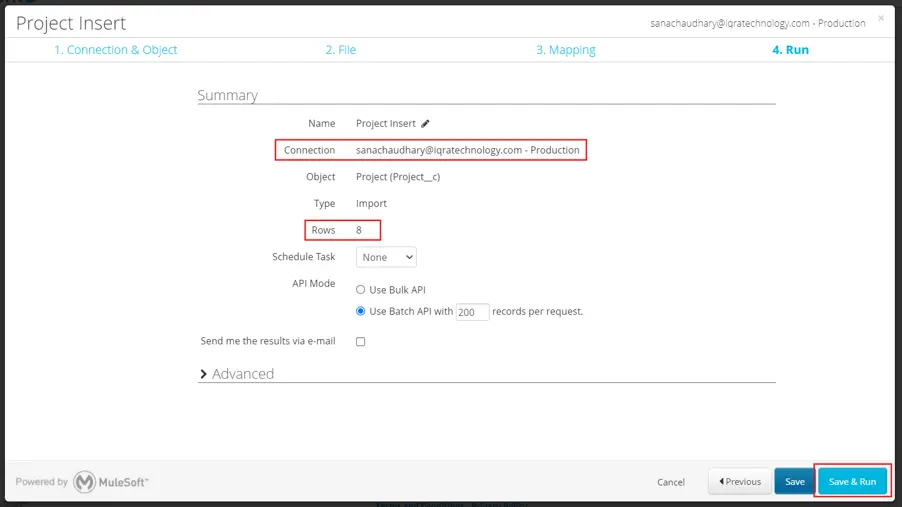
7. Upload the Data:
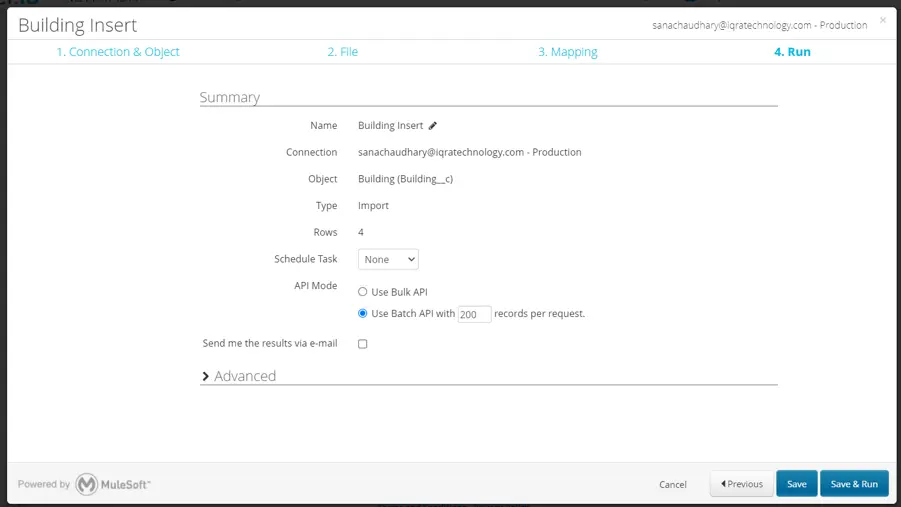
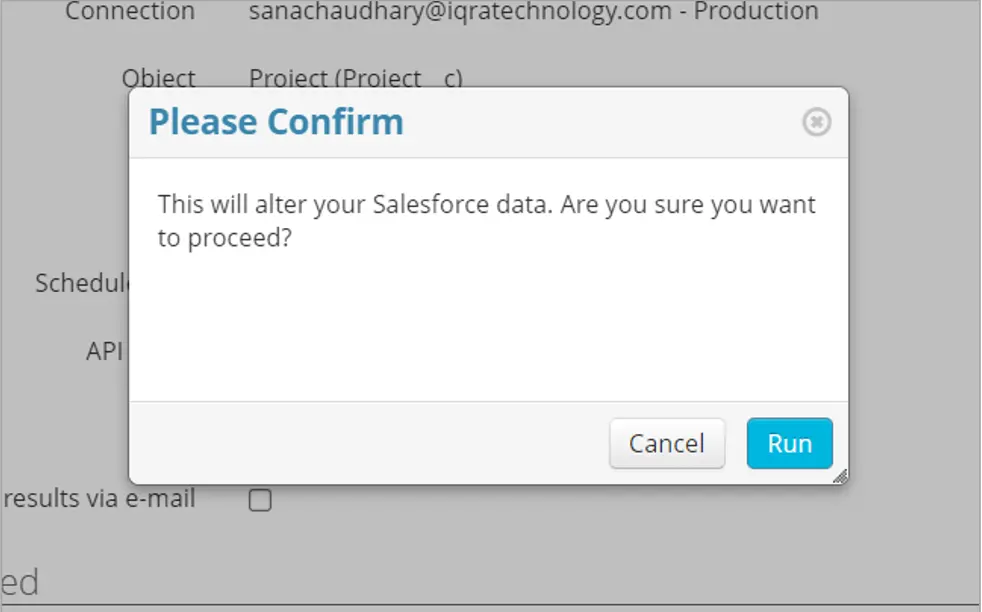
• Once everything is matched correctly, click Next and then Finish to upload the data.
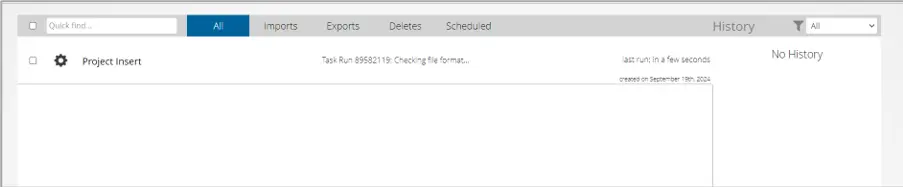
• Data Loader will start adding the records to Salesforce.
• When it’s done, it will provide a log file showing if there were any errors.
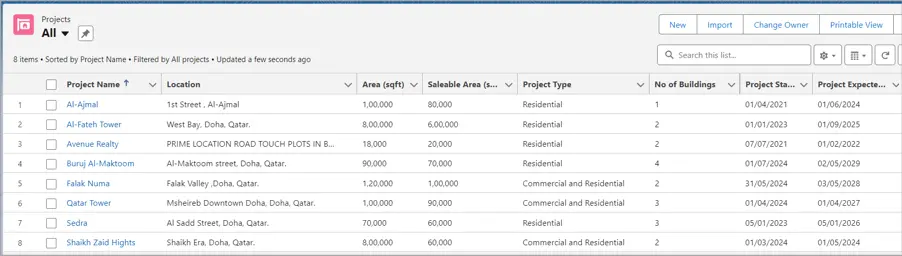
8. Check the Data in Salesforce:
• Log in to your Salesforce account and go to the Projects tab (or whichever custom object you uploaded data to).
• Review the records to make sure everything was uploaded correctly and that all fields have the right information.
B. Building Data Upload:
1. Create the Excel File:
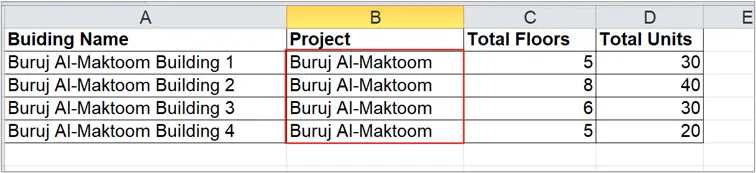
• Open Excel and fill in the necessary information for each field (like Building Name, Project Name, Total Floors, Total Units, etc.).
• Make sure the column names (headers) in the file match the field names in Salesforce.
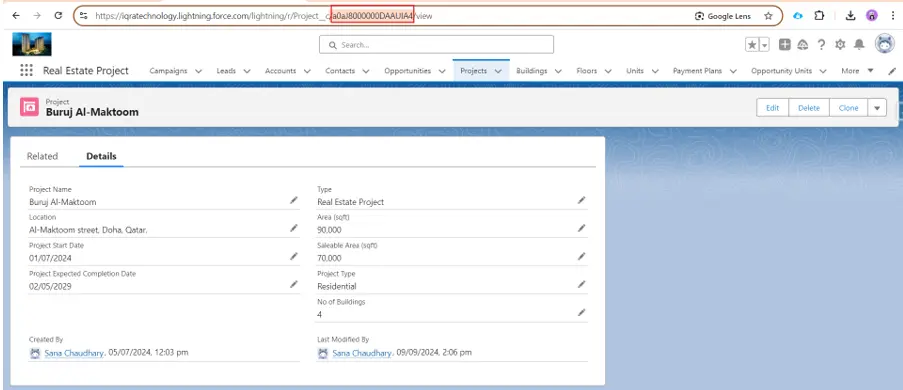
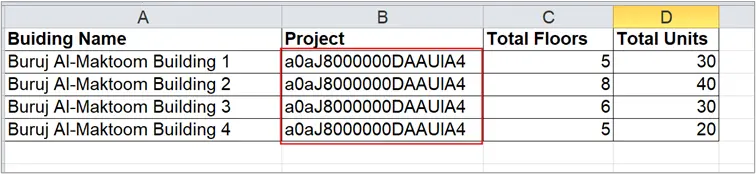
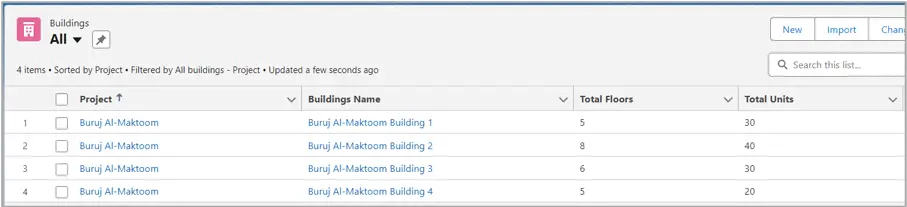
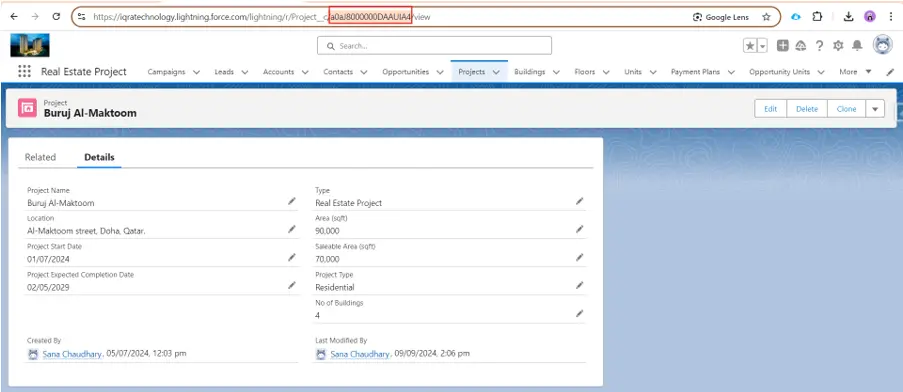
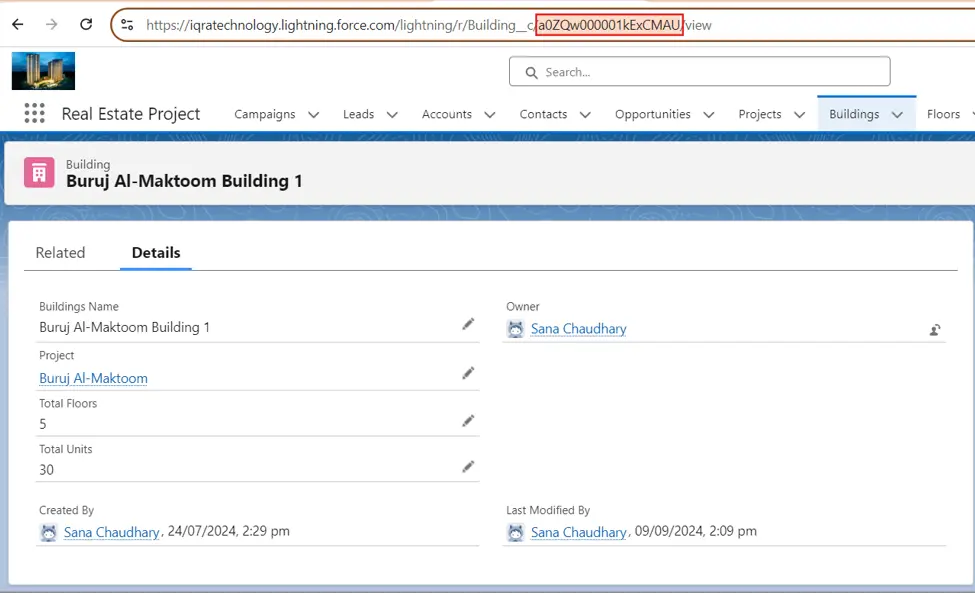
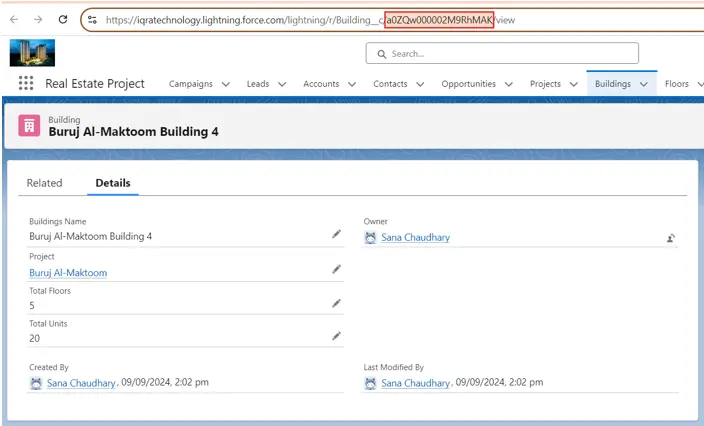
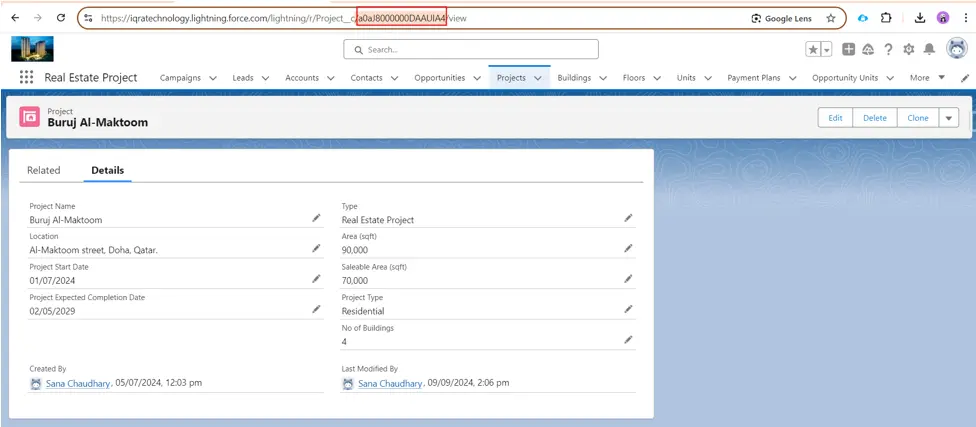
• Select the Project Id (18 digits id) which you want to use, to create the related building records. In this case we are using our project ‘Buruj Al-Maktoom’.
Replace the below project name with the Project id.
2. Save the File as a CSV:
• After filling in all the data, save the Excel file as a CSV (Comma Delimated) file. This is the format that
Salesforce Data Loader requires.
3. Log In to Data Loader
4. Start Uploading:
• After you log in, click New Task and select Import.
• Choose Insert because you’re adding new records to Salesforce.
• Select the Building custom object (or whichever object you’re using to store your building information).
• Data Loader will ask you to match the columns from your file (like Building Name, Project Name, Total Floors, Total Units etc.) to the corresponding fields in Salesforce.
• If Data Loader doesn’t do these automatically, drag and drop the column names to the correct Salesforce fields. For example, match “Building Name” to the field “Building Name” in Salesforce.
- Data Loader will start adding the records to Salesforce.
5. Check the Data in Salesforce:
• Log in to your Salesforce account and go to the Projects tab (or whichever custom object you uploaded data to).
• Review the records to make sure everything was uploaded correctly and that all fields have the right information.
C. Floors Data Upload:
1. Create the Excel File:
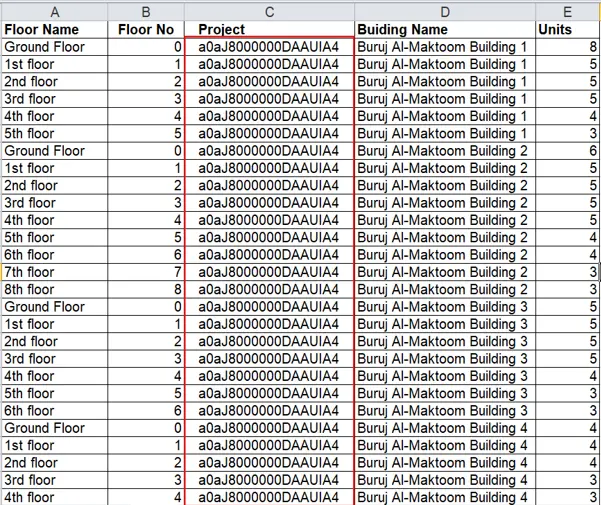
• Open Excel and fill in the necessary information for each field (like Floor Name, Floor No, Project Name,
Building Name, Units, etc.).
• Make sure the column names (headers) in the file match the field names in Salesforce.
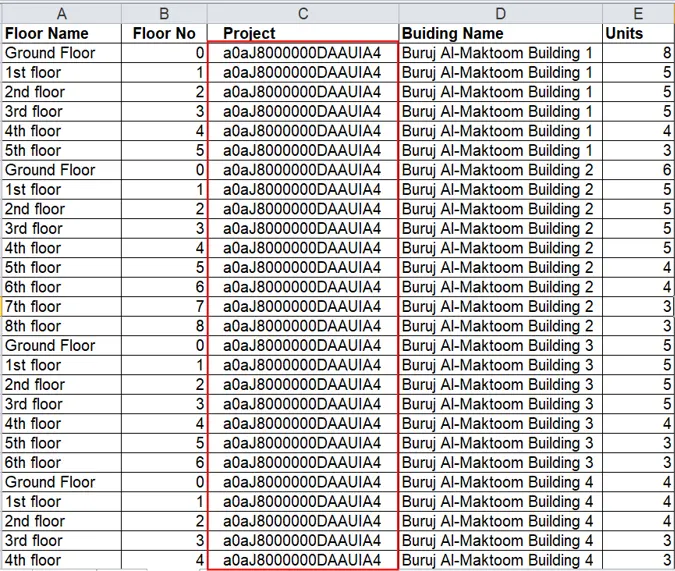
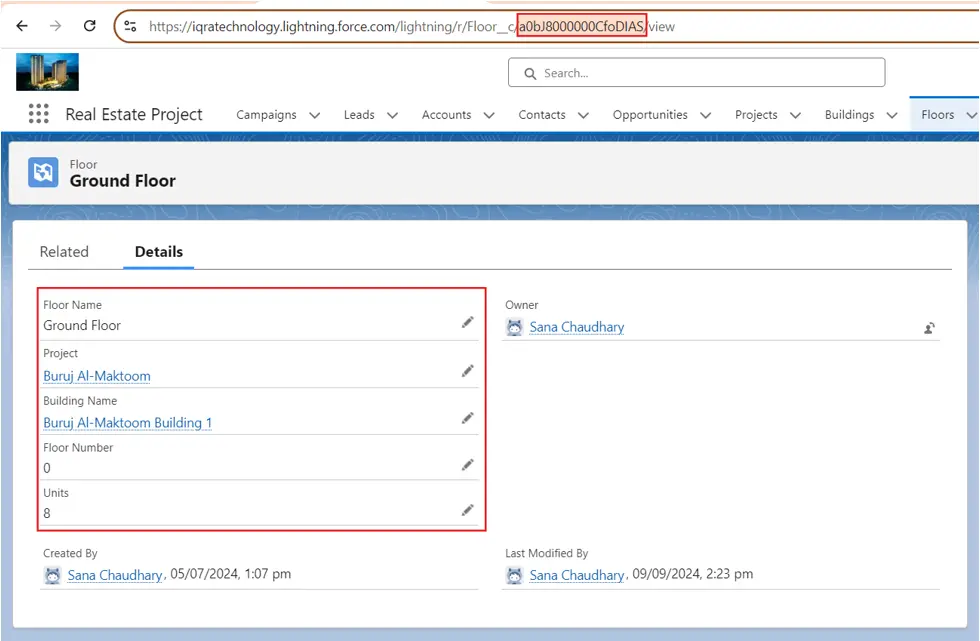
• Select the Project Id and Building Ids (18 digits ids) which you want to use, to create the related floor
records. In this case we are using our project ‘Buruj Al-Maktoom’ and its related buildings.
Project: Buruj Al-Maktoom
Replace the project name ‘Buruj Al-Maktoom’ with its corresponding Project ID.
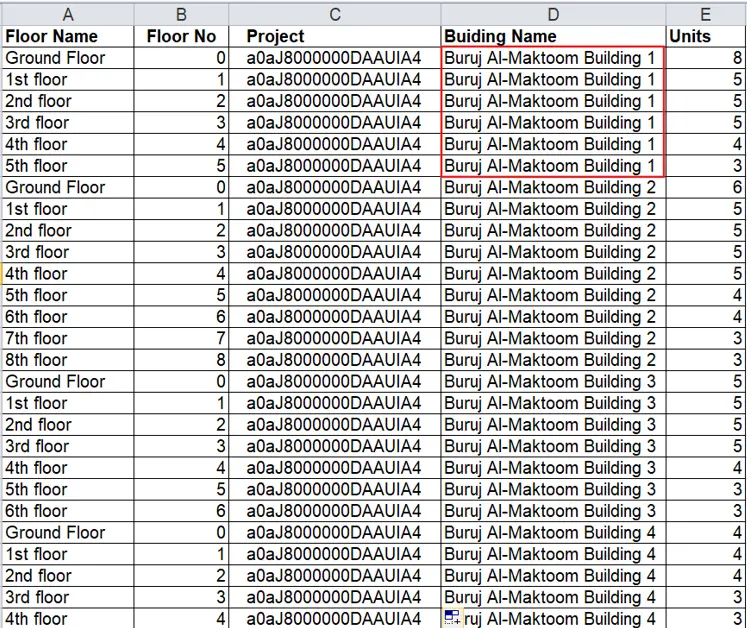
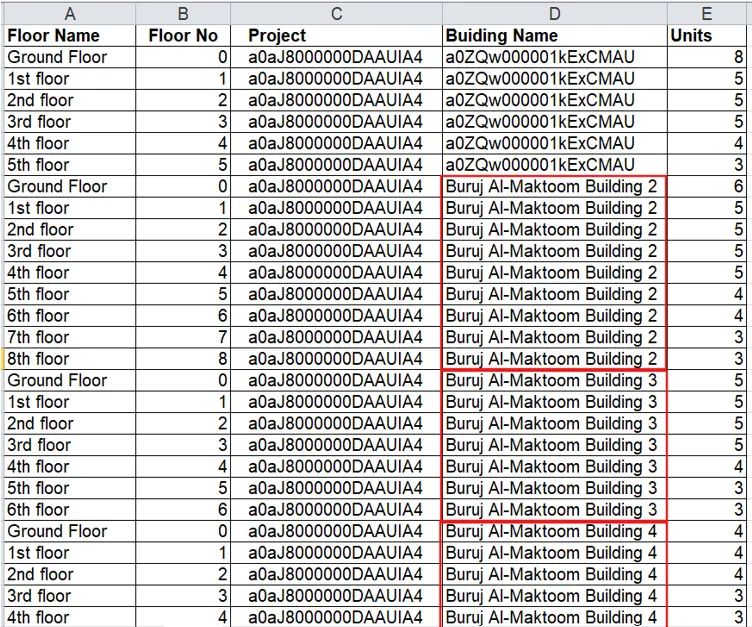
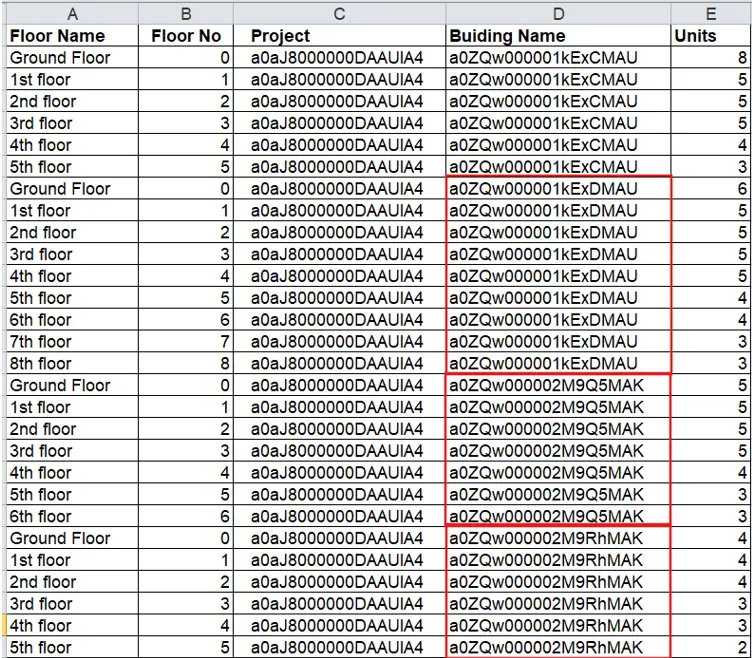
For Buildings:
Copy the IDs for the following buildings and replace the building names with their respective IDs:
Buruj Al-Maktoom Building 1
Replace the building name ‘Buruj Al-Maktoom Building 1’ with its corresponding Building ID.
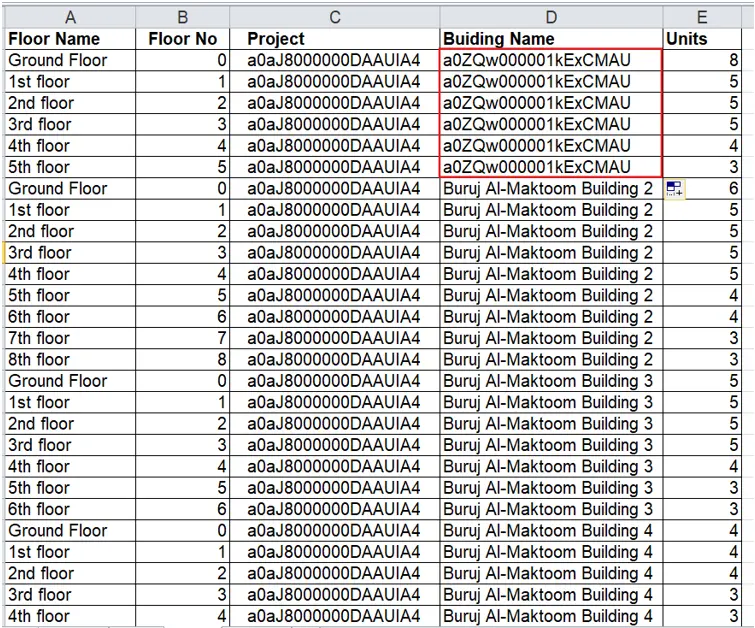
Buruj Al-Maktoom Building 2
Buruj Al-Maktoom Building 3
Buruj Al-Maktoom Building 4
Copy the ids and replace the below buildings name Buruj Al-Maktoom Building 2, Buruj Al-Maktoom Building 3 and Buruj Al-Maktoom Building 4 with the Building IDs.
2. Save the File as a CSV:
• After filling in all the data, save the Excel file as a CSV (Comma Separated Values) file. This is the format
that Salesforce Data Loader requires.
3. Log In to Data Loader
4. Start Uploading:
• After you log in, click New Task and select Import.
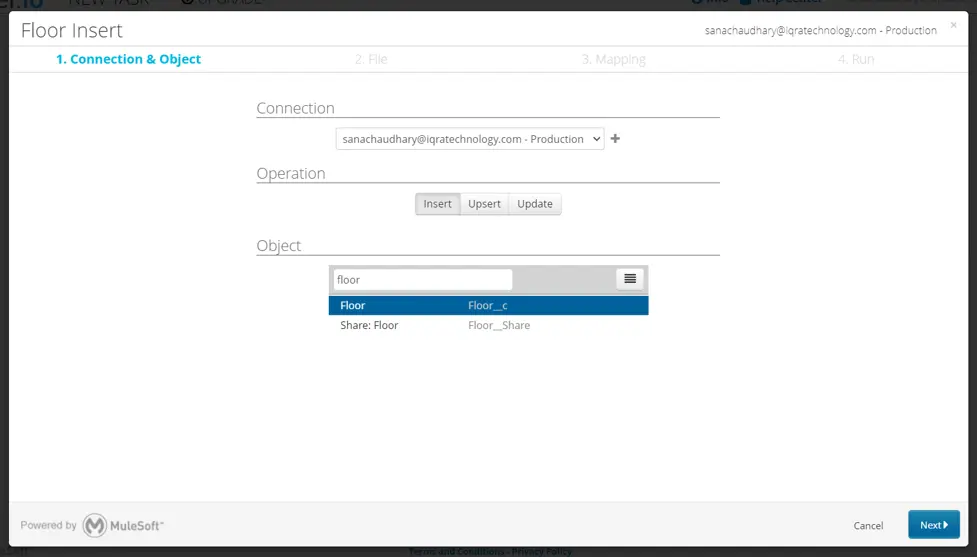
- Choose Insert because you’re adding new records to Salesforce.
- Select the Floor custom object (or whichever object you’re using to store your building information).
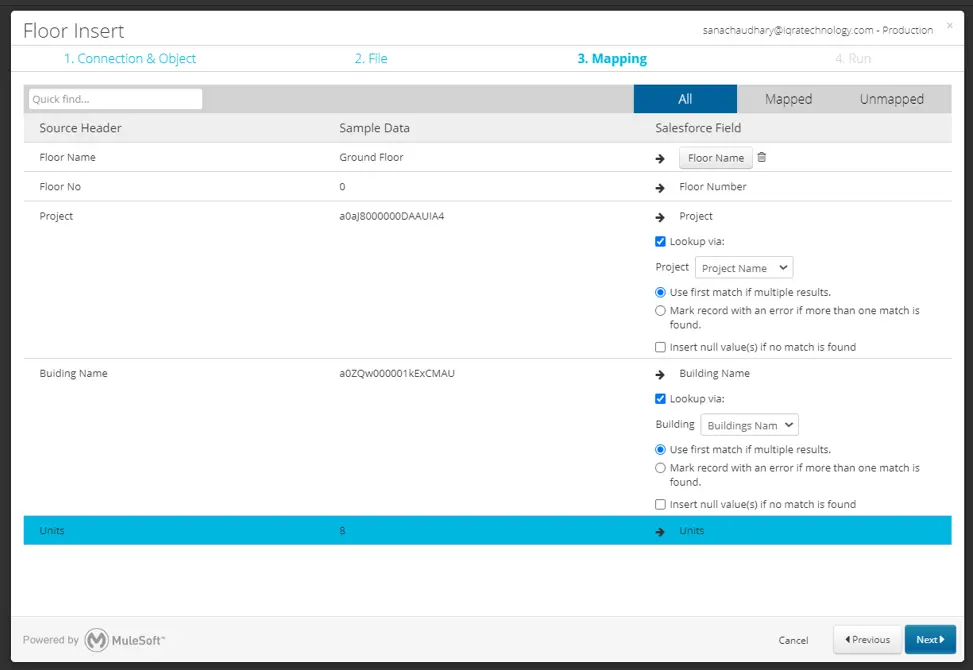
- Data Loader will ask you to match the columns from your file (like Project Name, Start Date, etc.) to the corresponding fields in Salesforce.
- If Data Loader doesn’t do these automatically, drag and drop the column names to the correct Salesforce fields. For example, match “Floor Name” to the field “Floor Name” in Salesforce.
- Data Loader will start adding the records to Salesforce.
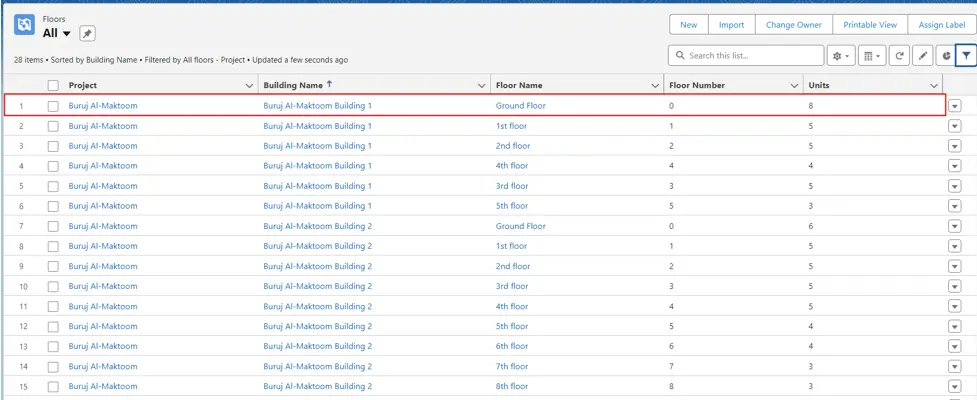
5. Check the Data in Salesforce:
• Log in to your Salesforce account and go to the Projects tab (or whichever custom object you uploaded data
to).
• Review the records to make sure everything was uploaded correctly and that all fields have the right
information.
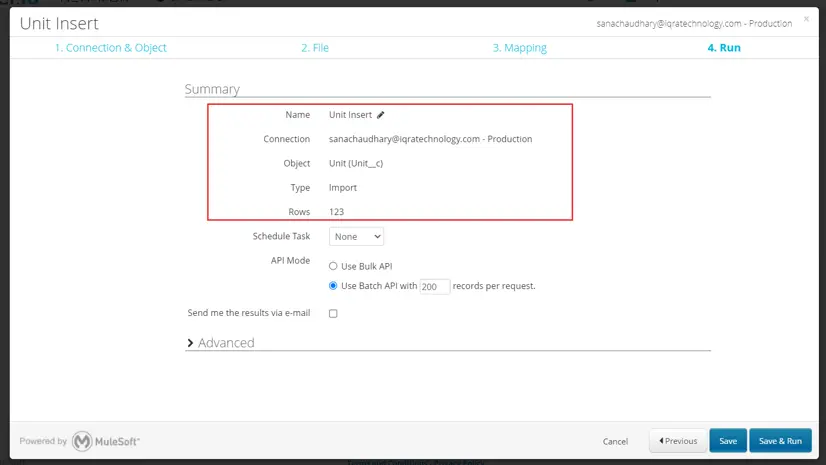
D. Units Data Upload:
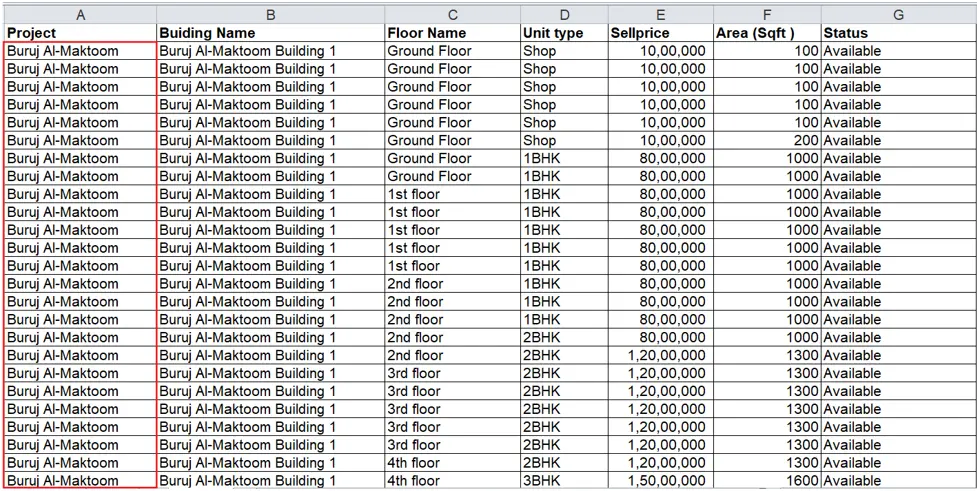
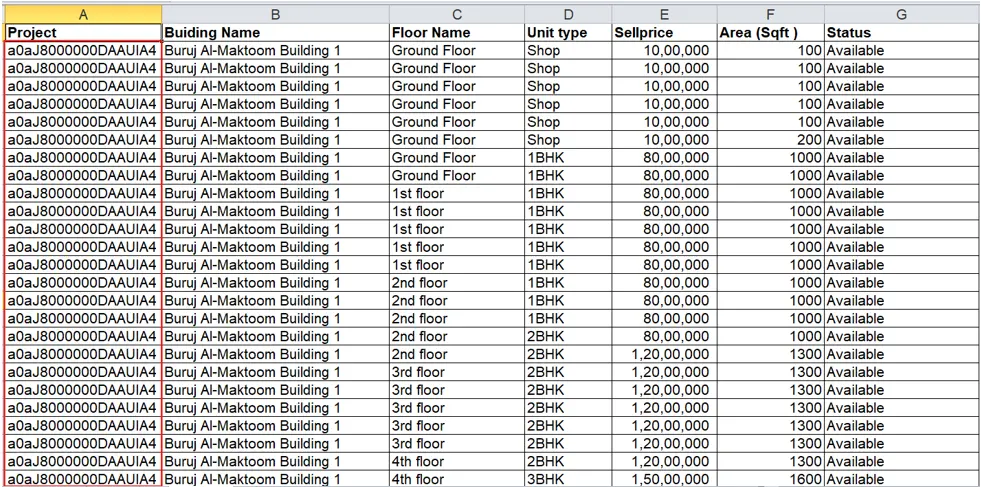
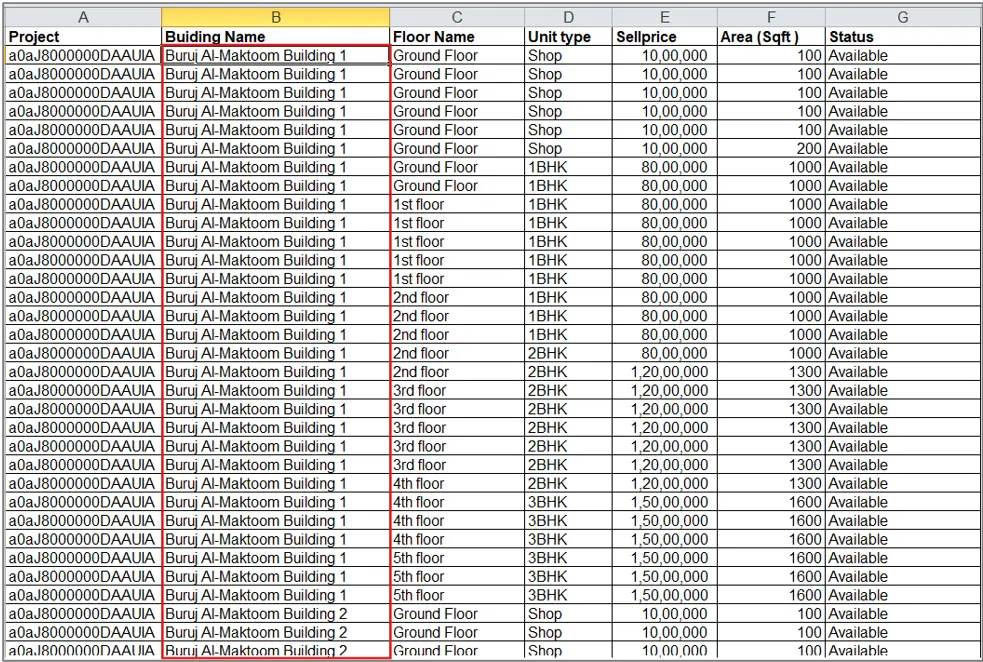
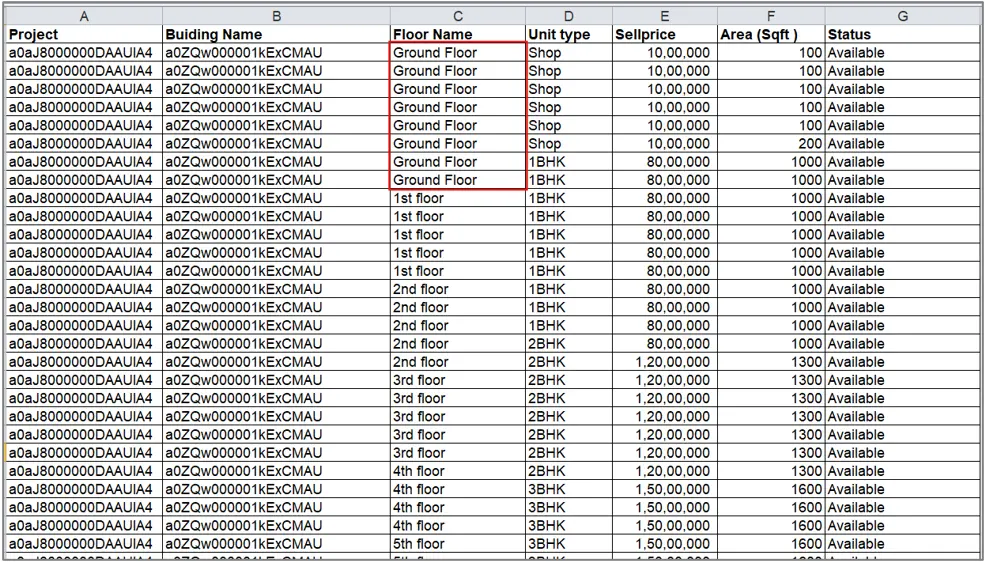
1. Create the Excel File:
• Open Excel and fill in the necessary information for each field (like Project Name, Building Name, Floor
Name, Unit type, Sell price, Area, Status etc.).
• Make sure the column names (headers) in the file match the field names in Salesforce.
• Use the 18-digit Project ID, Building IDs, and Floor IDs that you want to associate with the unit records. For
this example, we’ll be using the project ‘Buruj Al-Maktoom’ and its related buildings and floors.
Project: Buruj Al-Maktoom
- Replace the project name ‘Buruj Al-Maktoom’ with its corresponding Project ID.
For Buildings:
Copy the IDs for the following buildings and replace the building names with their respective IDs:
• Buruj Al-Maktoom Building 1
• Buruj Al-Maktoom Building 2
• Buruj Al-Maktoom Building 3
• Buruj Al-Maktoom Building 4
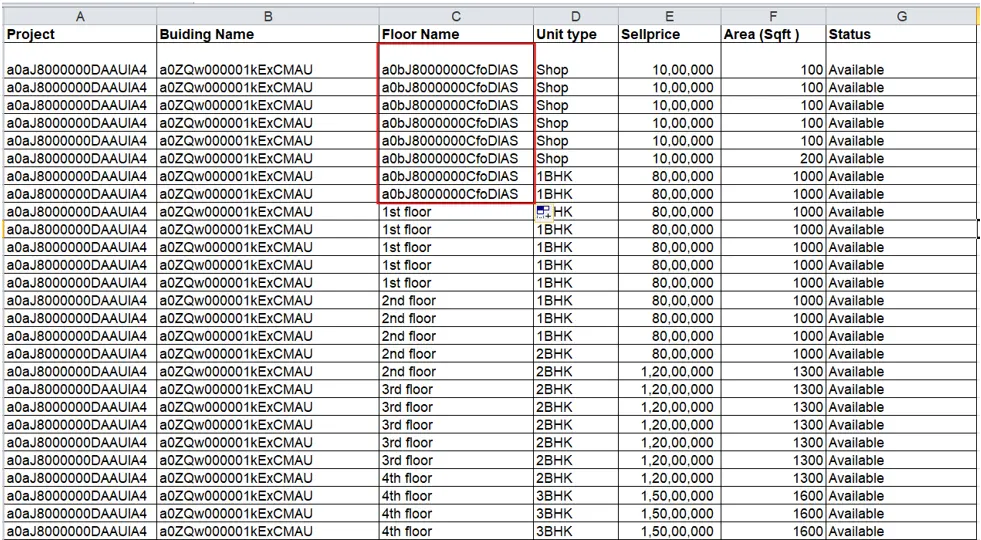
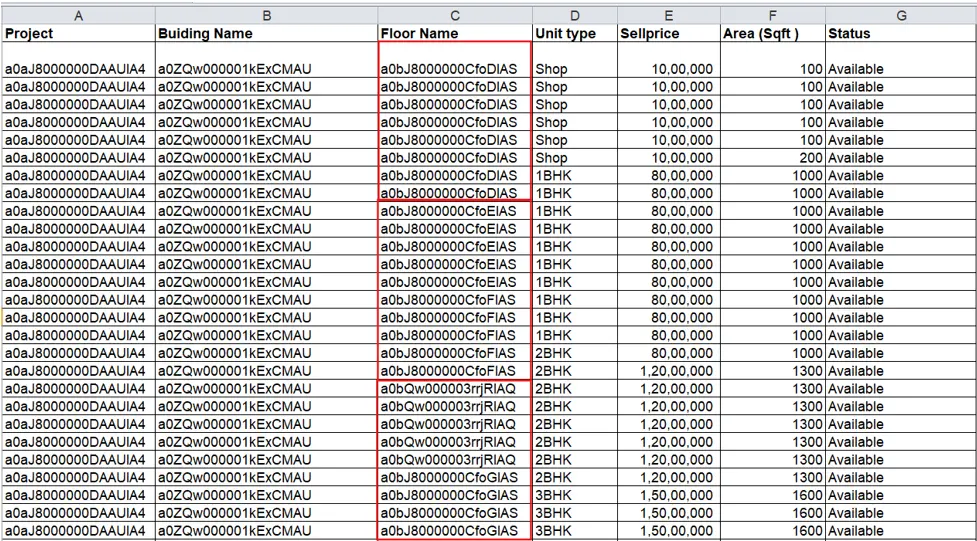
For Floors:
• Similarly, copy the floor IDs and replace the floor names with their respective IDs.
• Ensure that all floor names are replaced with their corresponding IDs.
Ensure that all floor names are replaced with their corresponding IDs.
2. Save the File as a CSV:
• After filling in all the data, save the Excel file as a CSV (Comma Delimited) file. This is the format that
Salesforce Data Loader requires.
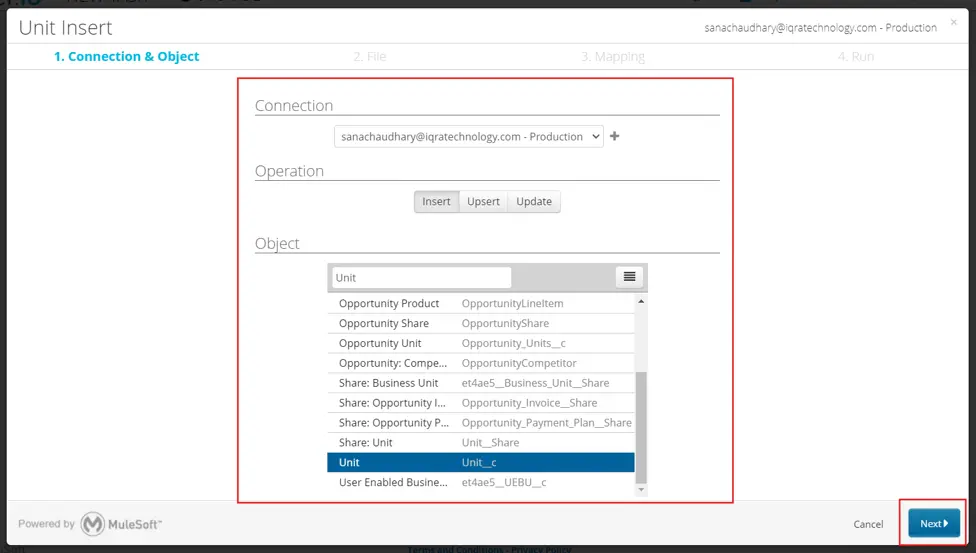
3. Log In to Data Loader and Start Uploading:
- After you log in, click New Task and select Import.
- Choose Insert because you’re adding new records to Salesforce.
- Select the Unit custom object (or whichever object you’re using to store your building information).
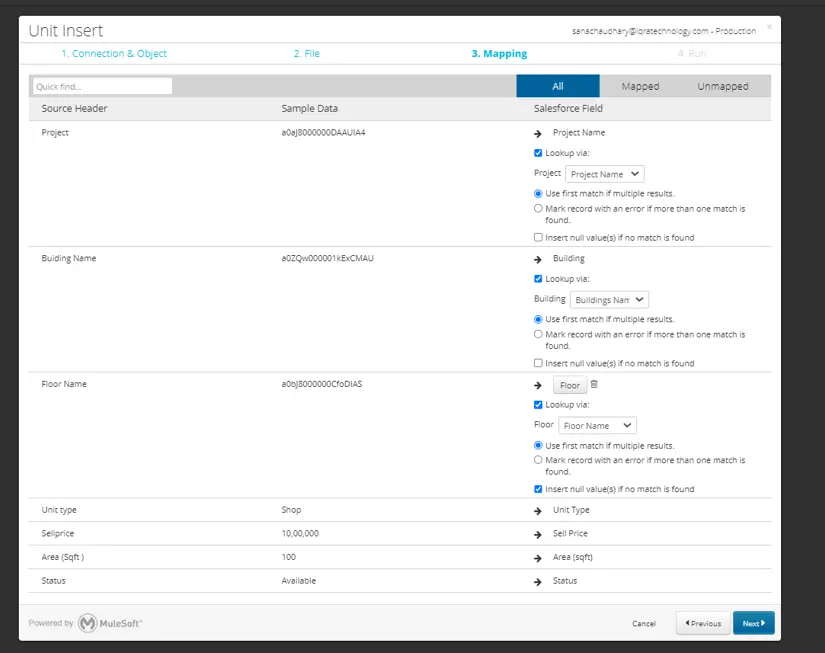
5. Data Loader will ask you to match the columns from your file (like Project Name, Building Name, Floor Name,
Unit type, Sell price, Area, Status etc.) to the corresponding fields in Salesforce.
6. If Data Loader doesn’t do these automatically, drag and drop the column names to the correct Salesforce
fields. For example, match “Project Name” to the field “Project Name” in Salesforce.
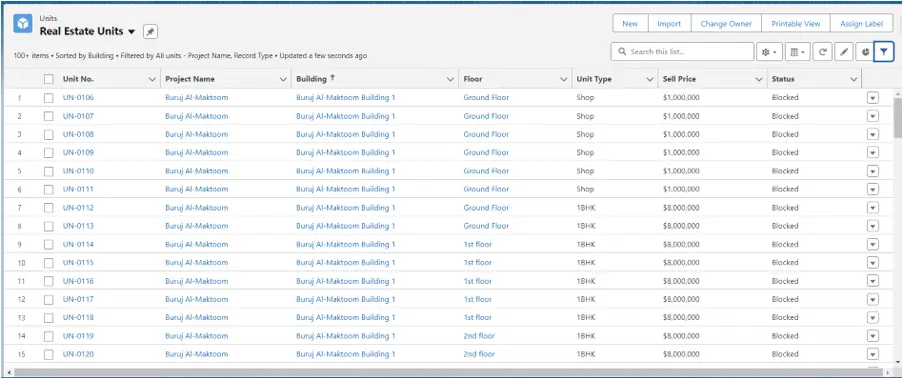
6. Check the Data in Salesforce:
• Log in to your Salesforce account and go to the Projects tab (or whichever custom object you uploaded
data to).
• Review the records to make sure everything was uploaded correctly and that all fields have the right
information.
This process ensures that units related to specific projects, buildings, and floors are correctly created in Salesforce.