Banking Module
1. What is the Banking Module in Zoho Books?
The Banking Module in Zoho Books helps you manage your business’s bank accounts and credit cards. You can connect your bank account or add it manually, categorize transactions, reconcile them, and track cash flow effectively. It reduces manual work by fetching bank feeds and allows accurate financial tracking.
2. Add Bank Account Manually
Step 1: In the left navigation menu, click on “Banking”.
Step 2: Click “Add Manually” button under the “Stay on top of your money” section.

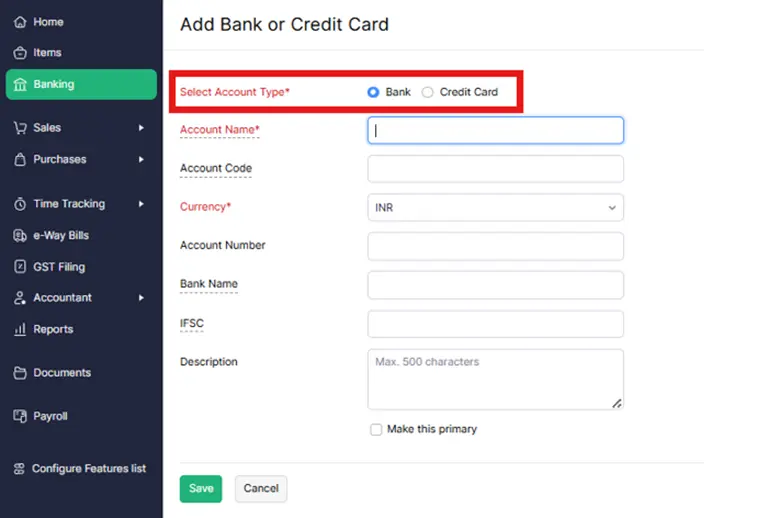
Step 3: Choose “Bank” as the account type.
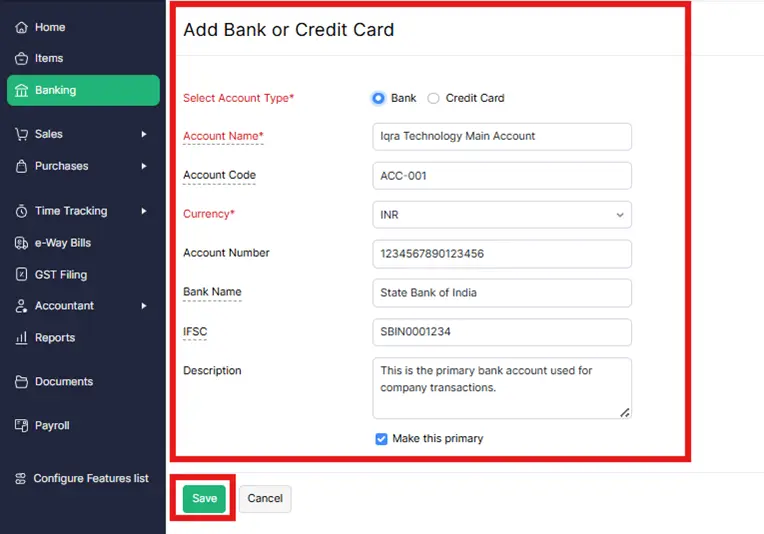
Step 4: Enter the required details:
Account Name (e.g., State Bank of India)
Account Code (Optional)
Currency (e.g., INR)
Account Number (1234567890123456)
Bank Name()
IFSC Code(SBIN0001234)
Description (Optional, like “Main current account” and primary account)Whatever You Want according to you.
Note: The State Bank of India is just an example. You can create Bank account according to your preferences and requirements.
Step 5: Click on “Save” button.
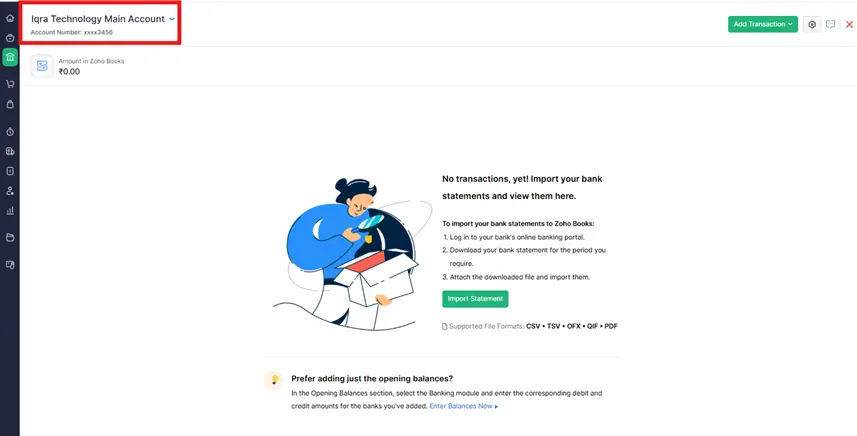
After following these steps, the Bank Account is successfully generated and shown on-screen above-mentioned image.
3. How to Add credit card account manually
Step 1: Go to the left navigation menu and click on “Banking”.
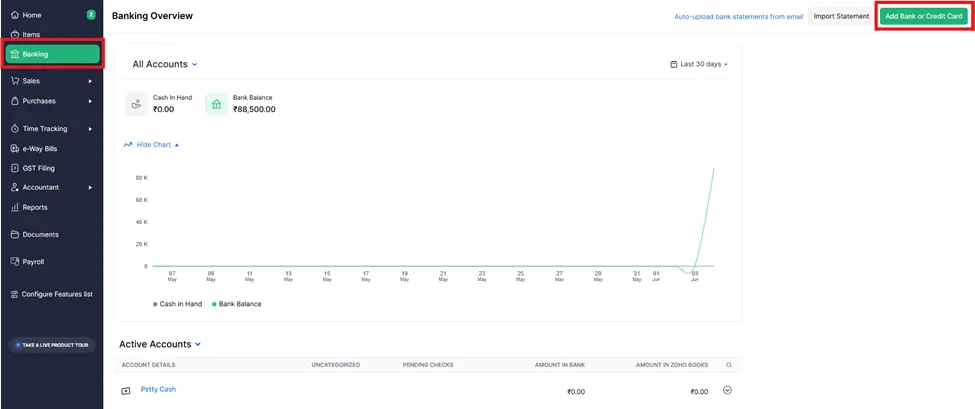
Step 2: Click on the “Add Bank or Credit Card” button.
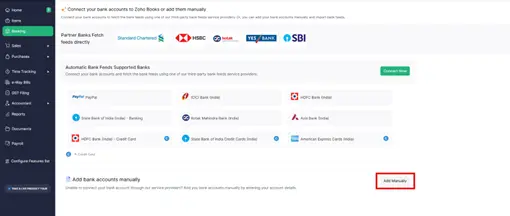
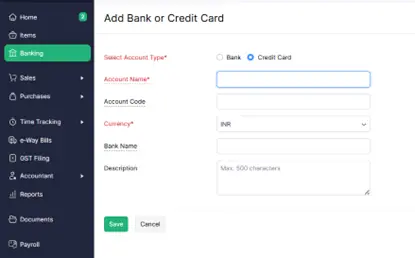
Step 3: On the main banking screen, click the “Add Manually” button.
Step 4: In the Add Bank or Credit Card form, select “Credit Card” under Select Account Type.
Step 5: In the Account Name field, enter the name of your credit card account (e.g., “ICICI Corporate Card”).
Account Code (Optional)
Currency (e.g., INR)
Bank Name (e.g., ICICI Bank)
Description (e.g., Used for online expenses)
Step 6: Fill Out the Card Details Form and complete all the required fields.
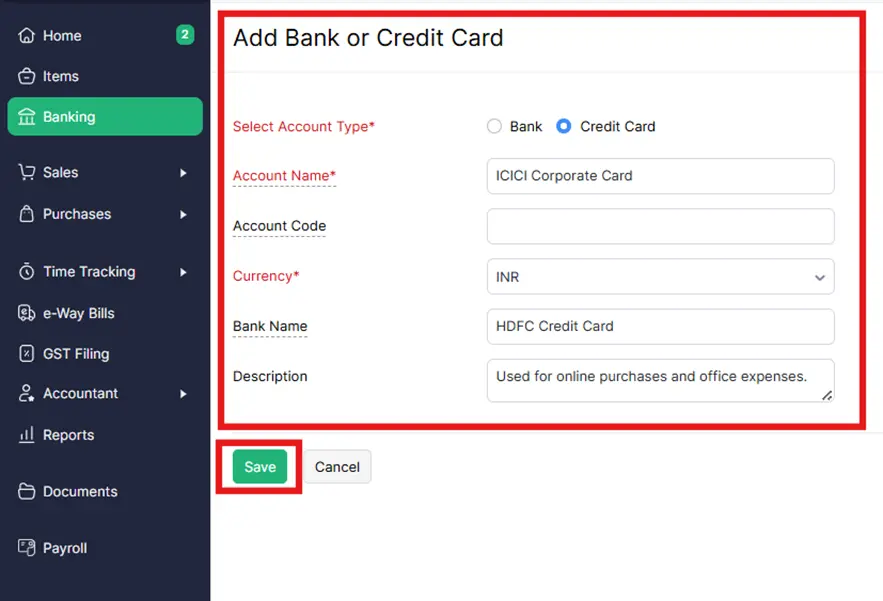
Step 6: Click “Save” Once you have filled in all the Bank Card information.
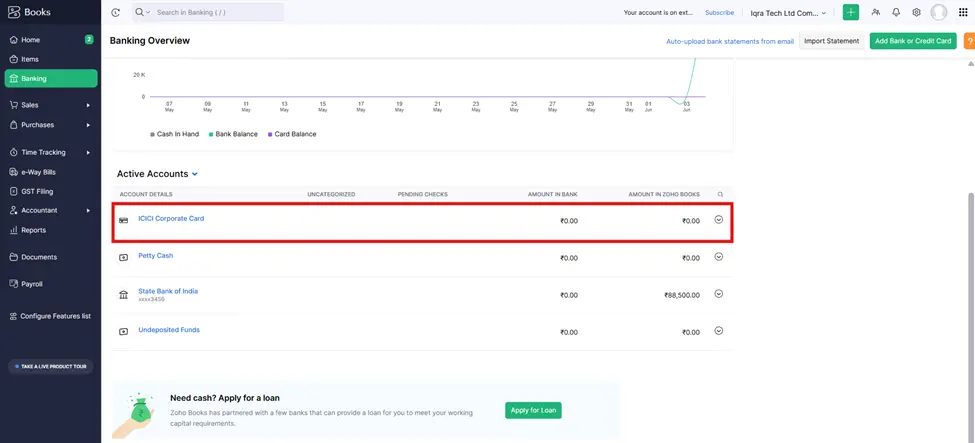
After following these steps the customer is successfully generated and shown on-screen above-mentioned image.
4. Import Bank Statements (if not connected)
Step 1: Go to “Banking”, and click on the bank account you’ve added.
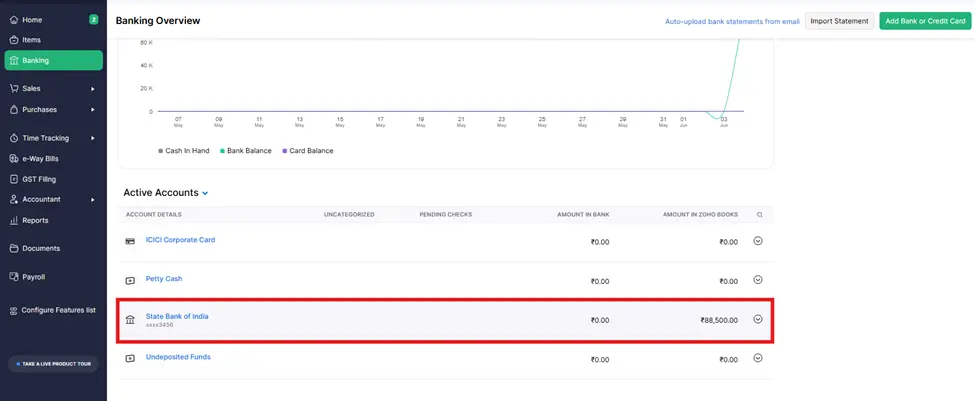
Step 2: Click on the “State Bank of India” Bank.

Step 3: Click the “Import Statement” button to proceed to the next step.
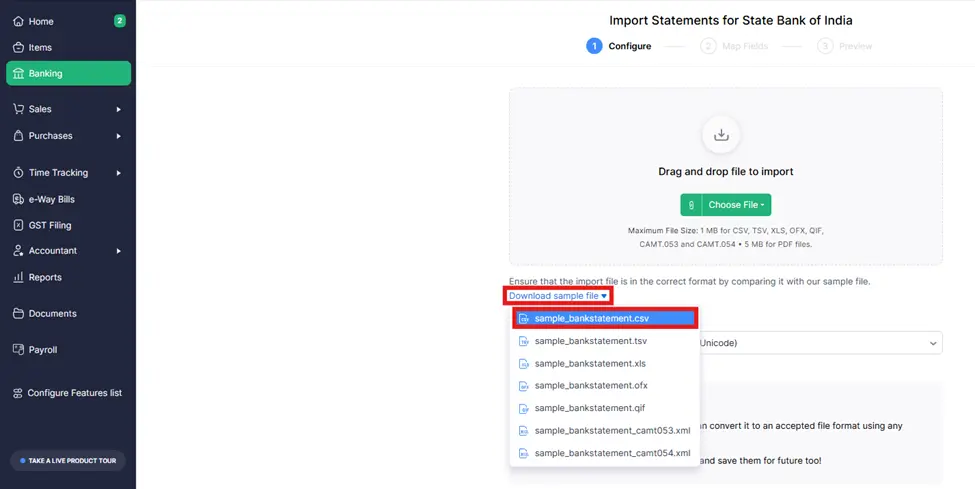
Step 4: You will now see the File import screen opened on your screen. This is where we will upload our bank statement file in the correct format.
Step 5: On the screen, you’ll notice options to download a sample file in various formats such as CSV, TSV, XLS, OFX, and QIF. We will choose to download the sample file in CSV format, as it is the most commonly used and supported format.
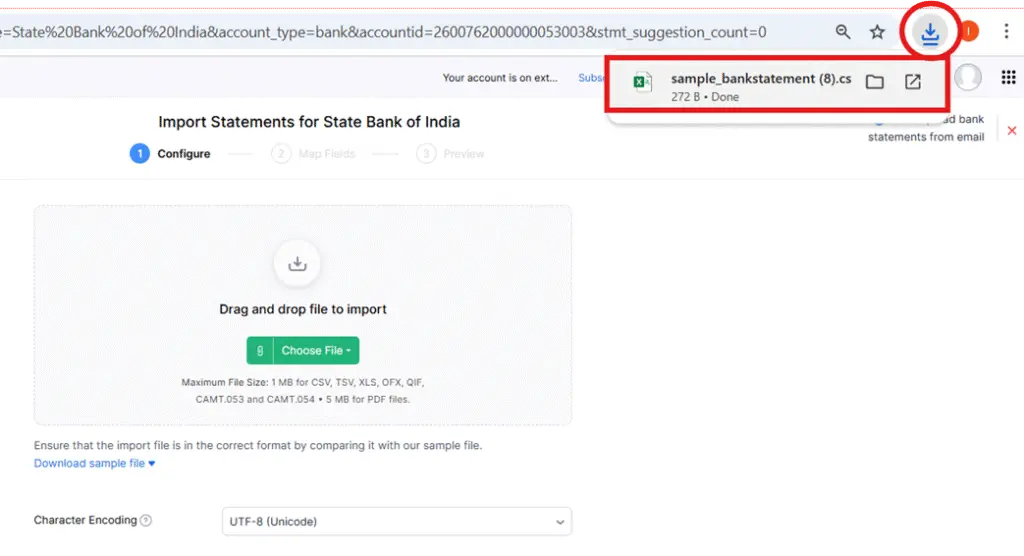
Step 6: After selecting CSV, go to the top-right corner of the screen, where you will find a Download button. Click on this button to download the sample sheet in Excel.
NOTE: Zoho Books will automatically try to map the columns in your CSV file to the relevant fields in Zoho Books (e.g., Date, Description, Amount, etc.).
You’ll need to confirm that the correct columns are mapped to the right fields. If they aren’t, you can manually select the correct fields from the dropdown.
Make sure the Date, Amount, Description, etc., match the appropriate columns from your CSV.
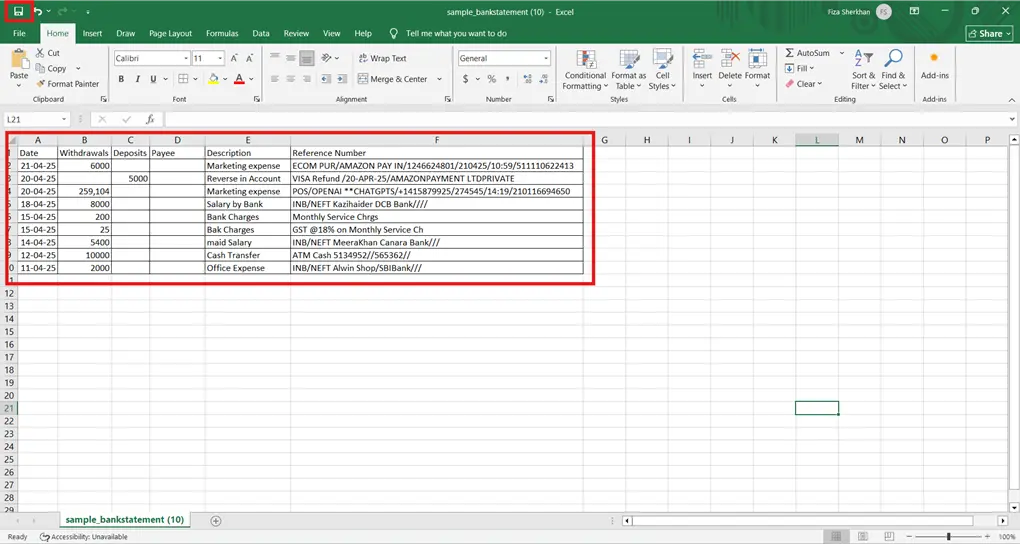
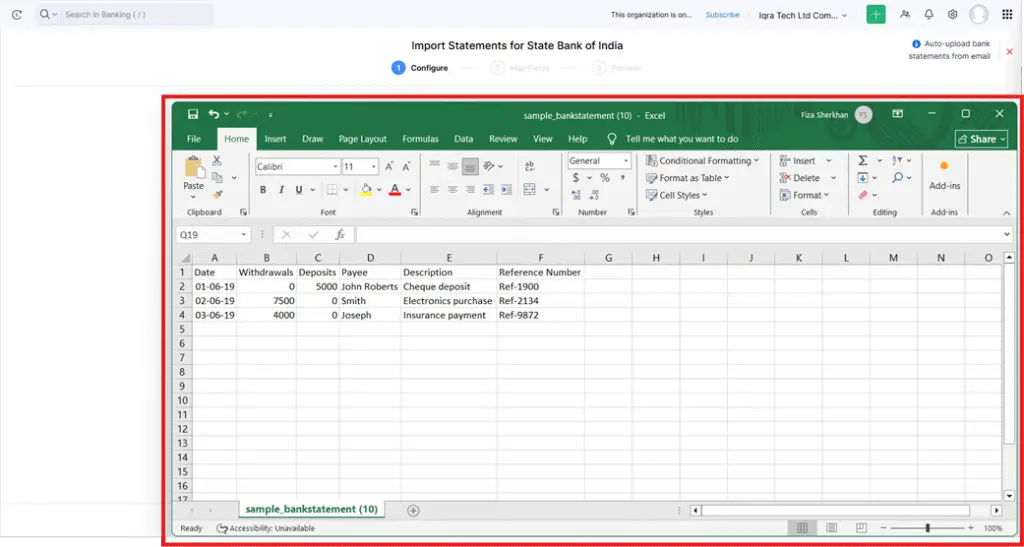
Step 7: Now you can see the banking statement sample CSV file I downloaded, to added bank statement in which I have added dummy details. This is just an example; you can add according to your choice.
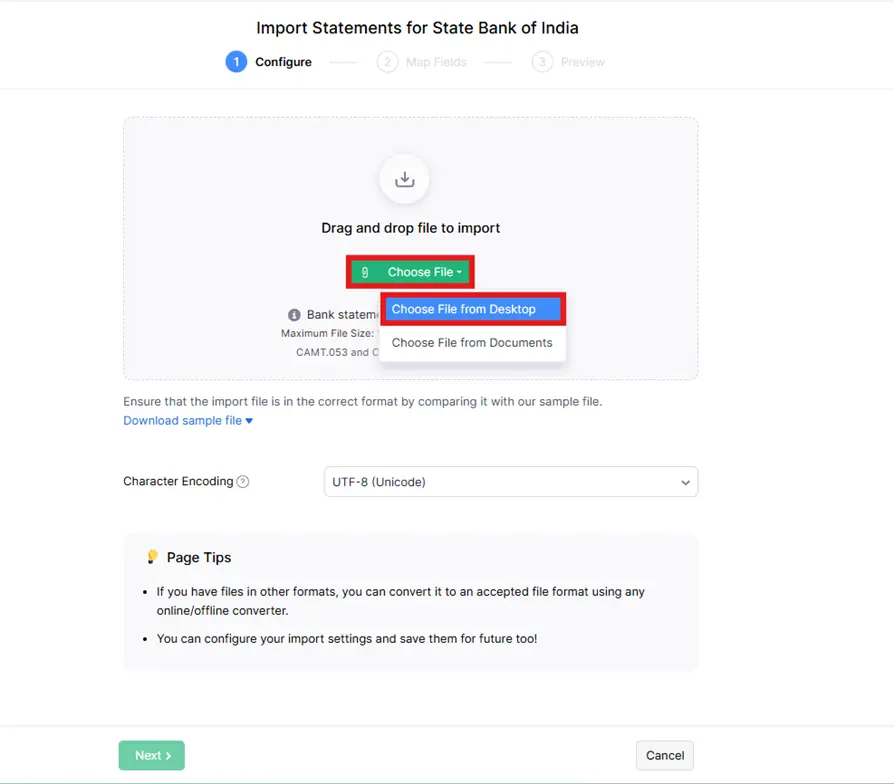
Step 8: After preparing the Banking statement CSV file, return to the Zoho Books screen in the banking section.
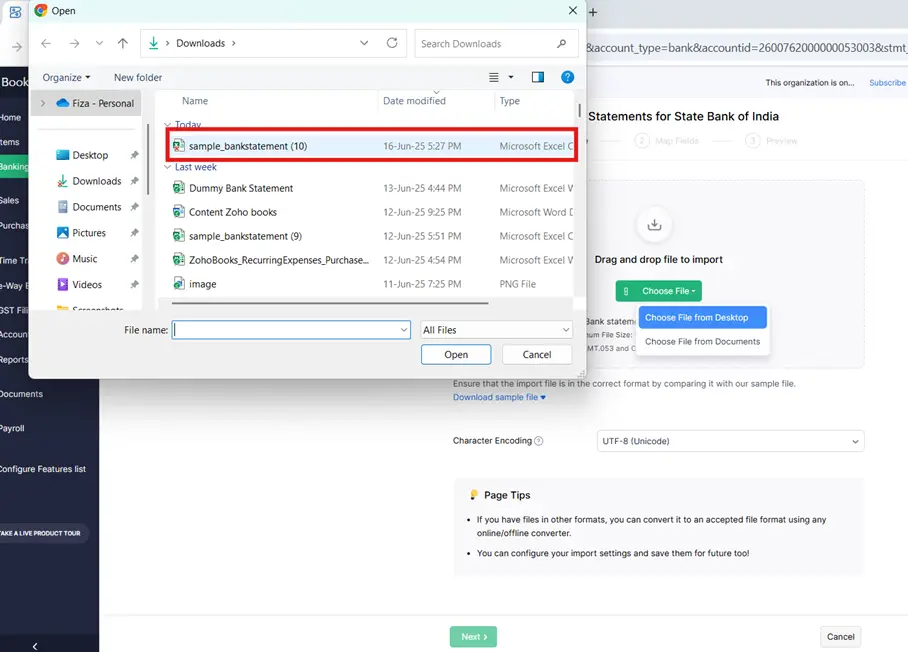
Step 9: You will see the option ‘Choose File’. After clicking on “Choose File from the desktop”, the File Manager will open. From there, you will select the CSV file, and it will be imported. You will see it displayed on the screen.
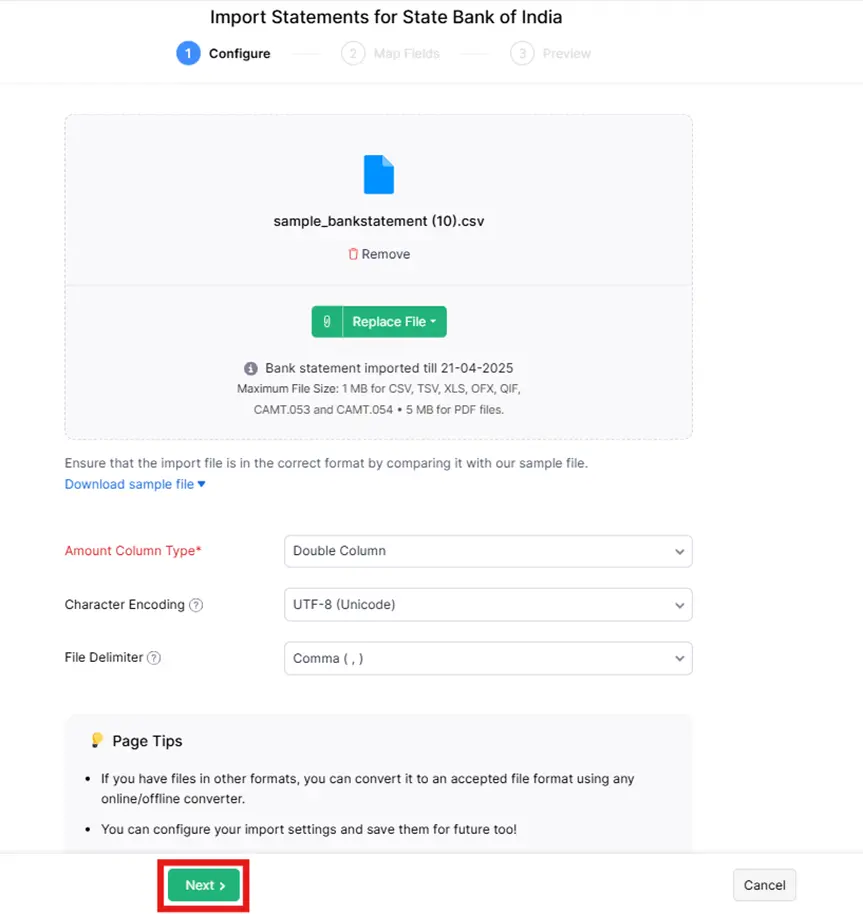
Step 10: After importing the file and configuring it, the “Map Fields” form will open. In this form, you will need to add the details of the statements, such as the columns from the Excel sheet. You will also need to select the corresponding fields from Zoho Books for the date fields you selected earlier.
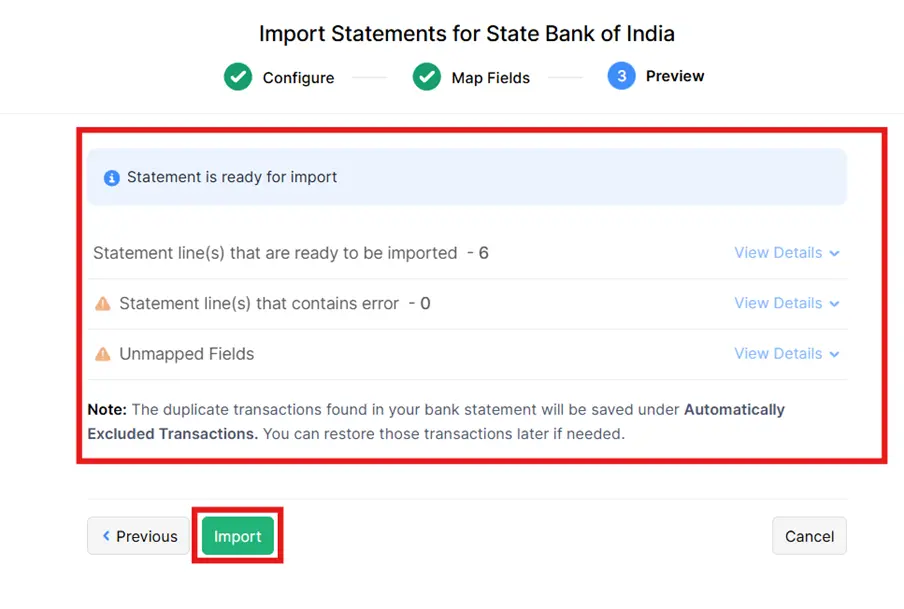
Step 11: After this, in the preview, it will show if there are any errors. But since there are no errors in our file, we will proceed with importing it.
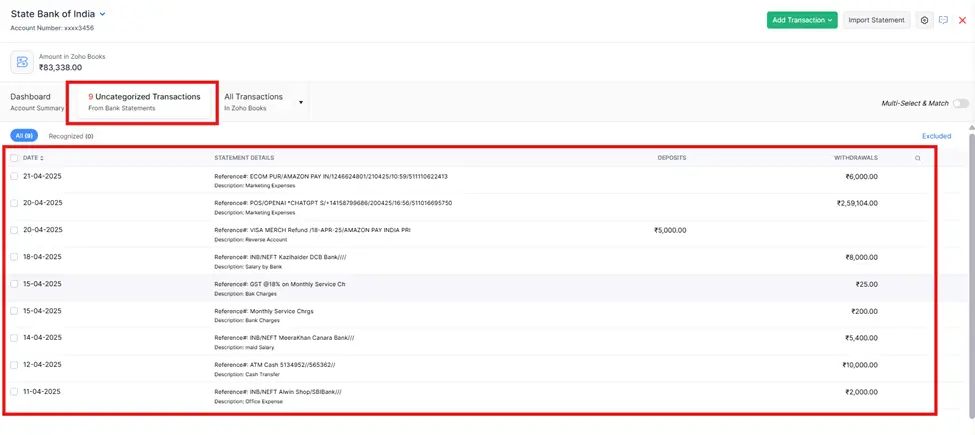
Now, you can see that your bank statement is fully imported into Zoho Books, as you can see on the screen.


