How to Record a Bill in Zoho Books
A bill in Zoho Books represents a record of purchases from a vendor, showing the amount, you owe them for products or services received. It’s a part of managing your company’s expenses and tracking liabilities. You can also attach files like invoices or receipts to the bill for better record-keeping.
Here are the steps for creating a Bill:
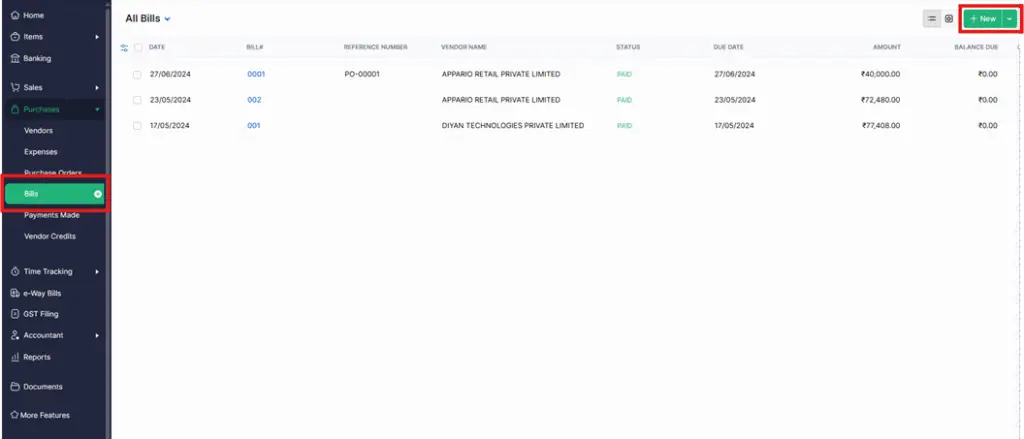
Step 1: Go to Purchases Module on the left sidebar and select click on Bills.
Step 2: Click the + New button in the top right corner of the page.

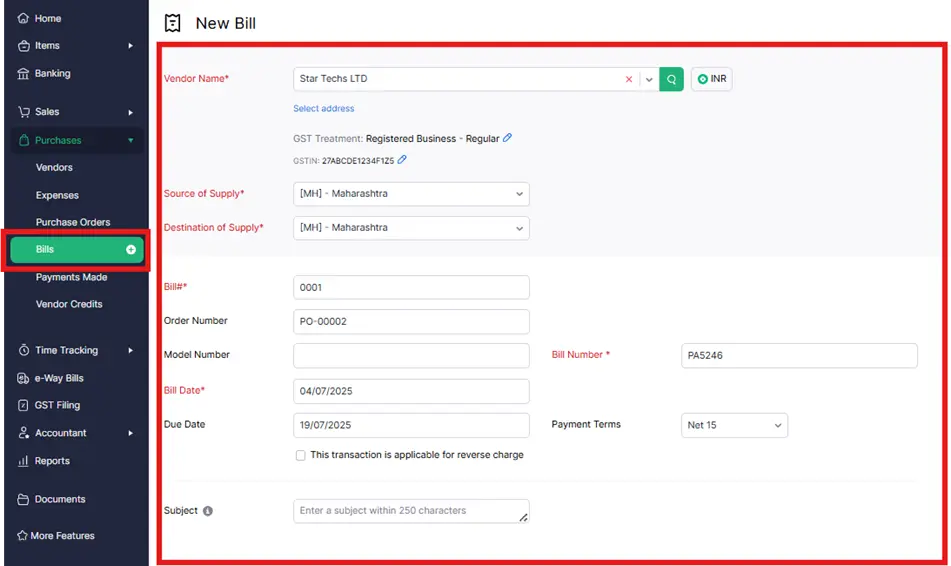
| Fields | Description |
|---|---|
| Vendor Name | Select the vendor whose bill you’re recording. |
| Source of Supply | This place will be auto-selected based on the customer’s GSTIN. |
| Destination Of Supply | Select the place where the supply is made. |
| Bill# | Enter the unique bill number. |
| Order Number | Enter an order number for your bill. |
| Bill Date | Enter the date on which you create the bill. |
| Due Date | Enter the due date for bill payment. |
| Payment Terms | Select the time frame within which you need to pay your vendor. For example, Net 15 would mean you’ll have to pay the vendor within 15 days from the date when the bill is created. When you select a payment term, the due date will be adjusted accordingly. |
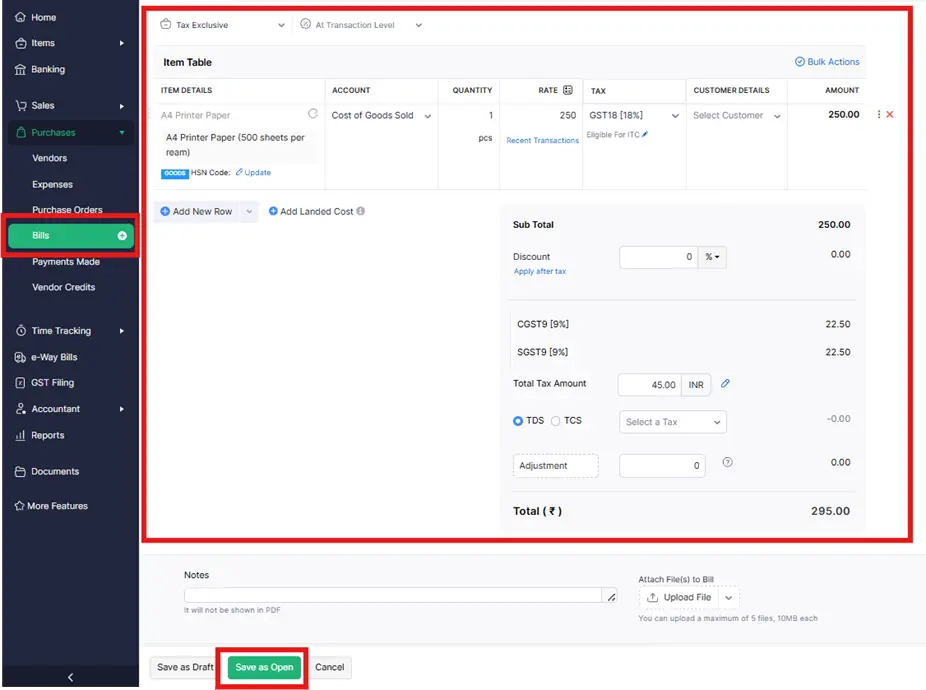
• Step 3: Fill in the required details.
Choose if the item rates are inclusive or exclusive of tax rates.
• Track other charges and landed costs by clicking + Add Landed Cost.
• Select the items for which you were billed in the item table and provide the customer details if you’re billing this to your customer.


Add notes and attach files to the bill.
Select a template for your bill.
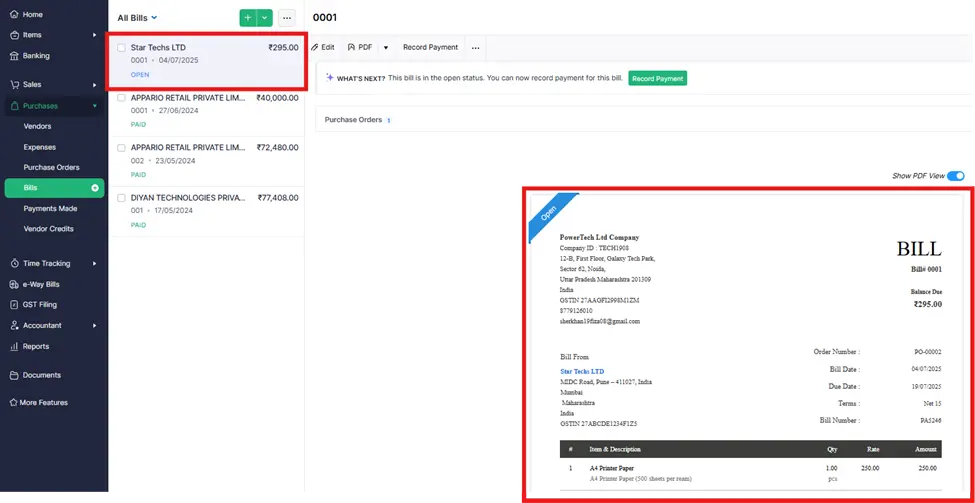
After entering the required details, click Save as Draft or Save as Open.

After following these steps the Bills is successfully Created.


