Getting Started: Free Trial Zoho Books
1. Create 14-Days Free Trial Zoho Books
To begin with Zoho Books:
Step 1. Visit https://www.zoho.com/books
Step 2. Click on Start My Free Trial 14 Days.
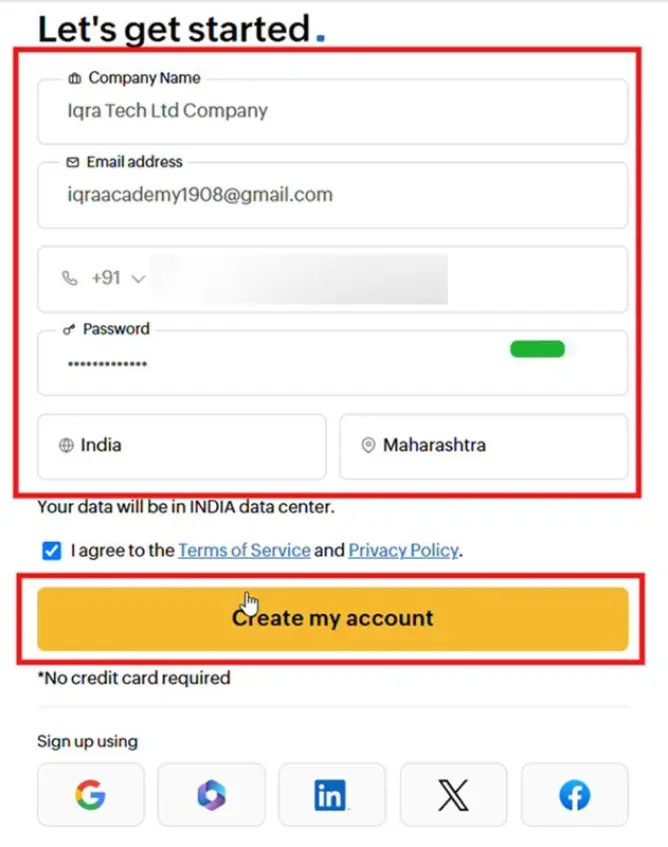
Step 3. Enter Your Company Name, Email, Mobile Number, create new Password, select your Country, and click on create my account.
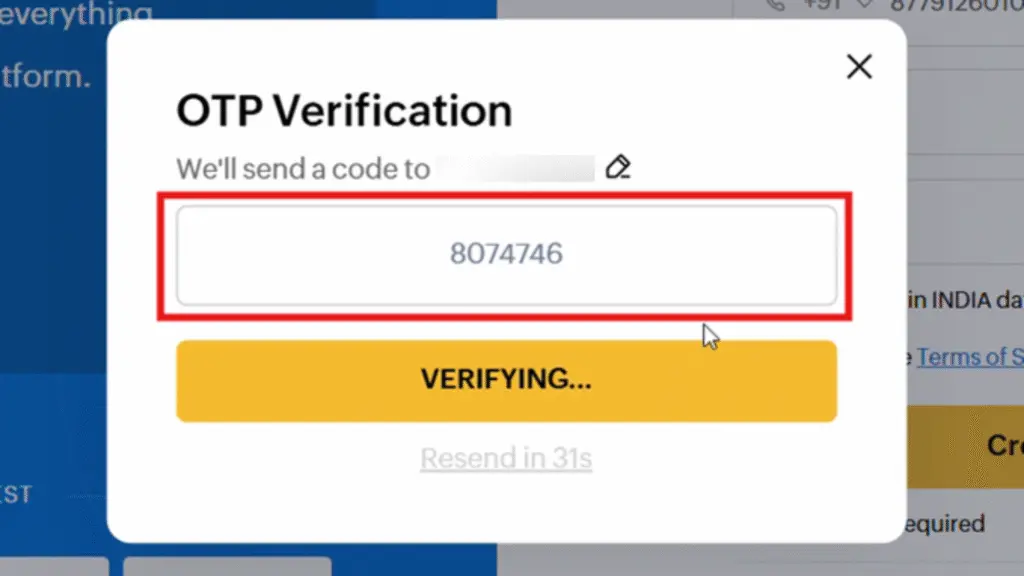
Step 4. Enter the OTP that you received on your number, and then verify the account.
Your free trial account will be created instantly.
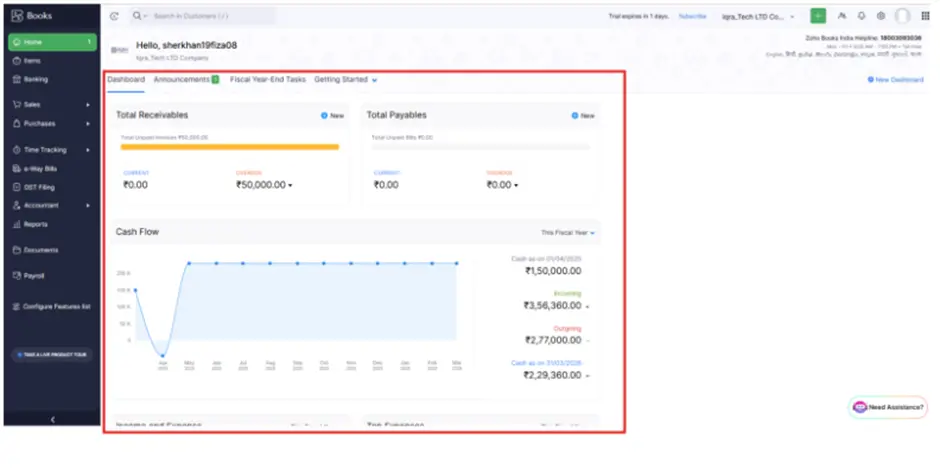
After Completing these steps you successfully logged in ZOHO BOOKS Dashboard. After the free trial login, we will come to the ‘Set Up Organization Profile’ section. Now we will set up the organization’s profile.
2. Set up Organization Profile
Step 1. Go to the Settings icon in the top-right corner of Zoho Books and click on it.
Step 2: You will now enter the Settings section.
Step 3: Under the Organization tab, click on Profile.
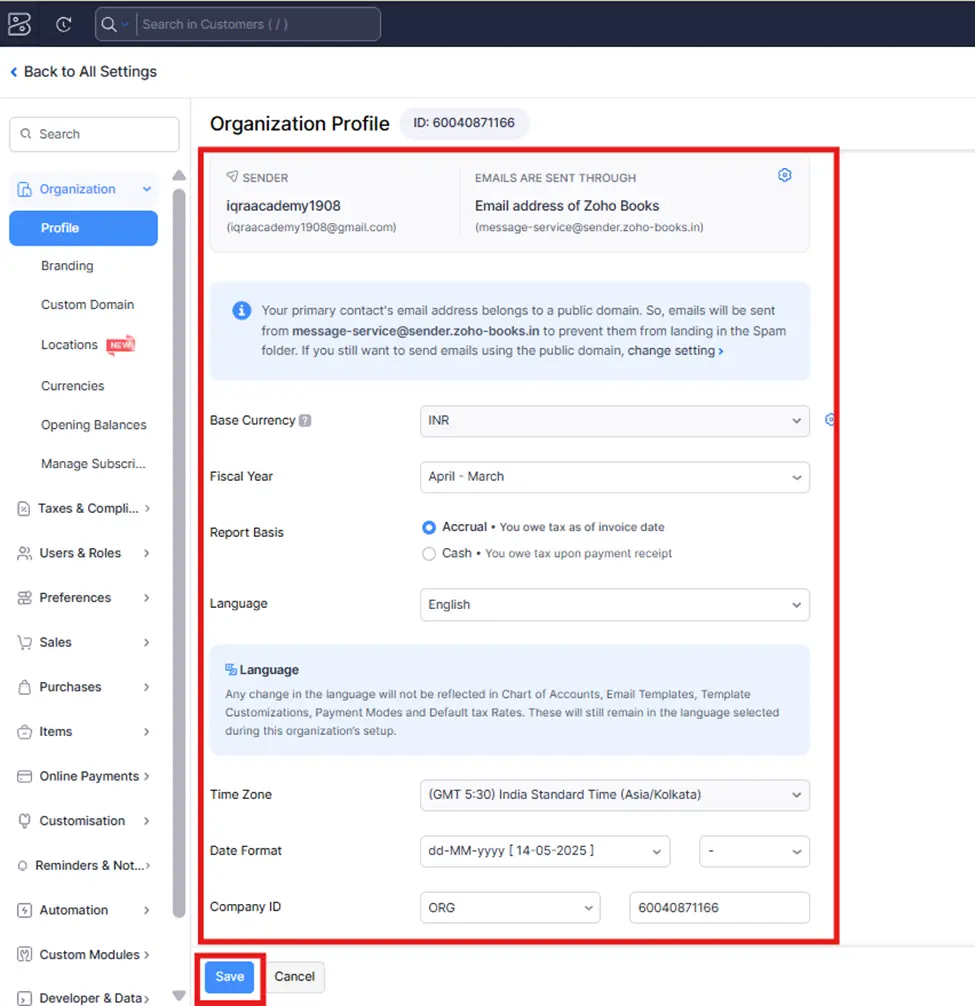
Note: Enter your organization’s details as per your requirements Organization Name Industry, Location, Address, Base Currency, Language, System Date Format, etc.
Step 4. Once all the required organization profile information is filled in, click on the “Save” button.
And now you have successfully set up your organization’s profile.
3. Tax Configuration / How to Set Up GST Registration
Step 1. In Zoho Books, click on the Settings icon located in the top-right corner of the screen. Step 2. After clicking the Settings icon, you will be directed to the Settings page.
Step 3. Under the Taxes & compliance tab, click on Taxes.
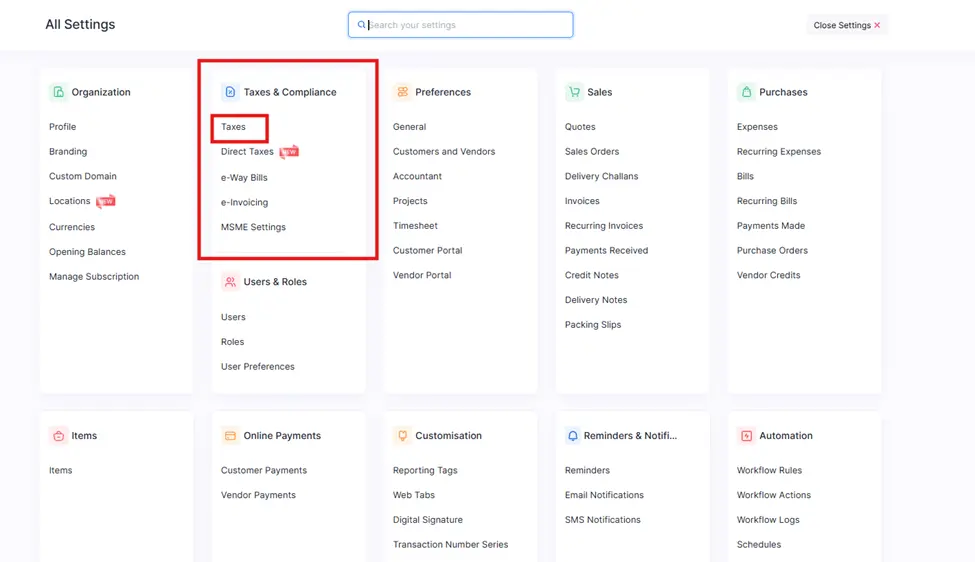
Step 4. Within the Taxes section, click on GST Settings.
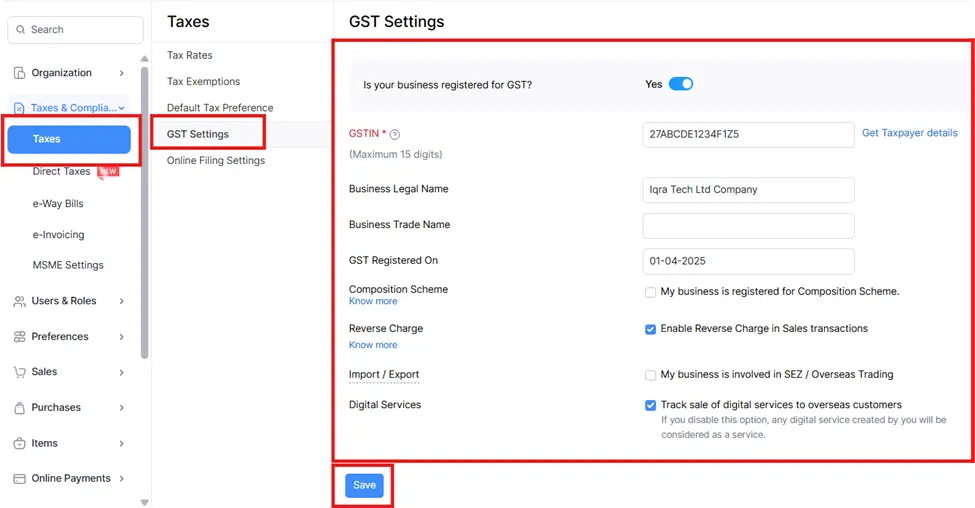
Note: Go to Taxes > GST Settings, then enter your GSTIN, Business Legal Name, Trade Name, GST Registration Date, enable Composition Scheme (if applicable), enable Reverse Charge (if needed), select SEZ/Overseas Trading and Digital Services options (if applicable), and click Save.
Step 5. After entering all the required GST details for your organization, click on the “Save” button to complete the registration.
4. Set up Currencies
Why do we set up currencies in Zoho Books?
We set up multiple currencies in Zoho Books when we deal with customers or vendors outside India who pay or get paid in other currencies. This helps us record payments, invoices, and transactions accurately in different currencies. By setting up currencies, Zoho Books can manage currency conversion, track foreign exchange rates, and provide correct financial reports for international business.
Step 1. click on the Settings icon located in the top-right corner of the screen.
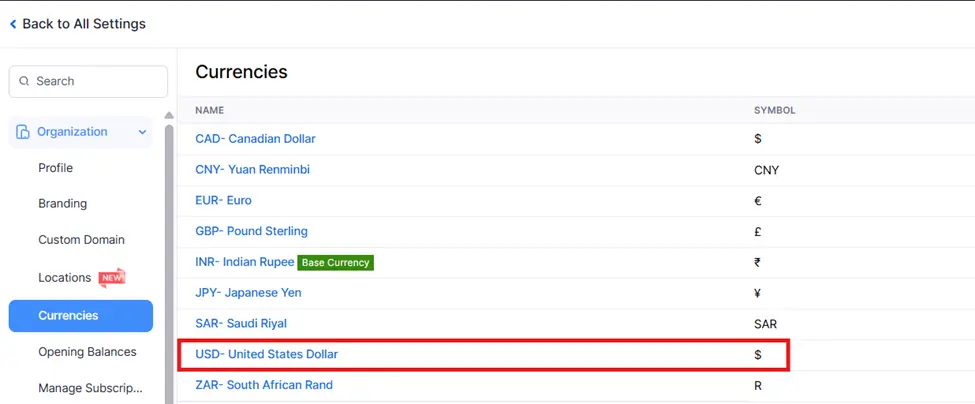
Step 2. After clicking the Settings icon, you will be directed to the Settings page. Under the Organization tab, click on Currencies.
Step 3. click on the + New Currency button. A new window will appear where you can enter the details for the new currency.
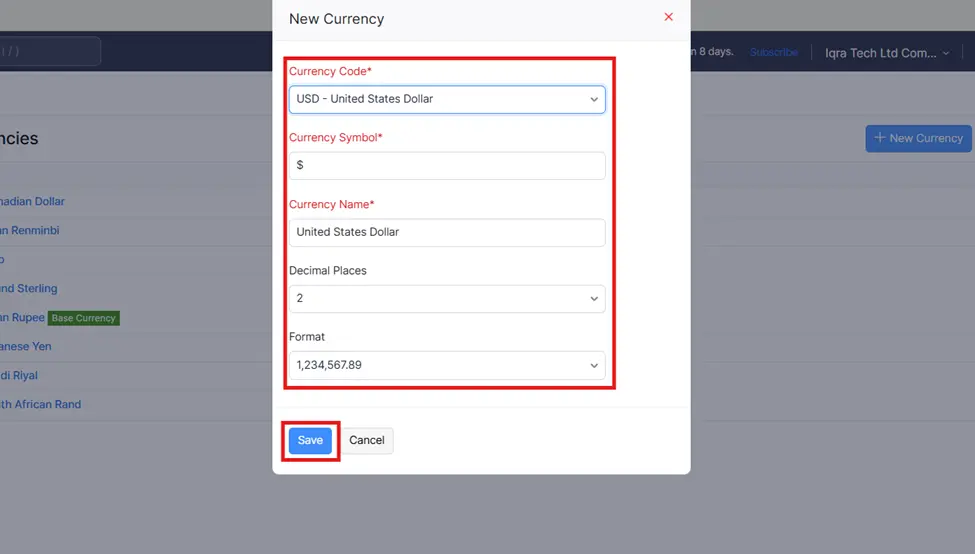
Step 4. Enter the currency’s name (e.g., USD – United States Dollar) & enter the symbol for the currency (e.g., $ for USD) fill all requirement in this form.
Step 5. After filling in the required details, click Save to add the currency to your organization. And now you have successfully created new currency.
Note:
Base Currencies: For the default currency of your organization, ensure INR (Indian Rupee) is marked as the Base Currency.
You can change your base currency if needed by marking the appropriate currency as the “Base Currency.”


