Recurring Invoices
Recurring Invoice in Zoho Books is a feature that automatically creates and sends invoices to your customers at regular intervals (like weekly, monthly, or yearly). It is useful when you provide ongoing services or products, such as subscriptions or maintenance. Instead of creating a new invoice each time, you just set it once with the schedule, and Zoho Books will generate and send the invoice automatically, saving you time and ensuring you don’t miss any payments.
Here are the steps for creating a Recurring Invoices:
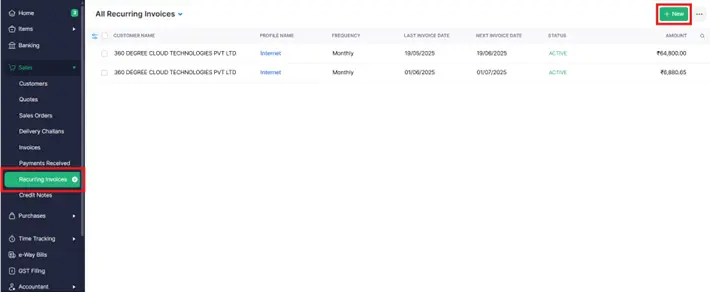
Step 1: Go to the “Sales” module on the left-hand menu.
Step 2: Click on “Recurring Invoices”.

Step 3: On the Recurring Invoices page, click the “+ New” button or “Create Recurring Invoice” to start a new template.


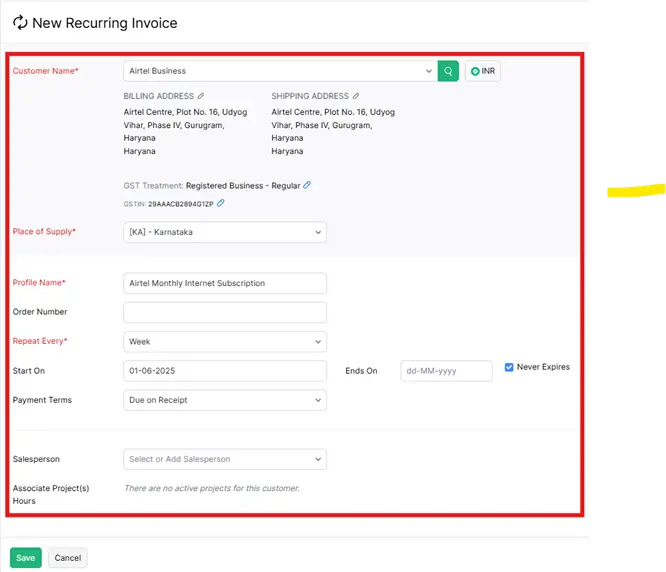
Step 4: Fill in the basic recurring invoice information:
Customer Name: Select the customer you’re billing.
Profile Name: Enter a name for internal reference (e.g., “Monthly Airtel billing”).
Repeat Every: Choose the frequency (e.g., Week, Month, Year).
Choose the payment terms (e.g., “Due on Receipt”, “Net 15”, etc.).
Start Date: Set when the recurrence begins.
End Date: This is the date when the recurring invoice should stop being generated. You can set a specific end date if the billing is only for a limited period (e.g., 6 months or 1 year).
Note: If the billing is ongoing with no fixed end, simply check the “Never Expires” option so the invoices will continue automatically until you manually stop them.
Send Email: (Optional checkbox) Enable to auto-send invoices to the customer.)
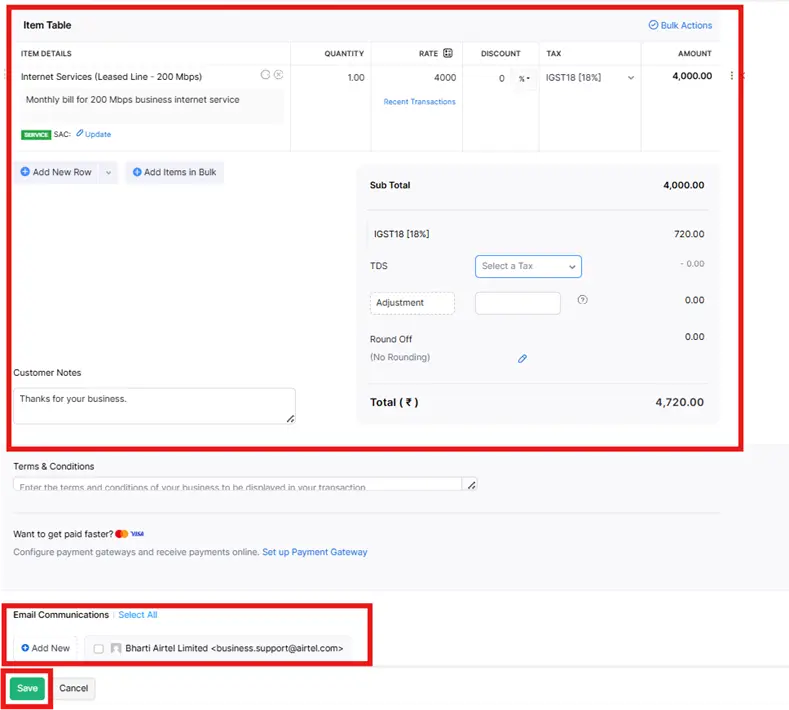
Step 5: added item details, price quantity, tax, and Fill Out the shown on the screen.
I have taken the 200 Mbps expense of Airtel as an example. The Airtel business is just an example. You can create Recurring invoice accordingly to your preferences and requirements.

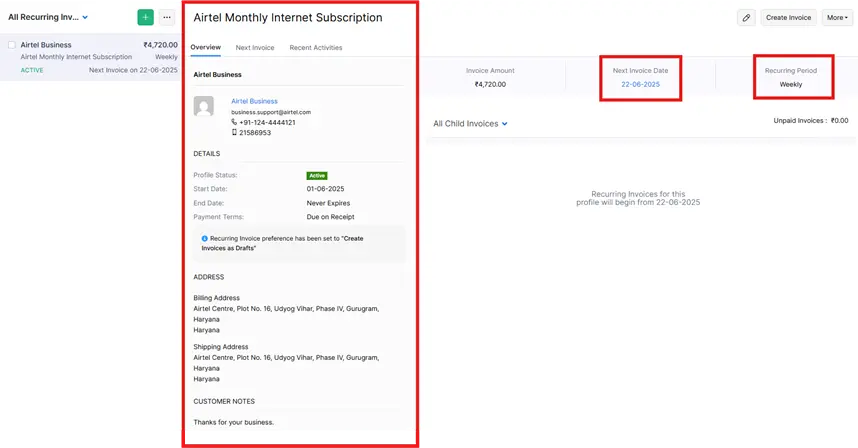
You have now successfully completed the creation of the recurring invoices, following the format displayed on the screen above.


