Vendor Creation
In Zoho Books, a Vendor is any individual or company from whom you procure goods or services. You create a Vendor record to store their contact details, payment terms, tax information and banking details. Once set up, you can raise Purchase Orders, record Vendor Bills, track bill payments and credit notes, and run expense claims against that Vendor—giving you a complete audit trail of what you’ve purchased, when payments are due or made, and how much you’ve spent with each supplier. This centralization helps enforce approval workflows, ensures accurate expense categorization in your books, and provides clear visibility into your payables and cash flow.
Here are the steps for creating a Vendor:
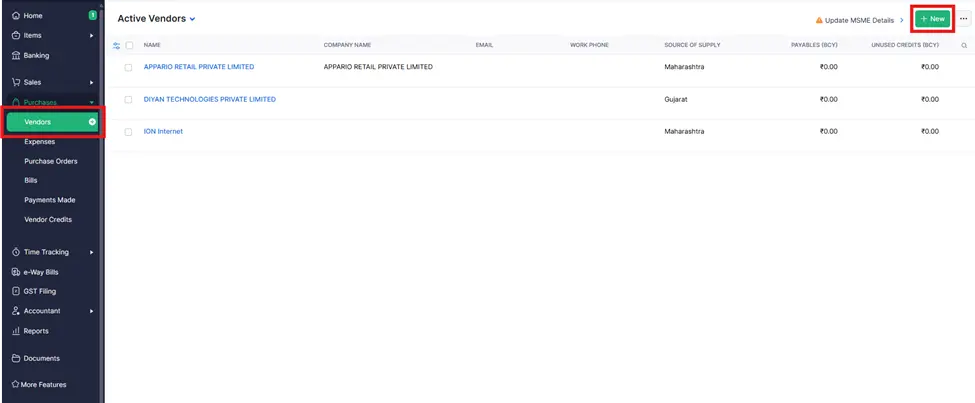
Step 1: In the left navigation menu, click on “Purchases” and select “Vendors”.
Step 2: On the Vendor page, click on “New Vendor” to create a new vendor.

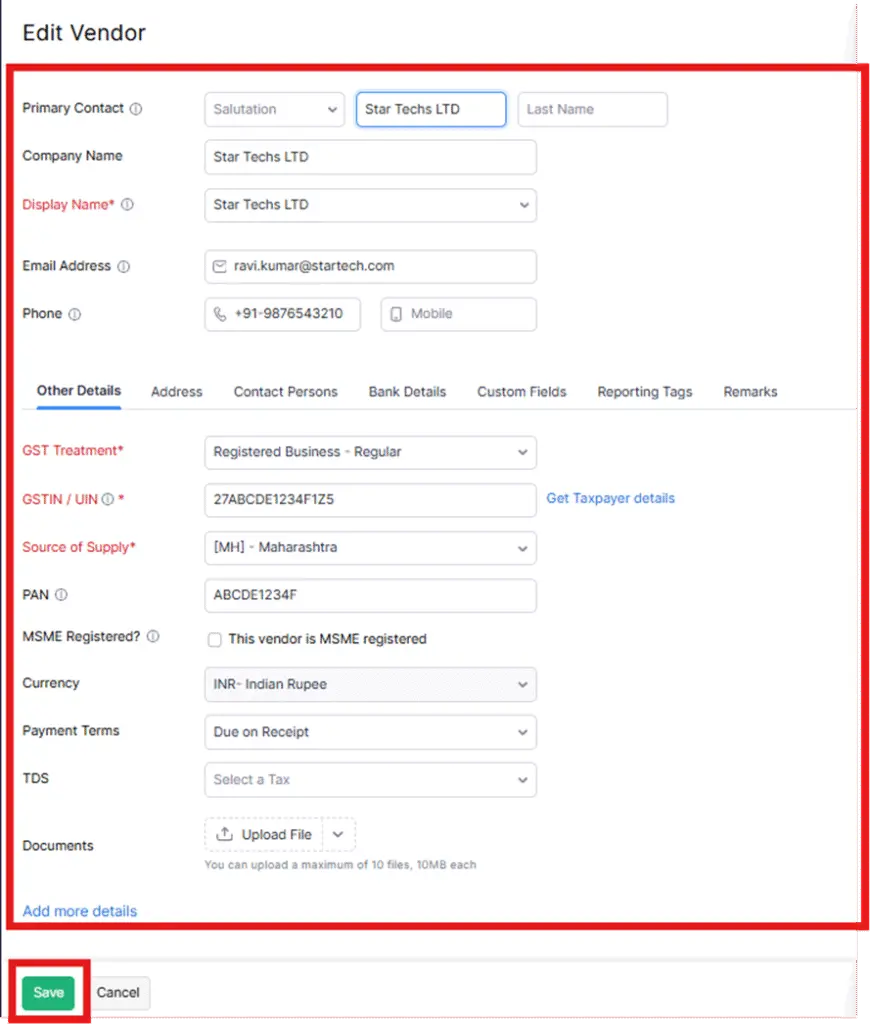
Step 3: Fill in Vendor Details.
Vendor Name: Enter the full name of the vendor.
Phone Number: Enter the contact number.
Email Address: Enter the vendor’s email for communication.
Address: Provide the vendor’s billing and shipping address.
GST/TIN Number: (if applicable) Add the GST or TIN number for tax purposes.

For Example: The Star Techs LTD is just an example. You can create Vendor account according to your preferences and requirements

generated and shown on-screen above-mentioned image.
By following these steps, you can successfully create an invoice.


