Manual Journals Creation
In Zoho Books, manual journals allow you to record unique financial transactions that can’t be recorded normally. For example, if you need to record a monthly depreciation rate, you can use a manual journal for that specific entry.
Here are the steps for creating a Manual Journal:
Step 1: Go to Accountant on the left sidebar and select Manual Journals.
Step2: Click + New Journal in the top right corner.
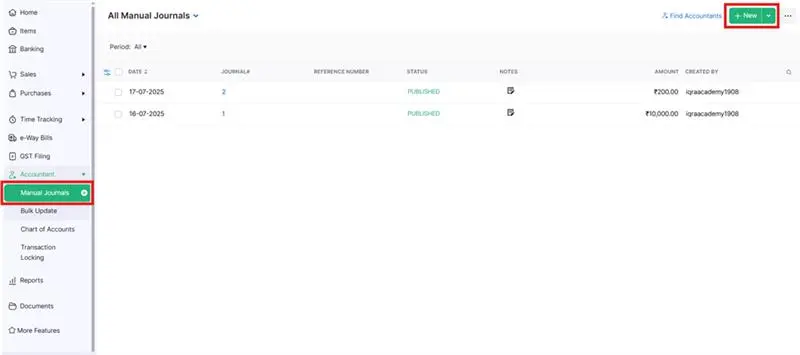
Step 3: In the New Journal page, enter the required details:
Note: Select the Date on which you want to record the manual journal.
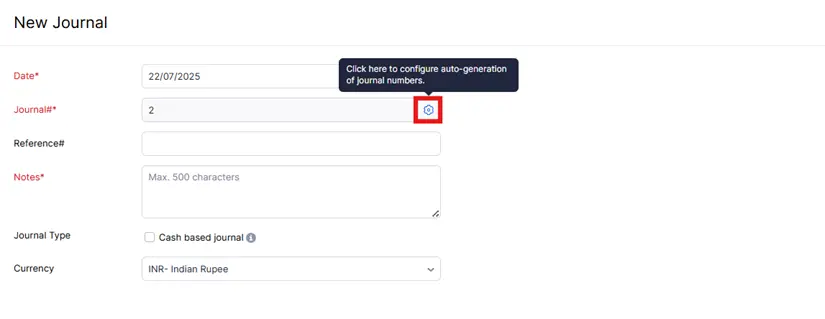
The journal number will be auto-generated in the Journal# field. To configure it, click the Gear icon next to the field.
Step 4: In the Configure Journal Number Preferences pop-up, select if you want to auto-generate journal numbers or enter them manually.
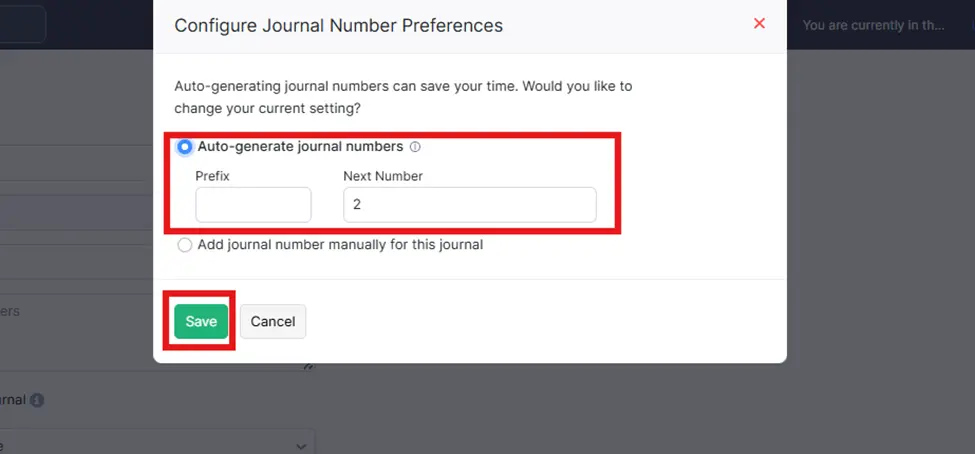
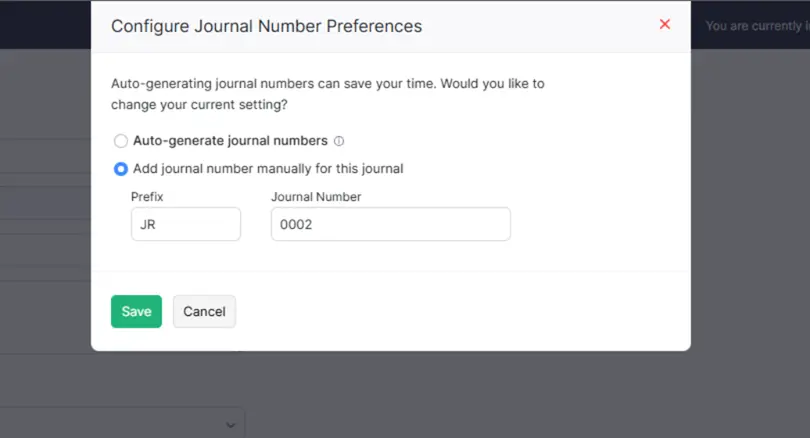
Note: In the first picture, the journal number setup is for auto-generation, and in the second picture, the setup is for manually adding the journal number. I prefer to keep it as auto-generated. You can set up according your choice.
Click Save.
Note: (We created Journal entry to record the ATM cash withdrawal of ₹10,000, which was then deposited into the petty cash account for cash expenses. You can create Items accordingly to your preferences and requirements).
Enter the Notes for the journal entry.
Check the option Cash based journal if your account adjustment has been done by cash transaction.
Select the Currency you want to associate with the journal.
Step 5: In the Items Table: Select the Account you want to track credit and debit entries.
Select the Contact you want to associate with the journal entry.
Enter the required credit or debit entries.
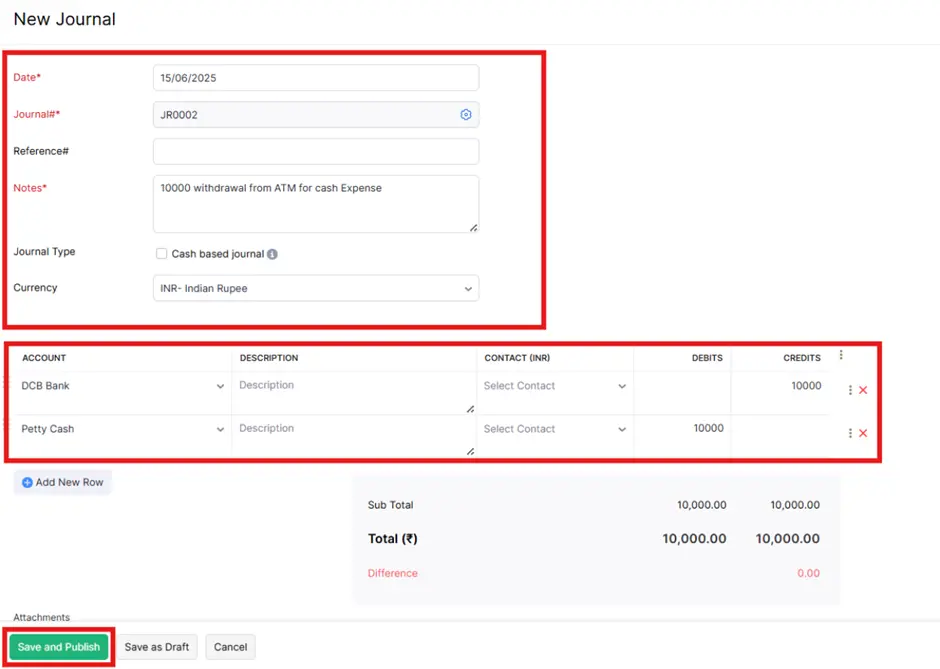
Note: Ensure that the amount debited is always equal to the amount credited.
Click Save as Draft or Save and Publish
Note:
When a manual journal is created in the Draft status, the amounts will not get reflected in the respective accounts. Click Publish to reflect the amount in their respective accounts.
You can also publish multiple manual journals by selecting the required journals and clicking Publish.
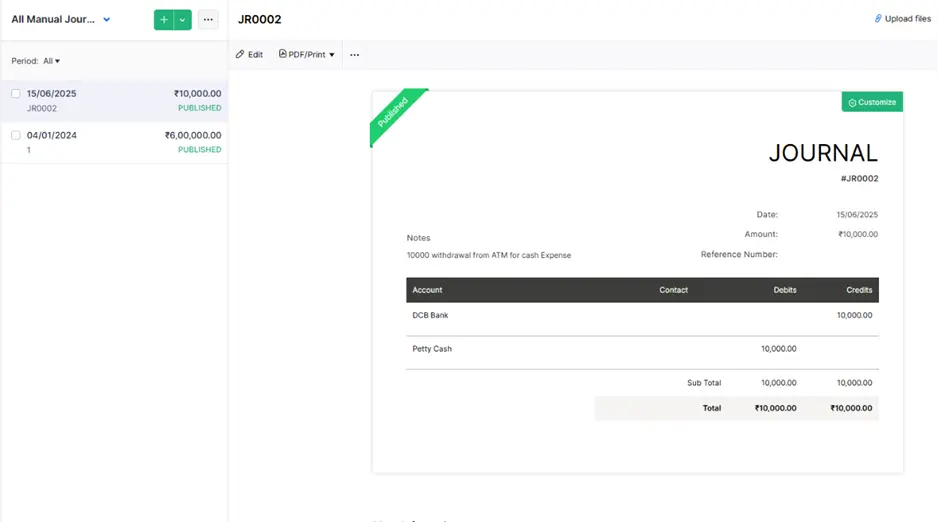
After following these steps, the Journal entry is successfully Created.


